M&M POS User Manual
Getting Started
Here you will find the full user manual documentation for M&M POS.
M&M POS is a customizable Point of Sale System that helps businesses manage inventory, sales, expenses and much more. It is a free app available on Android, iOS, macOS and Windows. Download our app from the Google Play Store, the Apple App store or from our website and turn any supported device you have into a Point of Sale System.
Supported devices:
Android 5.1.1 or higher
Apple iOS 11.0 or higher
Mac OS X 10.9.0 or higher
Windows 7 or higher
Download and get started:
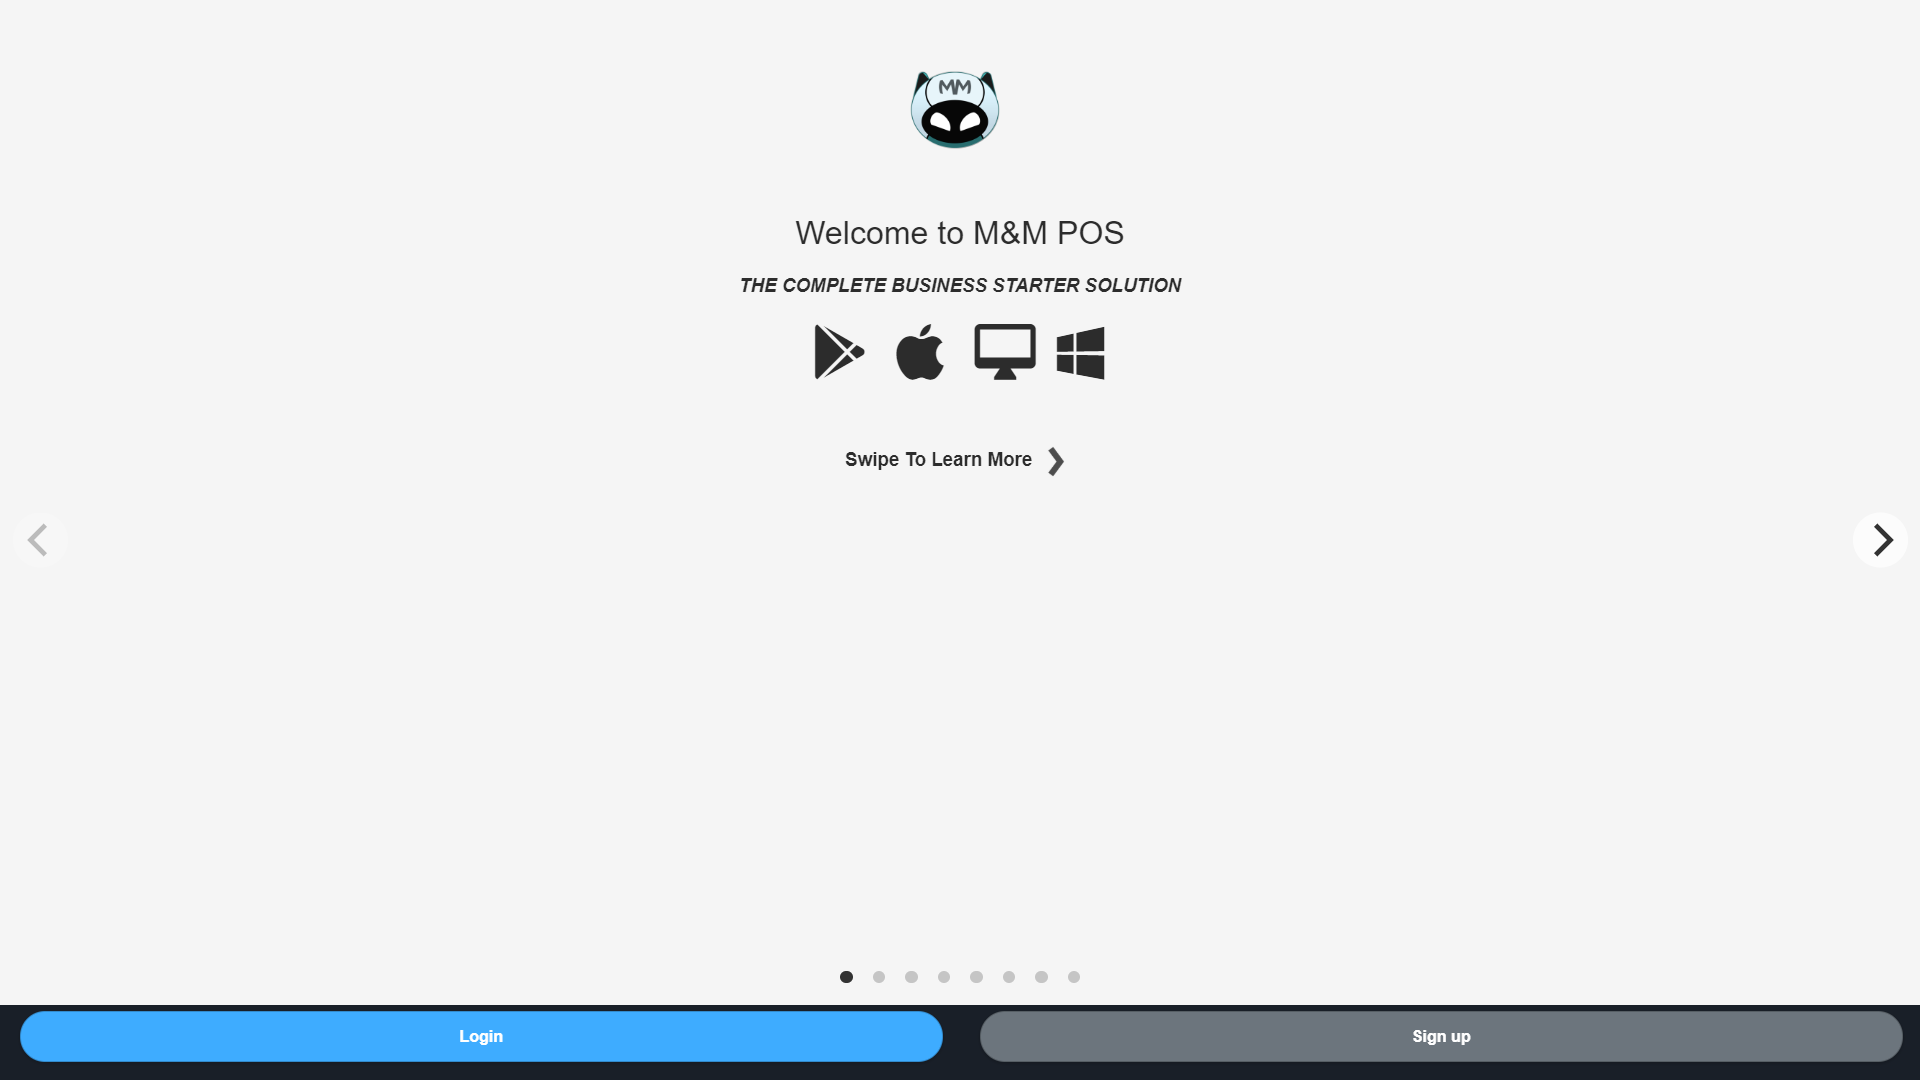
After you downloaded and installed the app on your device, you will be presented with the app landing screen. This is an introduction to the app and has a few slides that describe some of the features included. Select the sign up button on the bottom right to create your account. Fill in your business name, business email and create a password for the account.
The terms of service will explain our policies and the end user license agreement
You will be sent a verification pin to your email. You must enter this to continue creating your account. If you still do not receive a pin, you can contact support and we will be happy to assist you.
If you did not receive the pin after a few minutes, then you can try resending the pin
After entering the pin, your account is all ready! You will be greeted with a pop up which explains some of the basic things you need to know to get started.
If you already have an account, you can login by selecting the button on the bottom left. Enter your email and password and you will be signed in.
If you forgot your password, you can reset your password from the login form. Select “Reset Password” and a form will appear for you to enter your email. Enter the email associated with your account and select “Reset”. A pin will be sent to your email to verify you are the owner of the email and account. After you enter the pin, you can enter your new password. Resetting the password will not sign out any devices that are currently logged in. So, it will not interrupt any other users on your account.
If you did not receive the pin after a few minutes, then you can try resending the pin
There are two ways to sign out:
- You can select your store name from the left side menu panel and the option to sign out will be in the pop up
- You can also sign out from the settings page. It is the last option on the settings page
The layout of M&M POS is simple for easy navigation. Below is a list of the buttons and actions found on the top navbar:
- The menu button opens the main menu to navigate between different pages and to access your account settings.
- The refresh button is to refresh the page that you are currently viewing. This is useful when you want to clear data that is on the screen and start over.
- The notification button opens your recent notifications. You will receive notifications about different system events and updates from the M&M POS team.
- The preferences button will open the preferences menu. You can set the App to go into full screen mode on Desktop, set your preferred language that translates the App using Google Translate (The translations will not be 100%) You can change the theme of the App from light and dark mode to choosing different color themes. All of these preferences only affect the device that you are using. So, you can have one device in English and another device in Spanish all using the same account. Lastly, you can rate the App, share the App, or access these docs quickly from the preferences menu.
- The clock-in button is used to have your employees clock-in and out of the system. Clicking on the button will display the current clocked in employees and allow you to clock in or out.
-
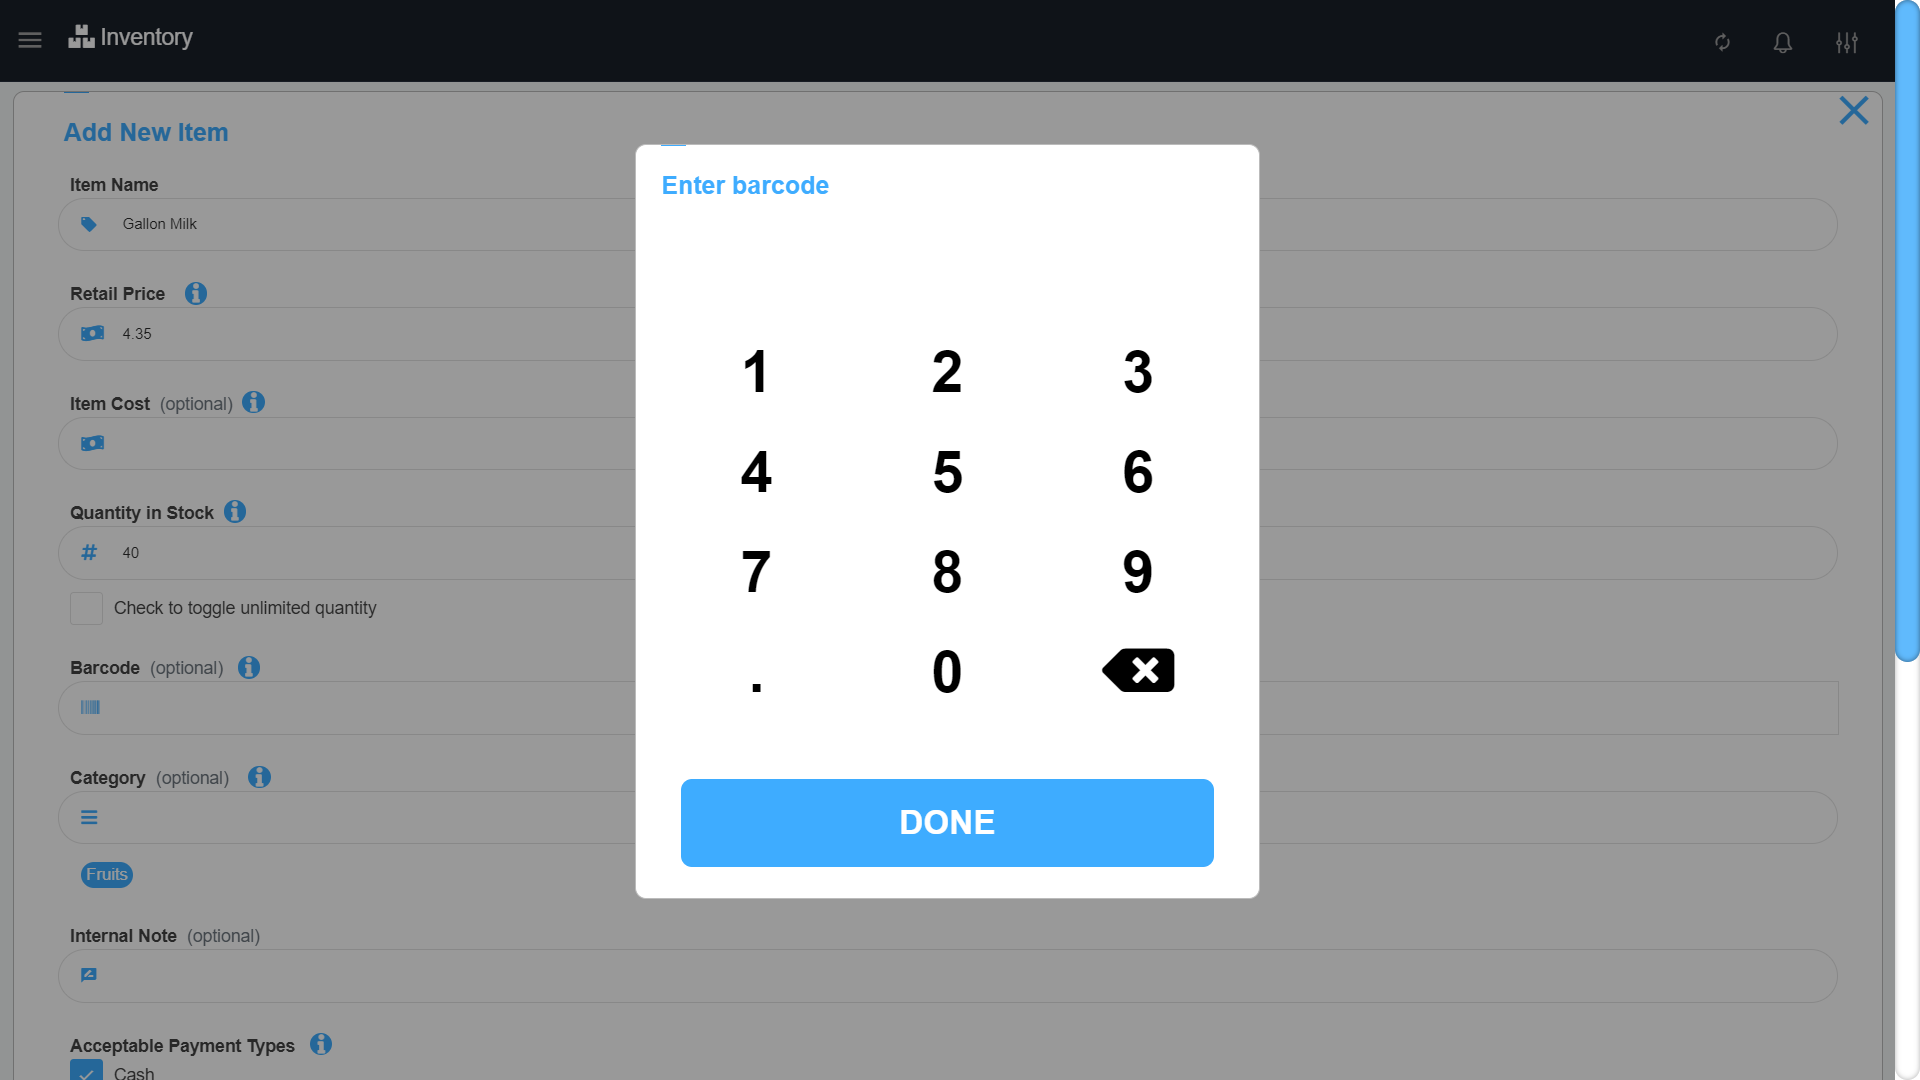
There is a built in keypad that appears when a number input is required
such as when entering a price or a quantity. The keypad will allow you
to enter numbers and can adjust to the type of number needed. For
example, if the number is a decimal value, then it will give you a
button to quickly enter ".00" at the end of the number your entering.
When entering a barcode, you can use a connected barcode scanner when
the keypad appears or if you are on a mobile device, you will see the
scan button
 in the top left corner which will open your device's camera to scan
the barcode. If you have a keyboard connected, you can also use it to
type in the value from your keyboard and hit enter to complete the
input. You can also toggle the sign of the number from positive to
negative by using the buttons.
in the top left corner which will open your device's camera to scan
the barcode. If you have a keyboard connected, you can also use it to
type in the value from your keyboard and hit enter to complete the
input. You can also toggle the sign of the number from positive to
negative by using the buttons.
The clock-in feature is part of the Employee Management Add-On
Hardware
M&M POS System is integrated with many different hardware devices that increases efficiency in your daily activities.
Barcode scanners work with M&M POS out the box. You can use barcode scanners with M&M POS to help increase productivity when adding inventory and selling. M&M POS supports USB barcodes scanners, wireless barcode scanners and Bluetooth barcode scanners.
Most devices, Desktop and mobile, accept USB and BlueTooth without additional setup needed. Once connected successfully, to read the value from a barocde in M&M POS simply focus on an input field and scan the barcode with your scanner. Some fields when you focus on them pop the number keypad, when this keypad is available you can scan the barcode to enter the value.
On mobile devices, you can use the camera as a barcode scanner by selecting the barcode icon button
this will be available next to the supported fields such as the barcode field on the sell page.
M&M POS allows you to print items such as customer receipts, exported inventory and other data. M&M POS supports USB, Wi-Fi, Ethernet, And BlueTooth printers. To print on Desktop, connect your printer to your device and make sure all the drivers for your printer are installed. For receipt printing set your printer as the default printer on your device and M&M POS will use it to print automatically. For all other print data such as exporting reports, you will be prompted by your operating system to select the printer you would like to send the exported data to. If you need assistance setting up your printer please reach out to us.
Bluetooth printers are supported on iOS and Android. For Android, make sure your printer is already paired with your device to find it in the list. iOS printing only supports low energy BlueTooth printers (BlueTooth 4.0 - BLE) with ESC/POS commands support.
Cash registers that are printer driven are supported in M&M POS. The cash drawer connects to your receipt printer via RJ12 cable. To connect the register to the app, make sure your printer is set up correctly and working as expected, then connect your register to your printer. This will connect the cash register to the POS and will automatically open when you complete a sale and print a receipt.
To control opening the register from the App check out the No Sale Add-on
Scales allow you to sell on the sell page quicker by allowing you to weigh items and calculate their total on the spot during a sale. The HoneyWell Stratos 2400 & 2700 are two models of scales that are certified to work on Windows Desktop with M&M POS. The scale connection to Desktop must be a serial port connection and then configured in the "Scale Settings" in M&M POS by setting the port number. If you would like to integrate your scale and are having issues please contact us for assistance.
For HoneyWell scales, you need the HoneyWell Scale Integration Add-On
CAS Scale labeler is used in stores that sell items by weight such as a butchery or a grocery store. M&M POS is integrated with CAS Scales to be able to read the barcodes from the CAS label and add it to the customer’s cart during a sale. This helps you complete sales quicker and improve customer satisfaction. To get your Deli CAS Scale Labels working with M&M POS you can read the "Working with CAS Label Printing Scales in M&M POS" article which goes into detail about how to set up your scale to be compatible with the app.
M&M POS supports USB magnetic card readers for the Stripe check out process. If you have Stripe connected and use the "Stripe Form" option then you can use a USB magnetic card reader to help speed up the checkout process when you have to enter the customer’s card information. It works as easy as focusing in the credit card number field and then swiping the card.
Add-ons
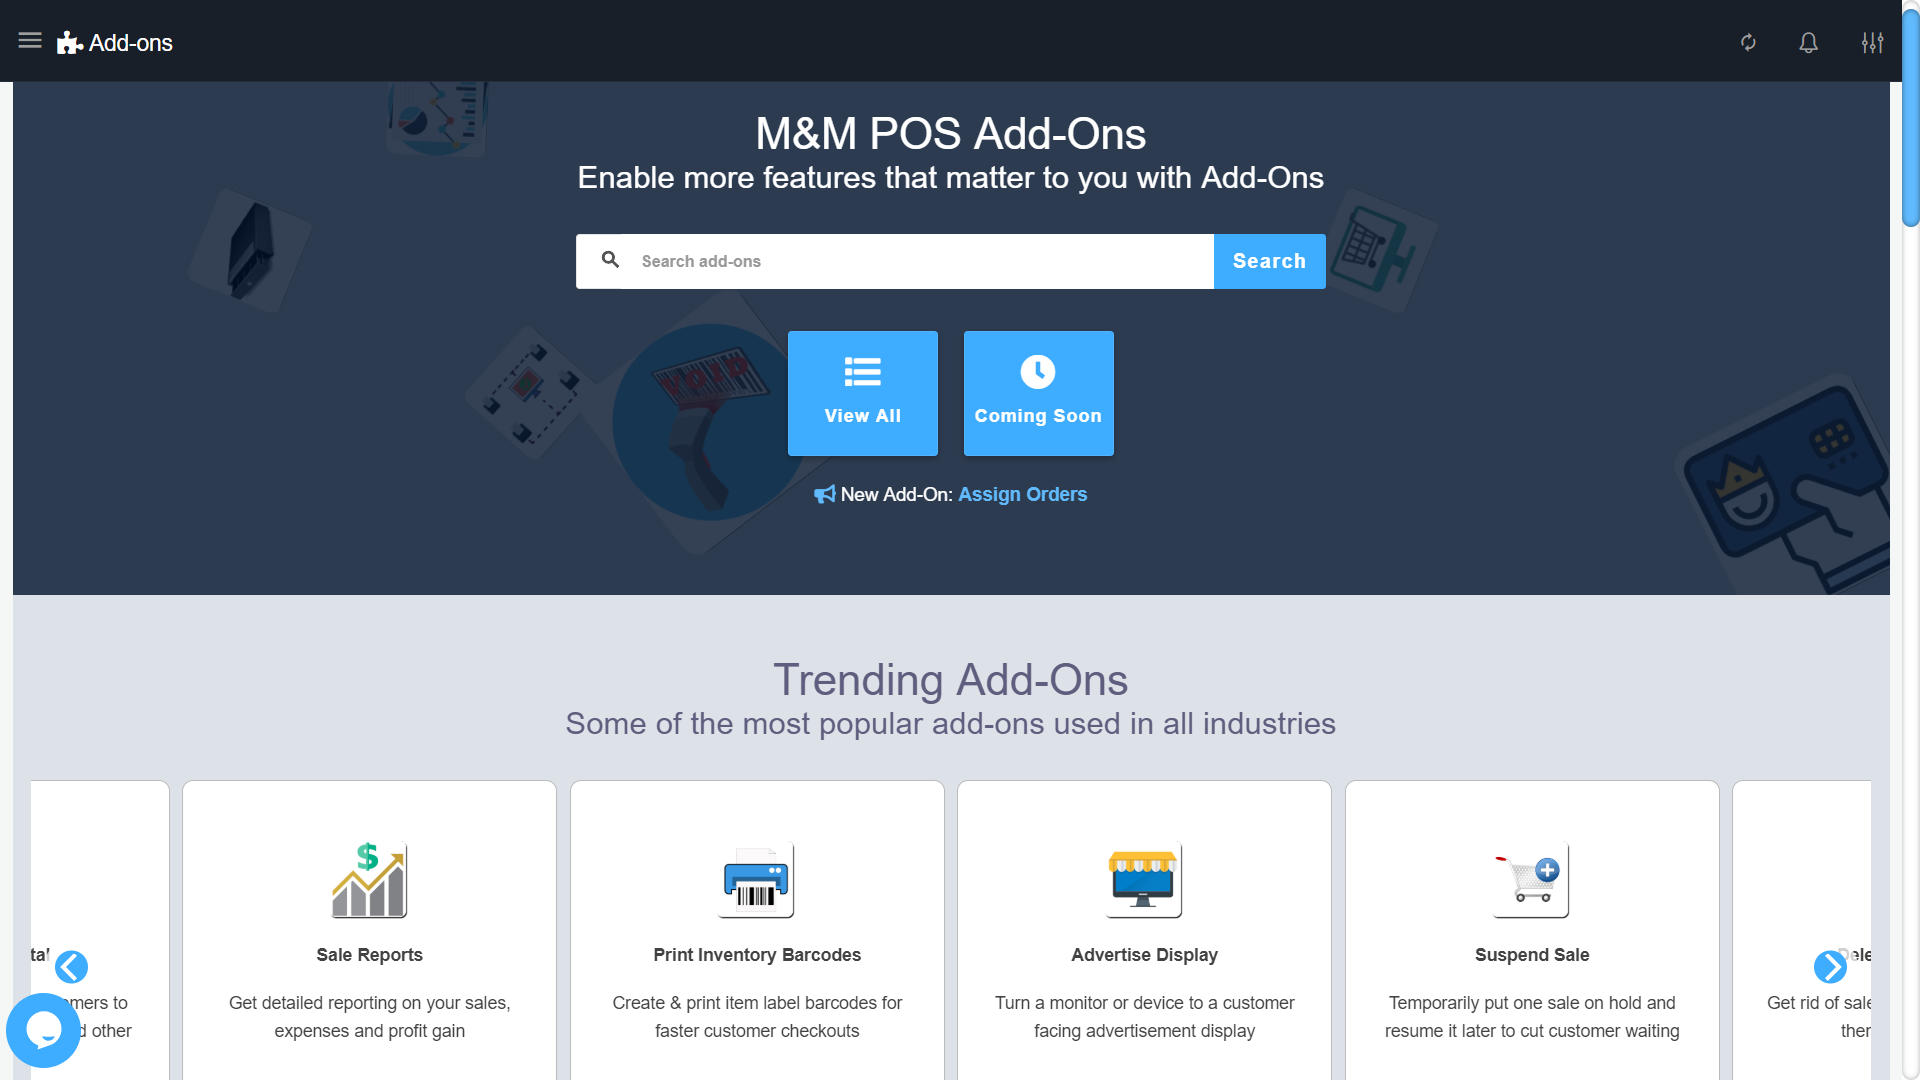
The Add-ons page is where you can find all the add-ons to customize M&M POS to your needs. Add-ons are extra features that help you manage and improve your business. There are over 30 add-ons available and our team is always working on adding more. On the add-ons page, you will see slides at the top that have useful information about new add-ons and discounts.
Check the slides for coupon codes to save on add-on purchases
To view all add-ons you can select the view all button and you will see the list where you can enable add-ons from. You can also search for an add-on or a keyword to see any add-ons that match or are relevant. Add-ons that are coming soon will be found in the coming soon section. You can upvote coming soon add-ons to show interest in it and that will increase its priority on our roadmap
You get a 7-day trial period to test out any add-on that you are interested in to see if it fits your needs. You can only trial an add-on one time, so take advantage of the 7 days and test out the features. We encourage our users to send us feedback after they finish a trial for an add-on to help improve and better serve everyone.
To start a trial, find the add-on you want to trial and select the "Start Trial" button. This will display a confirmation box to make sure you want to start the trial. Once you confirm, you can refresh your app and the new add-on will be available. Once your trial finished the button will be labeled "Trial Ended" and you cannot trial it again.
If you need an extended trial to test out a feature, reach out to our support team, we make exceptions to help our users
If an add-on fits your business needs and you would like to purchase it
to keep it forever, you can but the add-on for a one-time payment and it
will always be available for your account from all your devices. One
time purchases are a good way to save in the long run so you don’t have
to pay monthly. You will also get any updates we make to the add-ons for
no extra charge. You will be fully supported and can reach out to our
support team for any help. To purchase an add-on, you can add it to your
Buy Now cart by selecting that button and it will be stored in your
add-on shopping cart. You can add more add-ons to your buy now cart to
check out with multiple add-ons at once or just one add-on. To view your
add-on cart, select the floating cart on the bottom right and then
select the Buy Now tab to see the add-ons you plan on purchasing. To
complete the purchase, select Review & Complete Order. This will
take you to the secure check out screen and you can fill in your payment
information. You have the option of making a payment using Stripe or
PayPal. After you enter your payment information and complete the
purchase, you can refresh the app and the add-ons will be available.
You can use coupons to get a discount from on add-on purchases. Always check the add-ons page slides for coupons and use this for 15% off: UserGuideCoupon
If you would like to use an add-on but not commit to buying it, you can subscribe to the add-on for a small monthly cost. This cost is less than $15 for all our add-ons and some are even as low as $2! And you can pay as you go. To start a subscription, add the add-ons you are interested in to the subscription cart. You can add multiple to subscribe to at once. To view your add-on cart, select the floating cart on the bottom right and then select the Subscriptions tab to see the add-ons you plan on subscribing to. To complete the subscription, select Review & Complete Order. This will take you to the secure check out screen and you can fill in your payment information. You have the option of making a payment using Stripe. After you enter your payment information and complete the purchase, you can refresh the app and the add-ons will be available. The subscription will be auto renewed every month. If there were any issues with the payment during the renewal, the add-on will be disabled from your account. You can always start the subscription again and enter the correct payment information.
Inventory
The
Inventory page is where you add your items. Once you have items added
to your inventory, you can start selling them on the Sell page. At the
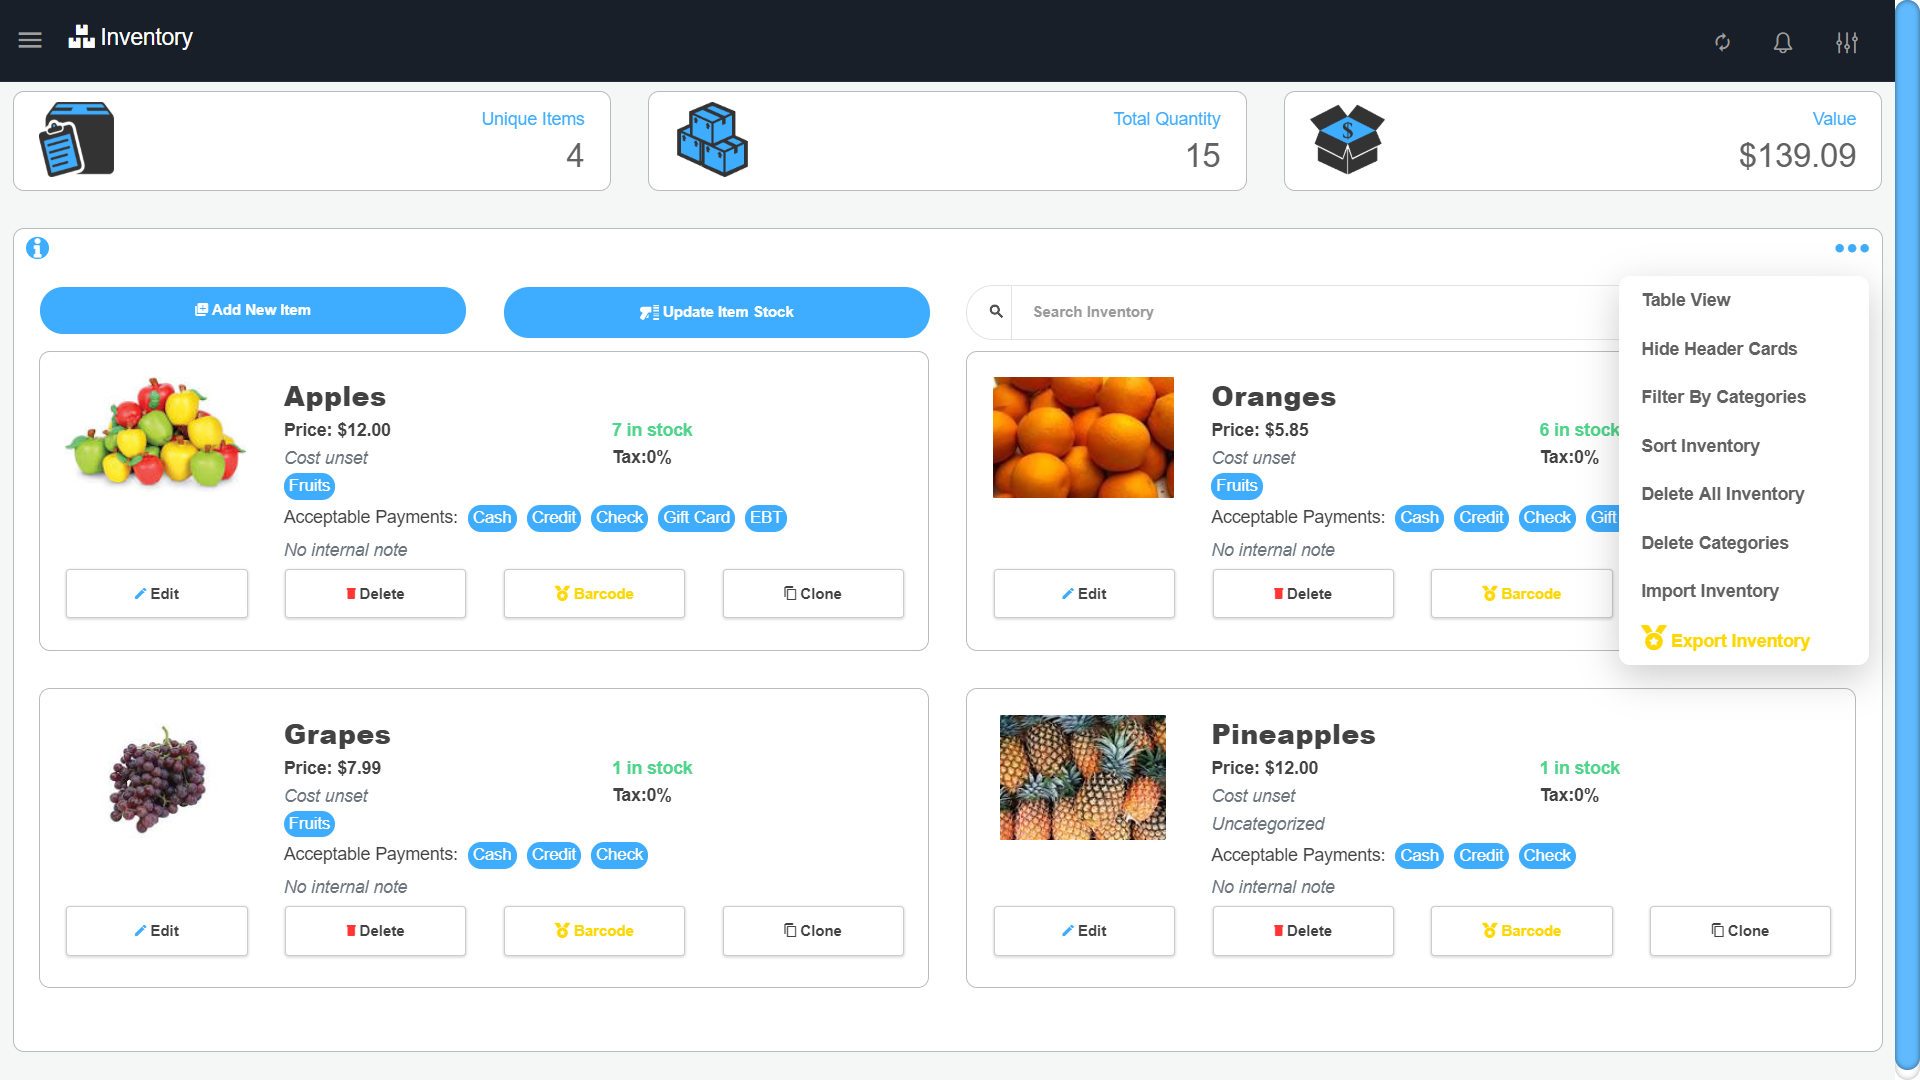
top of the page, there are three header cards that give you summary
information about your inventory.
- Unique Items tells you how many items are in your inventory list. This includes the items that are currently out of stock.
- Total Quantity is the sum of all your item’s quantities. Items that are out of stock, have a quantity of 0, and therefore are not included in this sum.
- Value is the sum of all your item’s prices multiplied by the quantity. This shows you the estimated value of all the inventory in your store if it were sold.
The three-dot menu on the top right has options for you to change your inventory listing style and more settings
If you have your inventory list from a different POS or from your
vendor, you can import it to M&M POS to fill in your inventory. To
import an inventory list, select the three-dot menu button and choose Import Inventory you need to format it according to our guidelines.
Below we explain the steps needed to format your list. This can be done from Microsoft Excel or Google Sheets.
-
Add these column headers to the first row and make sure they are in this order:
A. Name* (The name of the item. This is a required field)
B. Price* (The retail price of the item. This is a required field)
C. Barcode (The barcode or SKU of the item. This must be unique for every item)
D. Quantity (The quantity on hand for the item. Will be set to 0 if left blank)
E. Category (An optional category to organize your items with)
F. Description (The description or internal note about an item)
G. Cost (The item’s cost price)
H. Tax Percent (The tax percent that is applied to this item)
-
Once you have the list with all your items in the order described above,
you need to export your list to a tab-delimited text file.
Microsoft Excel: File > Save As > Enter a file name and choose the extension “Text (Tab delimited)” from the drop down list and save the file
Google Sheets: File > Download > Tab separated values (.tsv, current sheet) and save the file. After its downloaded locally to your device, rename the file extension to .txt
- After you have the .txt file, upload it in the M&M POS Import wizard
- If the file meets our guidelines, you will get to choose the accepted payment types for the items
- Then you will be presented with a preview of the top 10 items so you can make sure everything looks correct before saving the list
- If everything looks good, save the list by selecting Import List
From
the Inventory page you can add a new item by selecting the Add New Item
button. A form will appear with all the item’s properties that you can
set. The only required fields are the name and retail price. Below is an
explanation of each field:
- Item Name: the name of the item that will be displayed in the app and on the customer’s receipts.
- Retail Price: the price you are selling the item for. This is how much a customer would be charged if you sell this item. If you select the "Set price when adding to cart" check box, it will allow you to enter the price on the Sell page when the item is added to the cart. This is useful for items you want to decide the price during checkout instead of when entering the item.
- Item Cost: the cost that you have to pay for the item. This is used if you want to see reports for profits.
- Quantity in Stock: the amount of the item that you have on hand. This will be automatically updated when you sell an item. The app will also notify you when you sell an item that is out of stock. You can change this behavior in the Sell Settings. If you want to have unlimited of an item, you can check the box to toggle the items quantity to unlimited. This will set it to 99999999999999999.
- Barcode: this is the item’s barcode or SKU. You can scan the item or manually enter it to set the barcode. On mobile, you can also use the camera as a barcode scanner. This must be unique for every item. If you enter a duplicate barcode, the app will notify you that this item already exists and will allow you to open that item or adjust the new item’s barcode. If you do not enter a barcode, the app will generate a random barcode for it which you can choose to use if you like. You can enter custom barcodes to find items quickly, such as setting most used item barcode to 111 or any short number you would like as long as it is unique. On the Sell page, you will have the ability to scan items to enter the barcode or you can manually type in the barcode and it will add the item to the cart
- Category: this is an optional field that will allow you to organize and filter your items by categorizing them. When you add categories to an item, it will allow you to sort by that category, view reports for categories, and find the item on the sell page by categories.
- Subcategory: if you enter a category for an item, you can then add a subcategory to organize items even more. This will help you find items quicker on the Sell page when looking by category
- Internal Note: this is an internal note or description to be used by your employees. It will not be displayed on the customer receipts. You can use it for item expiration dates or if the item has any special instructions
- Acceptable Payment Types: You can select what payment types a customer can use to pay for this item. This will be enforced on the Sell page when the item is added to the cart. Go here to see how to set the acceptable payment types of your store and add custom payment options
- Tax Rate: This is the tax percent that is applied to the item when you sell it. The tax will be added to the customer’s total when this item is added to the cart. Go here to see how to add different tax rates and set your tax as included in the price
- Image: you can add an image to the item by uploading your own or using some of the images suggested by our app. You will get the default inventory image if you leave this empty.
Once you are done adding the item’s properties, you can select the Add Item button to save your new item. Your items will appear in the list now.
To update an item in your inventory, select the edit button. This will open the edit form with all the item’s properties. You can update any field and then save at the bottom of the form. An explanation of what all the fields are is in the Adding Items section.
To delete an item in your inventory, select the can Delete button. This will display a confirmation pop up to make sure you want to delete the item, or you can cancel this action. You will not be able to retrieve an item that was deleted. If you want to delete all items in your inventory and start a new list, you can select the three-dot menu and choose Delete All Inventory. A confirmation pop up will appear to make sure you want to delete everything, or you can select cancel to stop this action. If you delete all items, there will be no way to retrieve your inventory list again.
If you have multiple items that are similar, you can clone one of them and make minor adjustments and save it as a new item. This would save you time instead of having to add each item separately. For example, if you are a grocery store and you sell three different juices, apple, orange and grape. If all these items have the same properties with the exception of the name and barcode, you can add the apple juice and set all its properties, then clone it and simply update the name to orange juice and set the orange juice’s barcode. After that you can clone the apple or orange juice and quickly add the grape juice following the same procedure. To clone an item, select the Clone button in the inventory list and it will be copied so you can modify it and save a new item.
You can update the stock of an item two different ways:
- You can Edit the item and set the amount of quantity on hand in the Quantity field and save that item. This is useful when you know exactly how many of an item you have.
- You can use the Update Item Stock button from the Inventory Page. This will allow you to scan new item’s you’ve received, and it will automatically increase that item’s quantity by 1. So, if you received a new shipment of 6 juices, you can select the Update Item Stock button, then start scanning the new juices that arrived. The app will automatically increase each juice’s quantity as you scan them.
If you want to find a specific item in your inventory, you can use the search field on the Inventory page. You can search by an item’s name, barcode, description or category. Just start typing what you are searching for and hit the Enter key on the keyboard or select the magnifying glass button . The app will show you your search results for any item that matched your search. To clear your search, select the to the left of the search or just delete your search. You can use your barcode scanner to enter the item’s barcode and find it quickly.
On mobile, you can also use your camera as a barcode scanner to quickly find an item with the barcode scanner button
Another way to find items is by sorting your inventory. You can sort the list by selecting the three-dot menu on the top right and selecting Sort Inventory. This will replace the search box with the controls to sort the list. You can choose to sort by date added, name, quantity in stock or retail price. By default, the list will sort ascending, if you want to see things in descending, check the box called Reverse.
To toggle back to search mode, select the three-dot menu and choose the Search Inventory option
If you set up categories on your items, you can use the filter option to view items by category. This feature will only exist if you have at least one item that has a category. To filter by category, select the three-dot menu on the top right and choose “Filter by Categories”. This will display your categories for you to choose from and filter your inventory list to the selected category. To get out of this mode, select the three-dot menu and choose “Hide Categories” and you will be returned to the full list.
If you want to remove a category from all the items that have it, you can delete that category. This will only remove the category property from the item and will not delete the item. To delete a category, select the three-dot menu and choose Delete Categories. This will open a pop up that has all your categories. You can delete them by selecting the trash can icon button next to the category name. A confirmation pop up will be displayed to make sure you want to delete the category. You can cancel this if you do not want to delete the category.
To use the print barcodes feature, you need the Print Inventory Barcodes Add-On
The barcode printer add-on allows you to print barcodes of any item.
It generates the barcode of the item and displays the item name and
price on a printable card. You can use the printed label to place on the
shelf of the item so you always know where to restock it and customers
always know the price. You can also use the printed barcode for any
items that do not have a scannable barcode on them. This helps speed up
customer check out process so you don't have to look for the item
manually through the sale form. You can also keep printed barcodes
around the cashier for the items that are most frequently sold or too
heavy to carry and scan.
To print the barcode go to the inventory page, find the item and click on the "Barcode"
button. This will prompt you with a review of the item and barcode.
Click on "Print Barcode" button to send the item to be printed
Sell
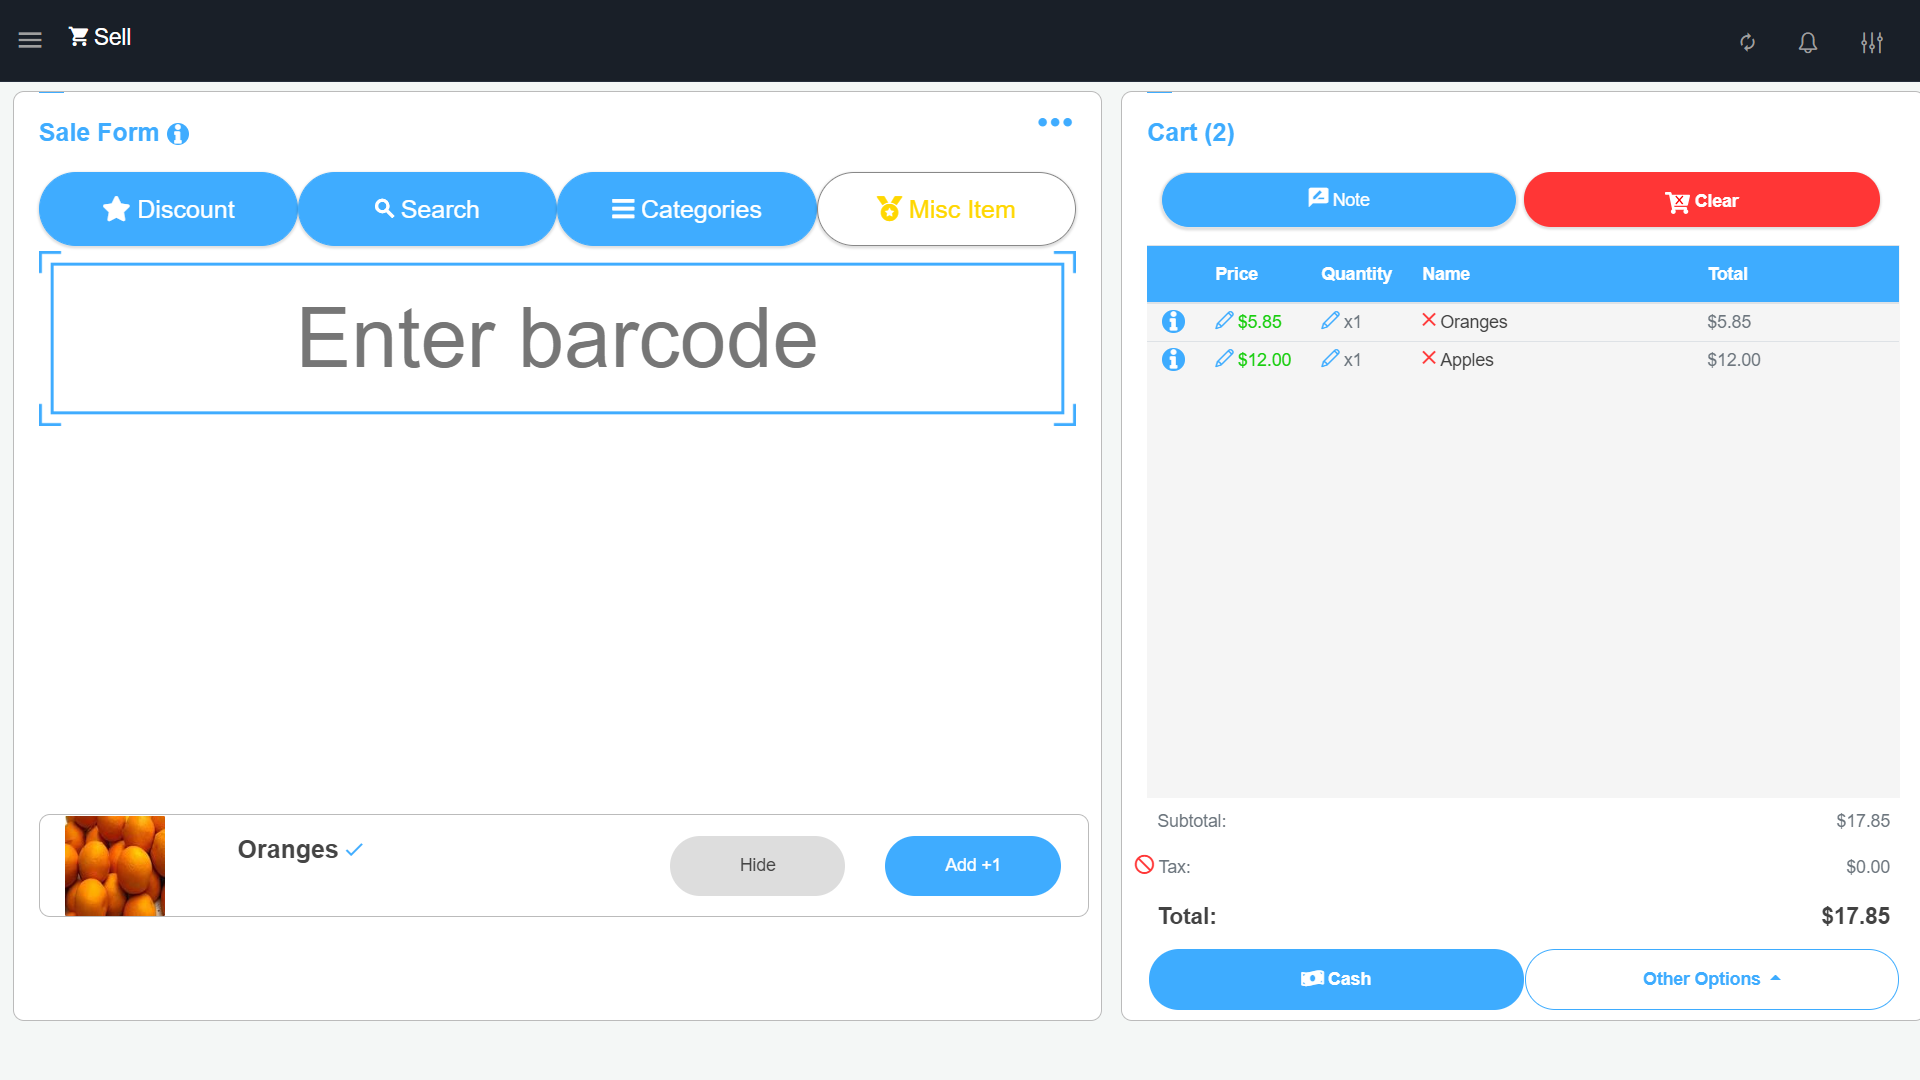
The sell page is where you perform your sales. The sell page is broken down to three parts:
- The sale form: The sale form has the different ways you can find items to be added to the cart including discounts. In the menu bar of the sale form you can find the sell settings page that allows you to customize the sell page.
- The cart: The cart section displays the items that you added to the cart, the totals, and the checkout buttons when you are ready to checkout.
- The checkout: The checkout page is after you confirm the payment type you can send or print the customer’s receipt.
There are different ways you can add items to the cart. This depends on how you setup your items in the inventory page. You can scan barcodes, search by item name, or filter by categories & subcategories. By default the sale from is in barcode scan mode. You can change the default view mode in the sell settings.
When you add an item to the cart you will see the item you added in a card at the bottom of the sale form and can click on the “Add +1” button to add one more of that same item. The last item that was added will appear on the top of the cart list so that you can always ensure that you added the correct item quickly.
To quickly remove all items in a cart to start a new sale you can use the red “Clear Cart” button that is on top of the cart items. Clicking this will not clear the items right away. You will be prompted first to agree to clear the cart, just in case it was accidentally clicked, once you agree to clear the items all items in the cart will be removed and you can continue with the new sale.
-
Barcode Scanning - If you have added the barcodes to your items in the inventory page, then on the sell page you can simply scan/enter the barcode into the barcode field to quickly add it to the cart. If the barcode entered was not found you will receive a pop up with a warning sound to indicate that the barcode entered was not found. If the item was found and added to the cart you will hear the success sound that it was added. USB and Bluetooth barcode scanners are supported on both Desktop and Mobile devices. Simply connect the scanner to your device. Make sure you are focused on the barcode input field (You see the cursor blinking) and then scan items. On mobile devices there is a barcode icon button
that appears next to the barcode input. Clicking on the barcode button
will open the device’s camera to use as a scanner. CAS Scale barcodes
are supported in M&M POS. Here is an article to help you with you
the setup: Working with CAS Label Printing Scales in M&M POS.
You can turn on/off sounds in sell settings from the three-dot menu button
-
Search - To search items by their name, barcode, or internal note you can use the search form. Use the search input to enter the keyword or barcode and then click on the search icon (or Enter on the keyboard) You will then get the results of items that matched your search and can select the items to add to the cart. When you select the item you will hear the success sound that it was added.
-
Categories - When you add items in the inventory page you can group items into categories, and subcategories. This allows you to filter your inventory in the sell page to quickly find items to add to the cart. On the sell page click on the category button and you will see all your categories that you have added. Clicking on a category will show you all the items in that group and any subcategories. If you see your item in the list you can select it to add it to the cart, or if your item is part of a subcategory you can click on the subcategory so you can further filter the list to find the item you want.
-
Misc Item - This is an Add-On that allows you to add items to the cart that are not in your inventory. This is very useful because you do not need to add items to the inventory, or if an item was not added in your inventory you can add it as a Misc Item to finish the customer’s sale and then later on add that item to your inventory. To add a Misc Item click on the “Misc Item” button and fill out the form. You will need to enter a name, select the tax rate to charge, and give it a price. Once you give the item a price it will be added to the cart. By default the name of the item is “Misc Item” you can clear the name and enter the name of the item or service you are adding.
The misc tab is available with the Miscellaneous Sale Add-On
Get the Inventory Specials & Coupons Add-Ons to set special discounts rules on items and sales
Discounts are a great way to increase customer satisfaction. There are two different types of discounts that you can add:
-
Discount by Percent - You can enter the percentage of the total sale you want to discount. For example if the total sale is $100.00 and you give the customer a 10% discount the amount that will be subtracted from the total is $10.00 and your customer will pay $90.00
-
Discount by Amount - You can enter the exact amount you want to discount from the sale. For example if the total sale is $100.00 and you want to discount $10.00 from the total, you can add the discount to be exactly $10.00 and your customer will pay $90.00
You can add multiple discounts to a sale by entering another discount by percent or amount
Adding a note to a sale is useful for internal use and for customers. When you add an internal note on a sale it will appear later in the transactions page for that sale. You also have the option to display the note on the customer receipt.
To add a note click on the Note button on top of the cart items. You will be prompted to enter a note in the input field and check the checkbox to display it on the customer’s receipt. After you enter the note you can always go back and click the “Note” button to edit or remove the note you entered.
The payment types that you can checkout with depends on the items that are added to cart for that sale. The payment types are set in the settings and then added to items on the inventory page. Once you are ready to check out you can use the quick checkout button or select a “other options” to view all payment types allowed on this sale. The quick checkout button can be customized through the sell settings (shortcut key F5 on keyboard). You can complete the sale by clicking the “Complete Sale” button or click the back button to navigate back to the sale form to edit or cancel the sale. Below is the workflow for each payment type upon checking out:
-
Cash - Selecting the cash payment method will give you the option to enter the amount of cash that was handed to you to calculate the customer’s change back. This amount entered will appear on the customer’s receipt and in the transactions page if entered. You can continue without having to enter the amount by completing the sale.
To enter the exact amount handed to you use the keypad button icon or you can use the quick cash buttons to add up the amount handed. For example if the total of the sale was $60.00 and the customer handed you two $20 bills and two $10.00 bills you can click the $20.00 button twice and then the $10.00 button twice to get a total of $60.00
-
Check - Selecting the check option will give you the option to enter a check number or reference. This will show on the customer’s receipt and be retrieved in the transactions page. You can complete the sale without entering a check number.
-
Credit - If you are using your own credit card processing machine but would like to record these transactions in M&M POS as credit you can select this option. Selecting credit will show you a credit card swipe screen that asks you to charge the customer on your machine and after the transaction is approved select the Complete Sale button to finalize the sale.
-
Gift Card - If your business creates gift cards for customers and would like to record these transactions in M&M POS you can select this option. Selecting gift card will show you a credit card swipe screen that asks you to charge the customer on your machine and after the transaction is approved select the Complete Sale button to finalize the sale.
-
EBT Cash - EBT Cash is similar as credit, but if your store would like to keep track of EBT Cash transactions specifically then you can select this option. Selecting EBT Cash will show you a credit card swipe screen that asks you to charge the customer on your machine and after the transaction is approved select the Complete Sale button to finalize the sale.
-
EBT - Stores that accept EBT payments from their customers can select this option to pay EBT. This EBT option will only be available for items in the cart that have EBT set in your inventory. When an item in the cart is set to not to be paid with EBT but other items are and you select EBT to check out, you will be forced to split the transaction by items. If the items are all EBT acceptable then you will receive the credit card swipe screen that asks you to charge the customer on your machine and after the transaction is approved select the Complete Sale button to finalize the sale.
The force split EBT will split the cart into EBT items and Non-EBT items. There are three steps to this split and you can back out to the sale form at any step:
- Confirm the EBT cart items and total. You can select to move items from the EBT cart to the cash cart. Once confirmed you can click the next button that will show you the credit card swipe screen.
- Charge the EBT card. Charge the EBT card with the amount on the screen. If the customer is not paying the full amount in EBT and is paying a partial amount only then you can change the total by clicking the pay partial and entering how much are you charging the card. Once you charge the card and it is successful you can click the next button to move onto the cash checkout
- The remaining total will be shown. This total needs to be paid in a different method so select a payment method from the available options to finalize the sale. Selecting an option will give you the workflow for that method so you can complete the sale.
-
Split Payment - When customers want to pay with different payment methods you can select the split payment option. This will navigate you to the split screen where you will see available payment types to split by and the balance. You can split the transaction payment into different payment types until the balance is $0.00
If a customer’s total is $120.00 and wants to pay $50.00 cash and $70.00 credit you would select “Cash” enter the amount $50.00 this will adjust the balance to be $70.00 and show you a “Cash $50.00” card that can be removed by clicking the trashcan icon. Then select “Credit” and enter the amount $70.00 to make the balance $0.00 Once the balance is $0.00 the “Confirm Split” button will be enabled so you can confirm and checkout. Confirming the split payments will trigger the workflow for each payment type entered. When you reach the last payment type workflow and continue it will finalize and record the sale
When you finalize a sale you will be redirected to the Sale Complete page. You will be able to review the total information like the cash change back if it was entered. You can then print a receipt if you have a printer connected and is set to your default printer. Alternatively, You can send an electronic receipt to a customer's email or phone number.
If you have the 'Notify Customers' Add-On sending email/text receipts will subscribe your customer in the background for you
The sell settings page gives you control of the sell page to customize it depending on your business workflow. To access the sell settings from the sell page use the three-dot menu on the top right of the sale form and select "Sell Settings" Alternatively, you can access the sell settings from the settings page. The list of settings available to you are listed below:
-
Set default sale form - You can customize the sale form to display the form that you use most. The default sale form is the “Barcode Scanning” the list of options you can set the default are:
- Barcode Scanning form
- Discount form
- Search form
- Categories form
- Misc Item form - (If Add-On Enabled)
- Set default quick pay button - The quick pay button is the button that appears under the cart next to the “Other Options” button. The default quick pay button is set to “Cash” but this can be changed to any payment type active including any custom payment types that were added.
- Set checkout refresh timer - When you finish a sale there is a 10 second timer that will refresh the page when it becomes 0 so you can start a new sale if no receipts were sent. This timer can be customized and set to how long you prefer.
-
Cart Settings - The cart settings affect how items are added to the cart. As of now there are two cart settings.
- Combine the same item quantities on add to cart - Check this if you want the quantity to be added together when you scan/select more than one of the same item or leave unchecked to add all items as new item lines.
- Allow sale of out stock items - If this is checked then the quantity in stock is ignored. Inventory Items that have a quantity of 0 will be allowed to be added to the cart & sold on the sell page.
- Show Subtotal - Show the subtotal column for items in the cart (Quantity x Price) This setting will affect the look of all carts throughout the application and electronic receipts
- Show Total With Tax- Show the total column for items in the cart that includes their tax (Subtotal + Tax) This setting will affect the look of all carts throughout the application and electronic receipts
-
Sound Settings - The sound settings allow you to turn on and off sounds that are played on the sell page. These sounds are:
- Sound on add to cart - This is the sound that plays after adding an item to the cart. If you would like for the system to notify you that the item selected was added successfully to the cart then you can keep this turned on. This is very useful if you use a scanner & scan items, this sound will let you know every scan if the item was found and added successfully or not.
- Sound on barcode item not found - When you are using the barcode scanning sale form to add items to the cart then, this setting will play a sound when the barcode you entered was not recognized and no items were found with the barcode entered. This is useful to notify you that an item was not found so you can stop scanning and adjust the sale to add the item missing or to try entering the barcode again.
- Sound on complete sale - This is the cash register sound that plays when you finalize a sale successfully. This helps with knowing that the transaction was successful and that you can continue with the next sale.
-
Inventory Settings:
- Hide Item Images - Set to hide inventory item images on the sell page during selling
This
Add-On will help move the line and cut customer waiting time. When you
are in the middle of ringing up a customer and they need to leave or go
back shopping because they forgot something you can temporarily suspend
their transaction, continue checking out other customers that are in
line, and once that customer gets back you can resume their transaction
exactly where they left off saving you and your customers time\
Click on the three dotted menu
you will see a new button called 'Suspend'
When you are in a middle of adding items to the cart you can pause,
click the suspend button, this will ask you if you want to suspend the
transaction, when you confirm the current cart will clear out and you
can make new sales. Once you are ready to resume back into the suspended
transaction, click on the menu tab, you will not longer see 'Suspend'
you will see 'Resume' which indicates that there is a cart currently
suspended,
clicking on 'Resume' will ask if you want to resume back into the
suspended transaction clicking yes will restore the cart with the
suspended cart list and you can continue where you left off and complete
the transaction.
When you suspend a sale that sale will forever be suspended on that device so you can go to other pages, and even close the App. When you come back to the sell page you can still resume the suspended sale
To use the suspend feature, you need the Suspend Sale Add-On
The
void mode Add-On gives you a quicker way to refund your customers for
items they are returning by voiding items during a sale/ Voiding during a
sale will help move your line quicker and still give you the same
reporting at the end of the day. This will save you more time focusing
on selling and giving your customer more time to spend shopping.
Click on the three dotted menu
you will see a red highlighted button 'Void Mode' Clicking this button
will turn void mode on. Any item added to the cart when void mode is on
will have a negative amount and will be colored red to indicate it is a
void item. When you are done voiding all the items you can click the
three dotted menu
and click 'Exit Void Mode' to return back to the normal state. Once
finished adding to the cart you can continue the transaction normally,
choose the payment method, and complete the transaction.
To use the void feature, you need the Void Mode Add-On
Expenses
The expenses page is for you to keep track of any payments you've made
so you can collect statistics and view reports about your store's
expenses. Examples of expenses: employee’s payroll, payments to vendors,
or monthly bills.
The top cards give you the total amount you spent so far. You can
quickly view the daily total, monthly total, and yearly total for the
current date that you are viewing. The top right menu bar has the table
and card view toggle that gives you the ability to switch between card
and table view.
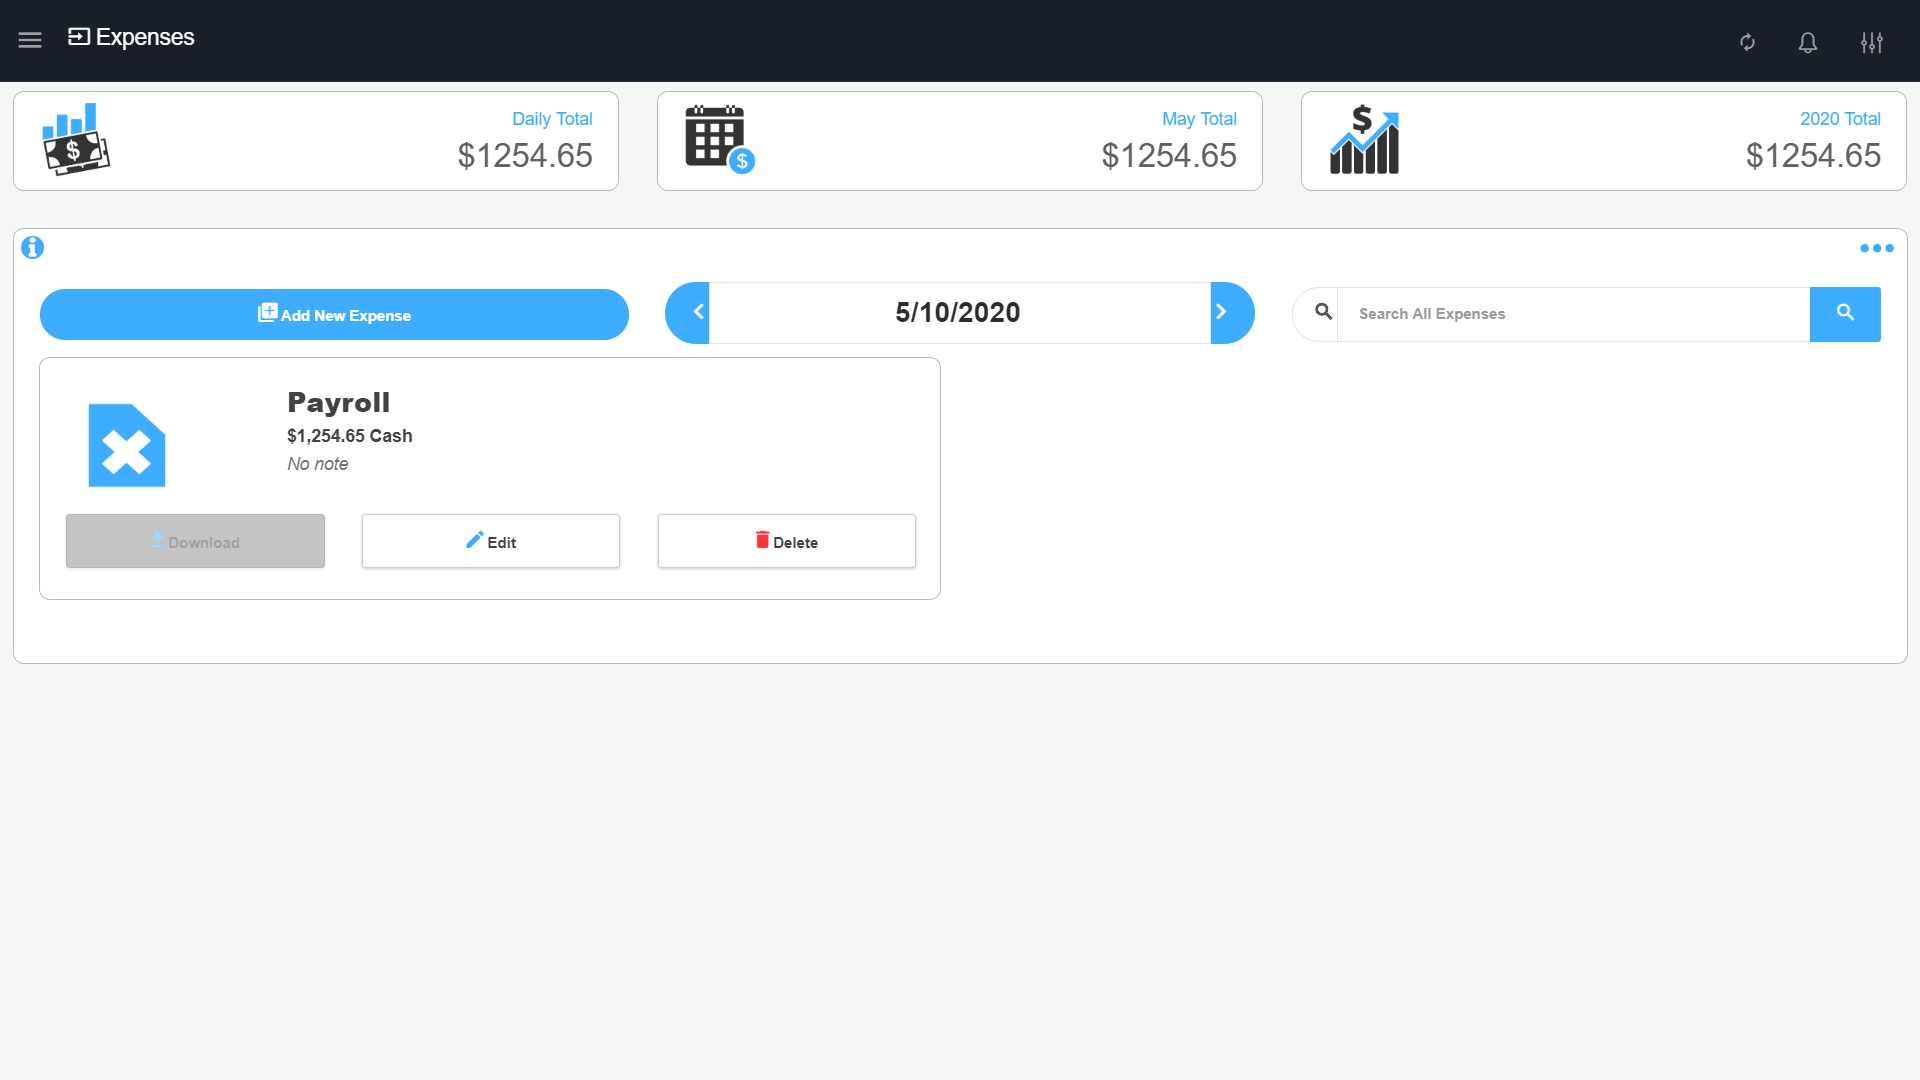
Start by clicking on the “Add new Expense” button to open the add form. You are required to give your expense a name, enter the date, enter the amount, and select the payment method in which this expense was paid with. You can optionally give your expense a category to later filter by, enter an internal note about the expense for later use and upload an image of the receipt if available. The receipt can then be downloaded at any time from any device when needed.
The expenses page displays expenses by their date or by a range. By default it loads expenses for the day. You can change between daily and range view by clicking the three dotted menu button and click the 'View Range' option to swtich back to daily click the 'View daily' option
You can filter your expenses by categories and get reporting total for each category
The search functionality in the expenses page allows you to search all your expesnses. The search can be by the name or internal note you entered for the expense. The search will get you results of all expenses found for the keywords you searched by
You can edit an expense by clicking on the edit button. This will give you the edit form where you can update the expense’s name, amount, payment type, the internal note, or receipt. When you are done editing the form click the “Save Expense” button to save the expense. The data on the page will reload with your new expense changes.
Use the delete button to delete an expense that you no longer want to keep track of or if you made a mistake. You will be prompted to agree that you want to delete the expense. Once deleted it will no longer be available and it will not be calculated in your totals
To
attach a receipt when you add an item you can select to upload a photo,
or if you already added your expense without an image then you can edit
the expense to add one. Once the photo is uploaded you can download
& view it from any device at any time by clicking on the image or
the download button.
If you are on mobile then you will be prompted to select if you would
like to directly open the camera to capture a picture of the receipt, or
to select from your photo library if you already have the photo
available.
If you are on a desktop you will be prompted to find your photo by your
operating system’s file lookup. Navigate to the folder where your
receipt is (e.g Downloads) Find the receipt file and select it to
attach it to the expense.
Transactions
The transactions page is where you can view all the sales you've performed on any given day. The top header cards give you insight on the date you are viewing. You quickly can see the total number of sales, the total of sales, and the total refunds for that day. You can use the menu button to switch between card and table view and to hide and show header cards for your convenience. Use the "Filter by Payment Type" to filter through transactions based off of payment types that were recorded on that day
After
you complete a sale, when you go to the transactions page the default
sales that load will be today’s sales. You can view older sales by
clicking on the date to select a specific day or use the
left and
right chevron to go to the previous or next day.
The table is sorted by the time the sale was done displaying the last
transaction on top.
The table displays some quick info about the transaction to view more
details click on the transaction you want to view. The transaction
details page will display all information captured on the sell page; the
receipt number, the cart with the items sold and totals, and any
internal note that was entered on the sale will appear under the cart.
You can use the
left and
right arrow buttons to quickly navigate between the transactions for that day.
Click on the receipt button to resend/reprint the receipt.
Click on the refund button to be navigated to the refund page with the sale.
If you are looking for a specific transaction and the customer has their receipt or you know the receipt number you can use the search to quickly find that transaction. The receipt number is always at the bottom of the receipt as a barcode. So, you can either type the number or scan the barcode if available.
If you have the delete transactions Add-On, the transactions that you delete can still be found with the receipt number. This is so that if you have deleted a transaction but a customer comes back later about that transaction you can still find it using its receipt number.
To edit a sale transaction go to the transaction you want to edit. In the transactions detail page click on the "Edit" button this will take you to the sell page with the transaction where you can add/edit items or edit the payment type
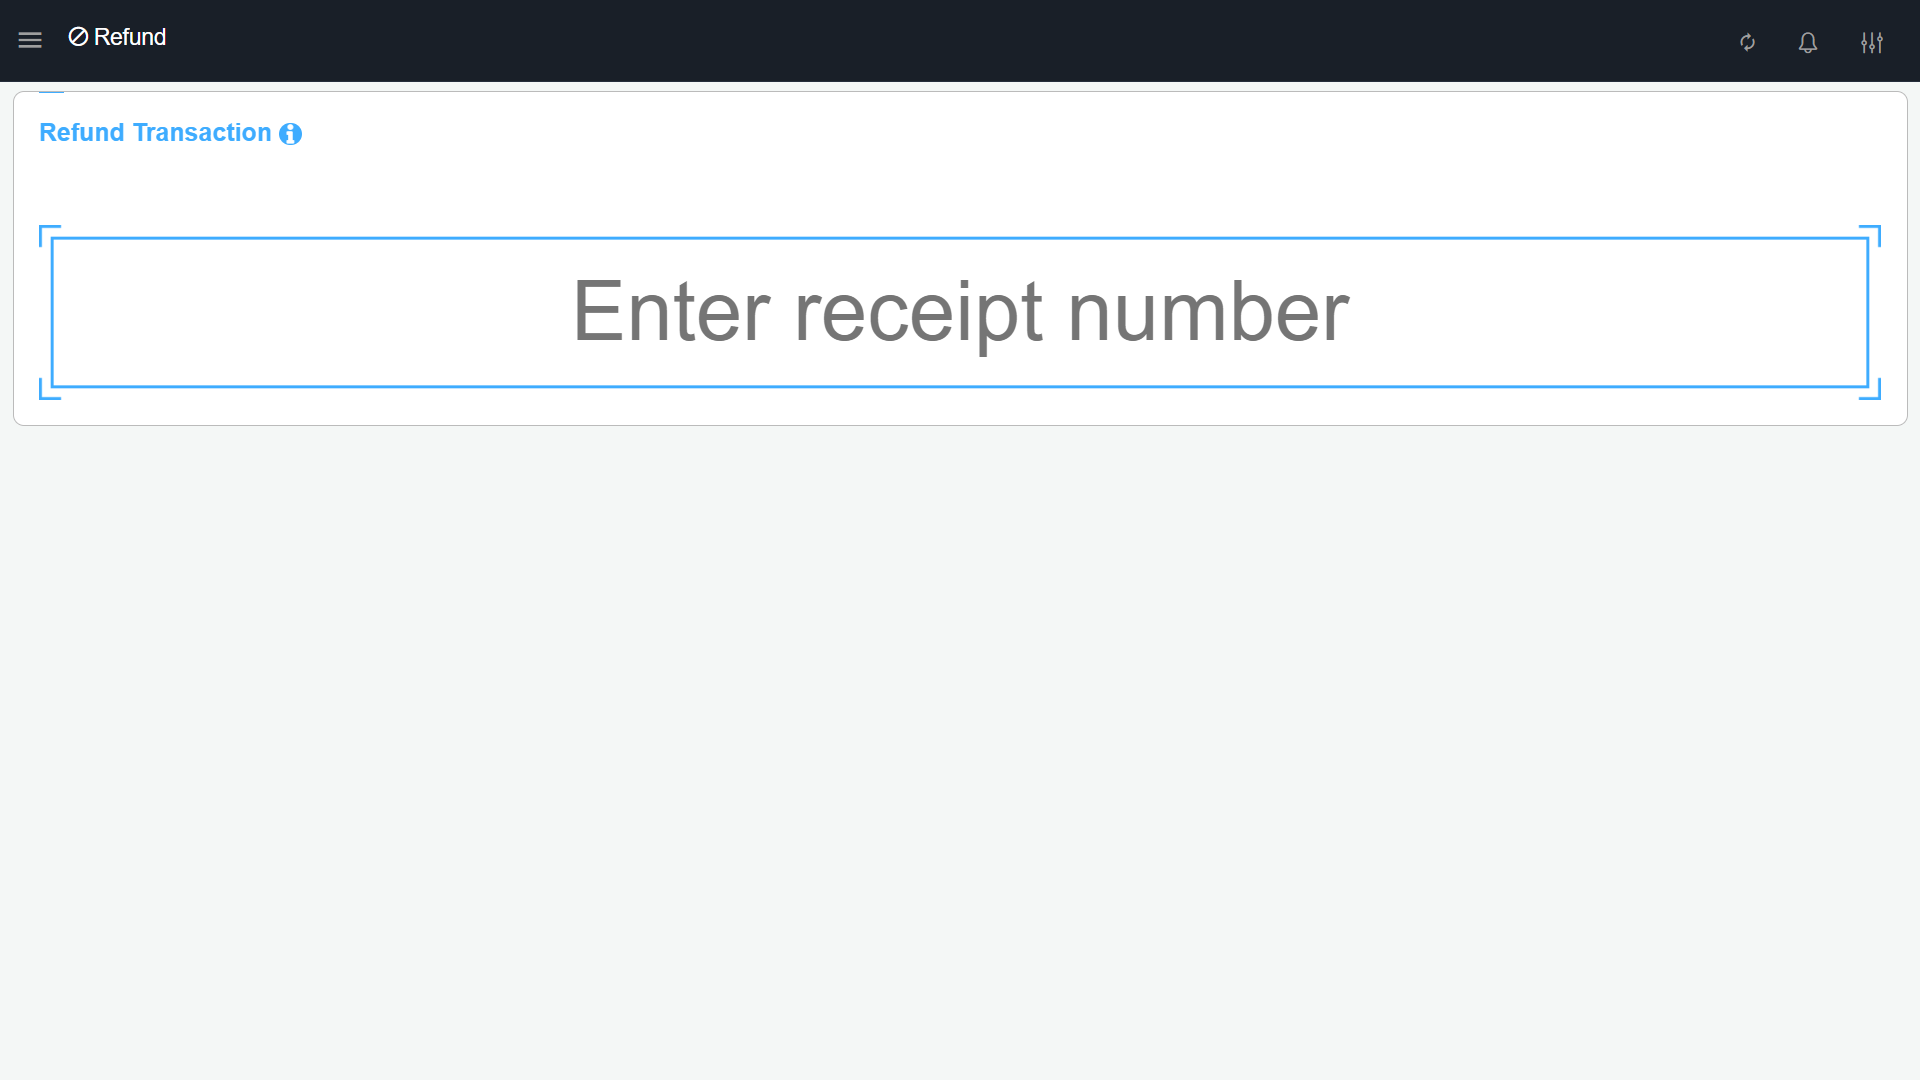
Refund
In some cases a customer might come back after a sale was completed to return some items they purchased. To accomplish this you will need to know the receipt number or if you do not have the receipt number you can look up the sale in the transactions page and from there click on the refund button to be redirected to the refund page. If the receipt number is available then you can directly go to the refund page and enter the receipt number to find the sale.
Once
you found the sale on the refund page the cart items will appear and
you can select which items you would like to refund. If you would like
to refund all items you can click on the select all button to select all
the items. Alternatively, you can scan or enter the items barcode to
select it from the list by using the search barcode field.
Under the cart items you will see the total of the sale, how much you
are about to refund, and the new total of that sale after the refund.
When you select the items that need to be refunded the refund amount
will change to tell you how much to return to the customer. When you are
done selecting the items click on the next button to be redirect to the
confirm page.
On the confirm page you have the option to enter the reason for the
refund and then you then have to select the refund payment method. The
refund reason will be available for you on the transactions page later
when you see refunded sales. The refund method is the method that you
are refunding to the customer, if you are refunding the customer in cash
you would select cash. Once you select a payment method the sale will
be refunded and you can then send/print the new refunded receipt for the
customer.
After refunding some items from a sale, you can always go back to that
same sale and refund the other items that were not selected. Once all
items are refunded in a sale you can no longer refund it.
To view your refunded sale, go to the transactions page. The sales that were refunded will have their old total striked in red, and the new total will be in green. This will indicate that this sale has items that were refunded. Clicking on that sale will open the details with the cart items. You will see the items that were refunded are striked red to indicate it was refunded. Click on the striked red items to view details about the refund. You can see the date it was refunded on, the payment method of how it was refunded, and the reason if there was one entered.
Settings
The settings page gives you control on your business’ information that customers sees, and internal settings such as payment types that you accept. Let us take a look at all the settings available to you.
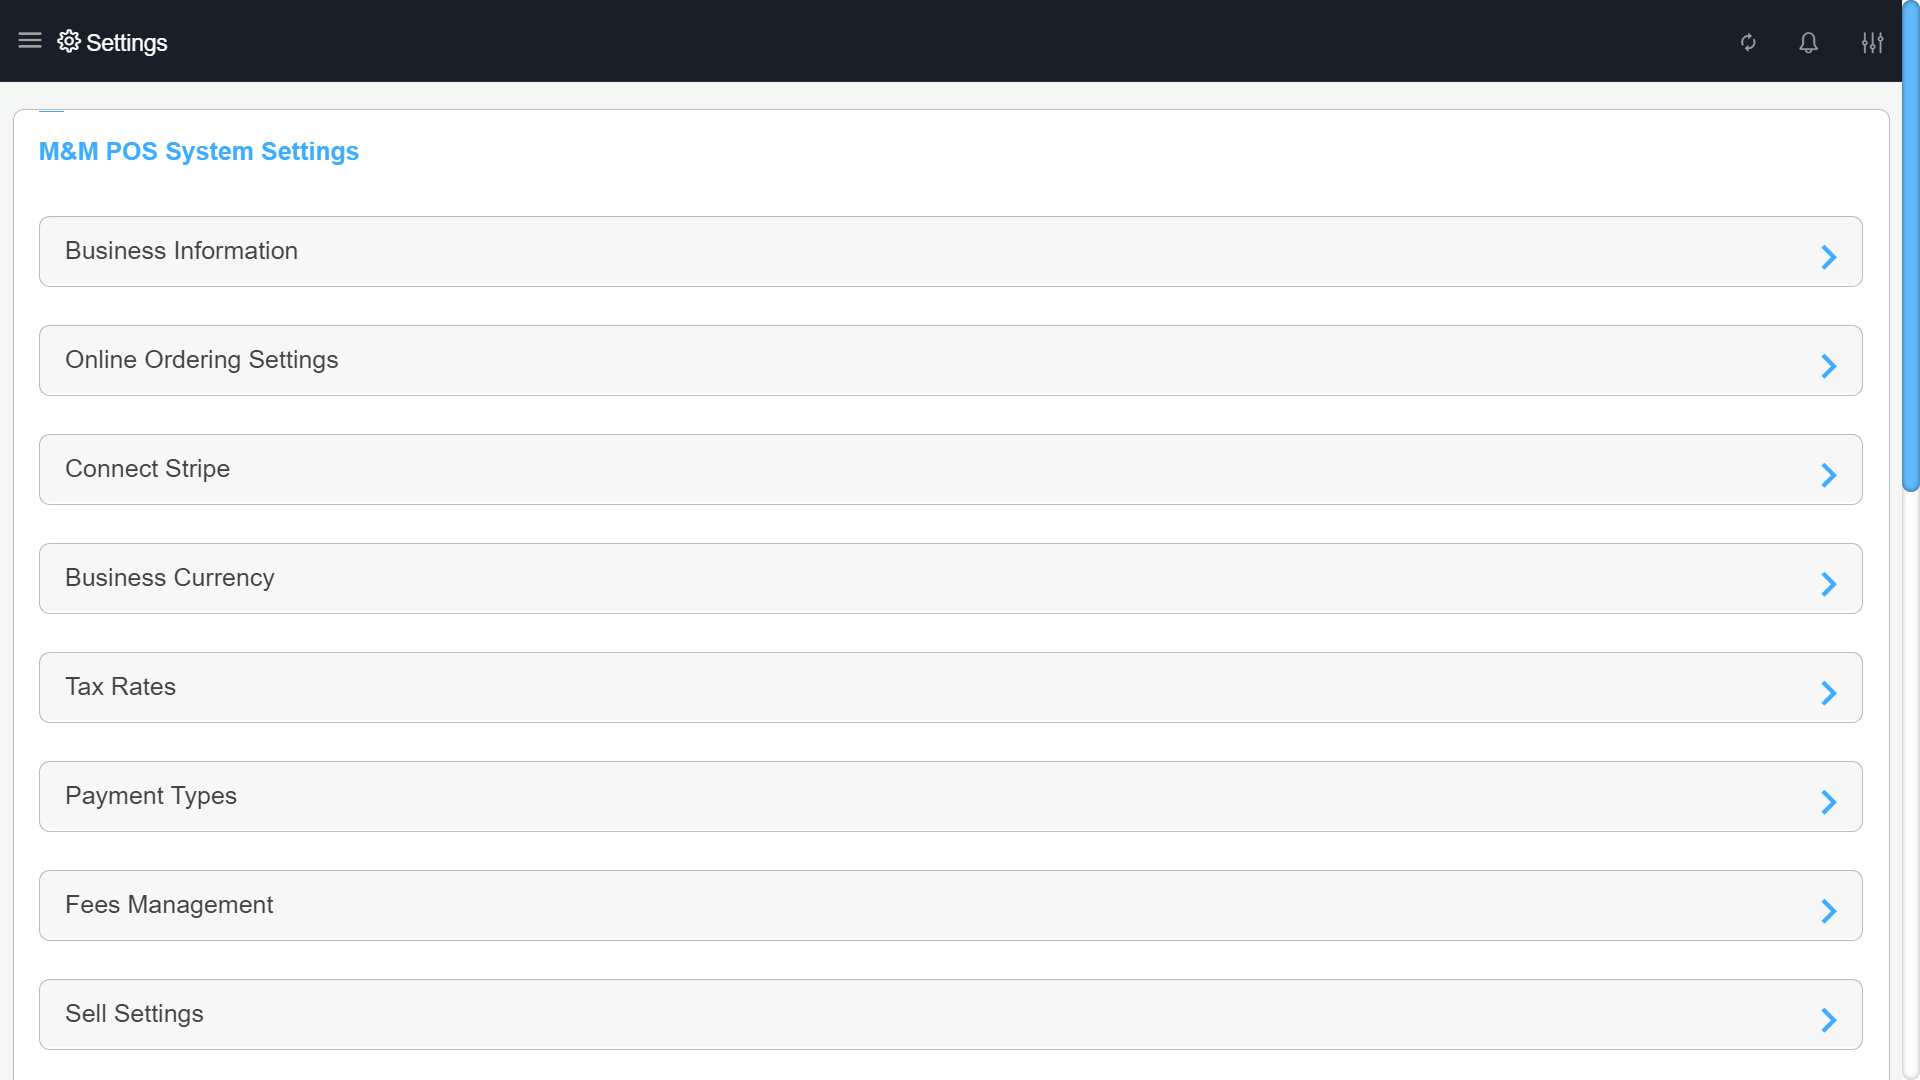
Filling in your business information is very important as this information is what will appear on your customer receipts. You can set your business name, phone number, website, address, store policy, and your logo.
The default currency of the system is US Dollars. However, if you are in a different country you can change the currency to the one you accept. This will make the system show all money values in your currency and also on your customer receipts as well. There are 139 currencies available in the system to choose from but if you do not see your currency in the list please send us a request
You
can add/edit your tax rates and select if your taxes are inclusive or
exclusive in the tax settings. By default the taxes you add are
exclusive. If you are in a country (e.g Australia) and taxes are
inclusive then you need to check the checkbox that states “My prices
include tax” this will make all taxes inclusive.
Adding a new tax rate is easy. Click on the “Add New Tax Rate” button to
open the add form, give your tax rate a name, enter the percent rate
and save. Now when you add or edit your inventory items the tax rates
will appear and you can select which tax rate are applied to which
items. This allows you to set different tax rates for different items.
To edit a tax rate use the edit button on the tax rate you want to edit.
When you update your tax rate percent all your inventory items that use
that tax rate will automatically be updated with the new percent.
Tax rates also appear in the sell page when you sell Miscellaneous items if you have the Add-On. So, you can add taxes on the go for different miscellaneous items.
The
standard payment types that are supported by the system are Cash,
Credit, Check, Gift Card, EBT, and EBT Cash. You can enable and disable
the payment types by checking the checkbox near the payment type. You
can also add your own custom payment types (e.g BitCoin, CashApp)
These payment types will appear in the inventory page when you add
items. You can set what payment types the item can be paid with. When
selling the item on the sell page the payment options will only list the
payment types that you set on that item to force it to be sold with
that payment type. For example, if you have an item that can be sold
with cash only when you sell the item you only see “Cash” as an option
to checkout with.
You can adjust settings related to your receipt printer to customize your receipts. Below are the settings that you can adjust:
- Header Text - That includes your store information and the receipt timestamp. You can update the font size of the header. The header font size affects all the text that appears at the top of the receipt. (Default: 10)
- Body Text - The body is all the text from the customer's cart items to the bottom of the receipt. You can update the font size of the body to fit your printer (Default: 8)
- Margins - You can adjust how much margin to take from the left and right side of the receipt paper when printing receipts. (Default: 15)
- Store Logo - You can set whether to hide your logo on printed receipts. Some logos may not print properly but appear great on electronic receipts, or you may have a printer (e.g EPSON) that allows you to set your logo in the printer’s preferences to always print. (Default: Do not hide. Print)
- Auto Print - You can set whether to automatically print receipts after checking out on the sell page or not (Default: Do not print)
- Use Default Printer - Set whether to use the device's default printer when printing sale receipts. If this is unchecked, you will be prompted with a dialog box to select which printer to use.
Support
The support page is where you can reach out to us at any time. You can submit general feedback about something you like or dislike, let us know about any bugs you find, ask for a feature request to be added to the App, or ask us any question you may have. Your ticket will be reviewed and we will reach out to you as soon as possible and work with you towards meeting any requests.
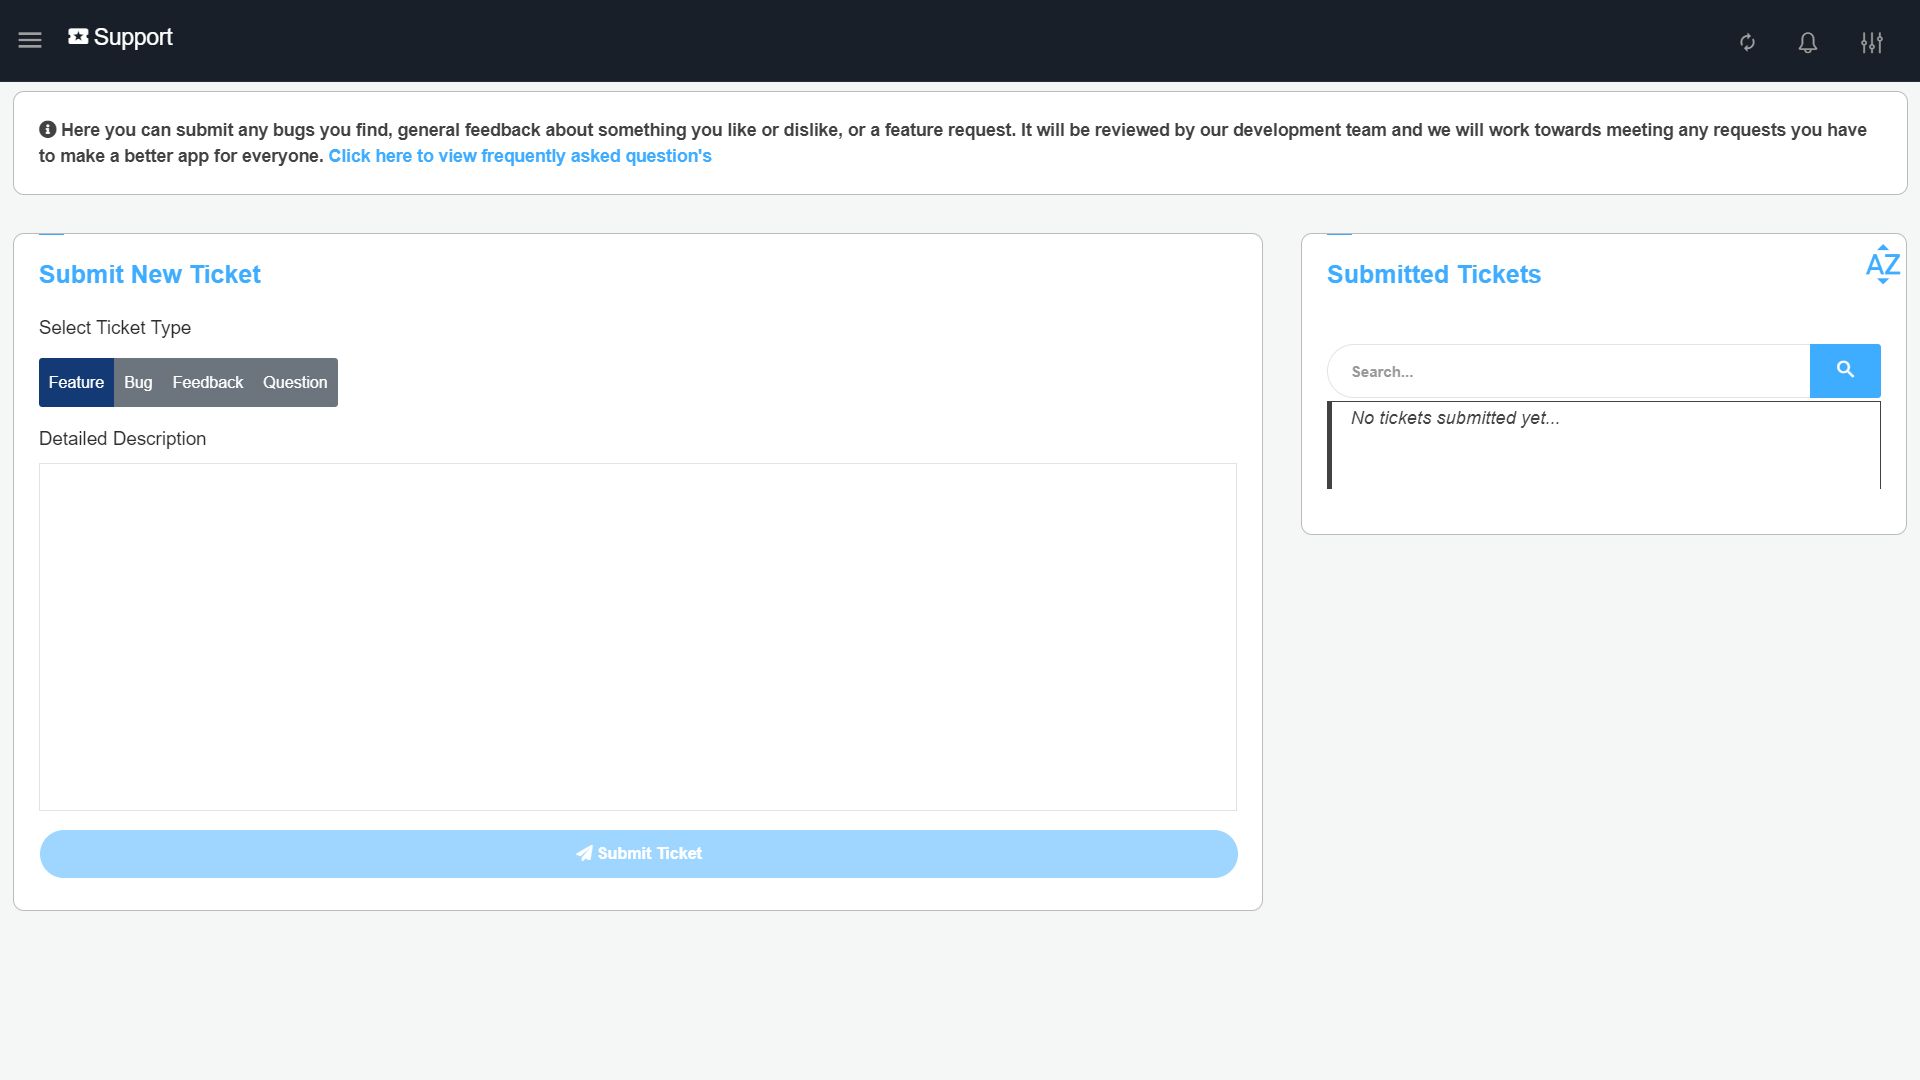
Open
the Menu tab and click on your account name. Navigate to the support
page. Select the ticket type from the options available (Feature, Bug,
Feedback, Question) Enter your detailed description and submit your
ticket.
The tickets you submit will be available to you for reference. You can
search and sort your tickets to find a specific ticket quickly, and have
the option to delete tickets.
Connect Stripe
Processing payments with M&M POS couldn’t be easier with our payment processing partner Stripe. To start processing payments all you need is a verified Stripe account. Once connected you can process payments from all of your devices at the same time for the same rate. You do not need to login to your Stripe account on all devices, once you connect from one device all your devices that use the same M&M POS account will be connected as well.
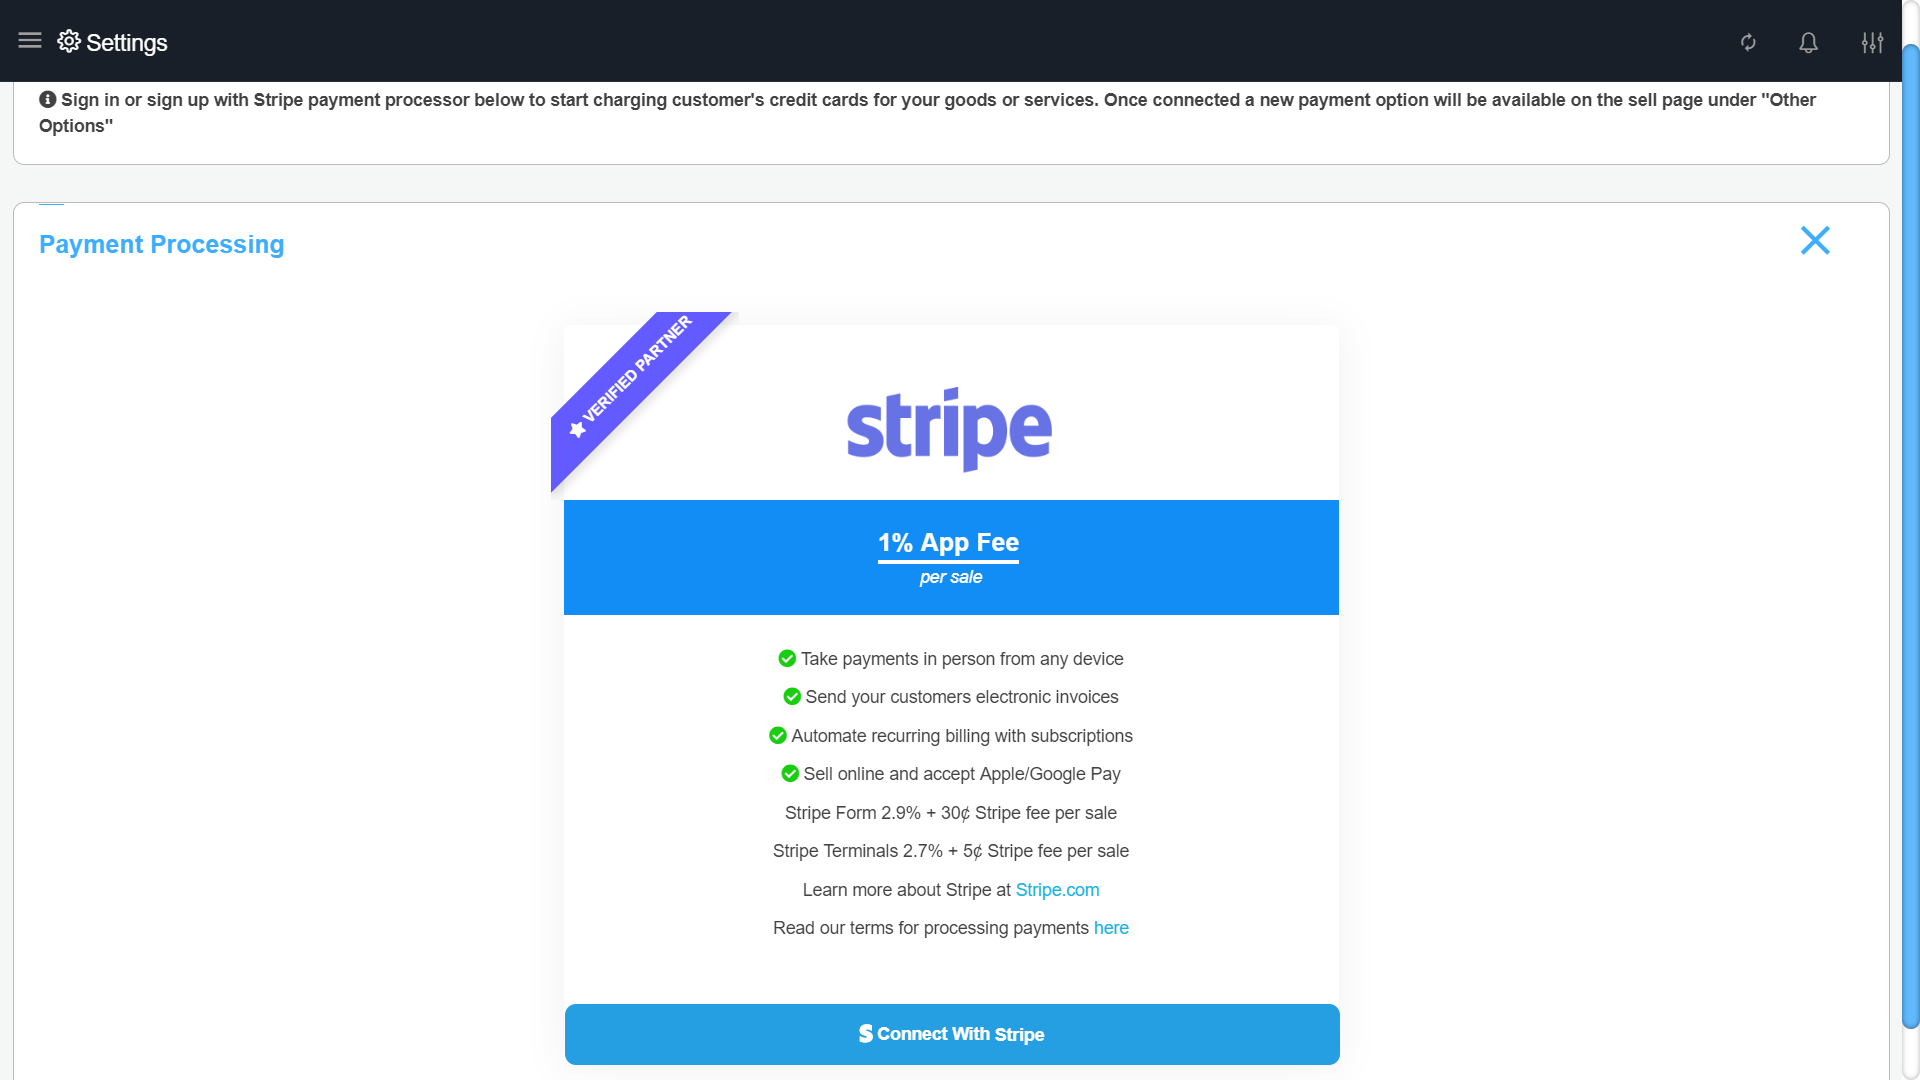
If you do not have an account with Stripe then you can sign up using the portal from the settings page. Once you make your new account Stripe may need additional information to verify your business before you can start processing payments. You will need to monitor your email inbox & dashboard for information from Stripe. Once you are verified you can connect & start processing payments on the sell page in M&M POS
If you are not verified and attempt to process a payment you will receive an error that your account is not ready for payments
To connect your account go to the settings page and navigate to the “Connect Stripe” page. Click on the connect button for the processor you would like to connect with. A new window will appear that will load the Stripe login form. You will have to login into your account and allow the permissions and that is it you are now connected.
Once connected you can start processing payments on the sell page. A new "Stripe" page will appear in the menu bar as well that will give you quick access to your Stripe dashboard and settings for syncing your Stripe produces and connecting your Stripe Terminal. There is also steps on how to process your first payment on the sell page.
On
the sell page you will see a new option for Stripe in the ‘Other
Options’ when you checkout a sale. "Stripe Form" and "Stripe Reader" the
"Stripe Form" will open the secure payment form where you can charge
the card. Fill out the form with the card information and then click on
“Charge Card” to charge it. If you have a terminal reader connected then
you would select "Stripe Reader" to process the payment using your
connected reader.
If the charge succeeds you will get a green check mark and the form will
disappear, and the transaction will be recorded. You can then
send/print the customer’s and merchant’s copy of the receipt.
If the charge fails or declines you will receive a message with the
decline code, decline reason, and some help on what should be done next.
If the charge declines you can cancel the payment and return to the
sell page to select a different payment method for the sale.
When you process payments in M&M POS in your Stripe dashboard you
will see the charges there as well so you can also manage any payments
from M&M POS in your Stripe dashboard if needed.
You can use USB magnetic readers to fill out the manual form quickly instead of manually entering the information from any device
To refund a complete or partial sale to a customer’s card, on the refund page if the sale was paid with Stripe you will see “Stripe” as a refund payment method. Selecting that payment method will refund the sale to the customer’s card. You will receive a message after confirming the refund if it was refunded to the card successfully or not. Alternatively, you can always go to your Stripe dashboard and refund the sale to the customer's card from there if needed.
Estimates
To use estimates get the Send Estimates Add-On
Send electronic estimates to your customers that aren't ready
to pay yet and turn those estimates to sales with the online form. The
online form will conveniently allow your customers to review &
either approve or deny the estimate at their own time. You will be
notified in real time when they send their response so you can act
quickly to convert that estimate to a sale.
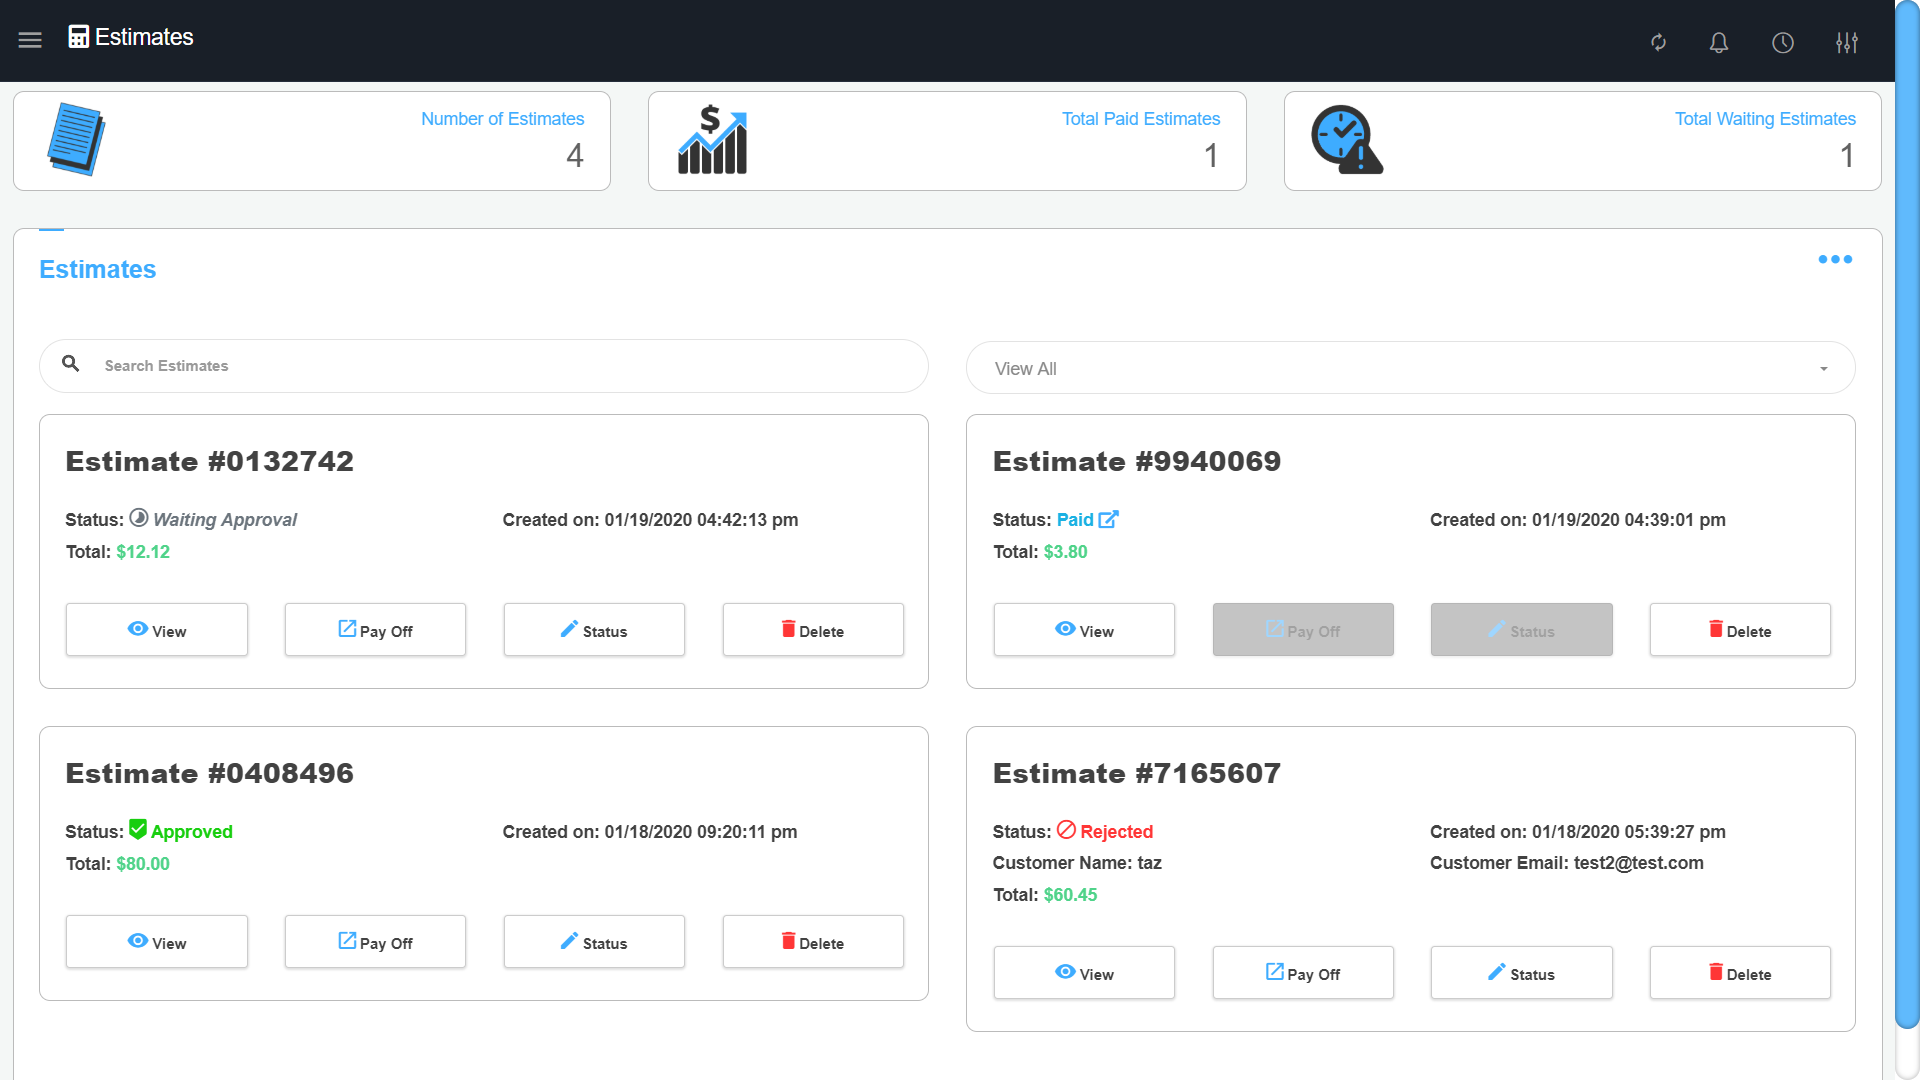
The “Estimates” page is where you manage the estimates you created. The
three cards on the top of the page give you the total number of
estimates created, the total number of paid estimates, and the total
number of waiting estimates. You can use the search and filter dropdown
list to quickly filter down the list by the estimate’s status to find a
specific estimate.
On the Sell page when you finish adding items to the cart, in the 'Other Options' list there will be a new option 'Estimate' This will prompt you to give your estimate a friendly name. This name will be visible to you only and is how you would find it later in the Estimates page. Once you finish the transaction it will be saved as an estimate and you can email/text the online estimate for your customer or print it and manually edit the estimate later.
An estimate has four different status:
- Waiting for Approval - This is the default status of the estimate when it is created.
- Approved - Customer approved of estimate and the estimate can be worked on.
- Rejected - Customer rejected the estimate and the estimate can’t be worked on.
- Paid - The Estimate was paid off and converted to a sale
The status of the estimate can be changed manually if it is not paid yet. From the estimates page use the “Status” button, it will be enabled if the estimate is not paid, clicking on it will prompt you to select the new status. To set a status to “Paid” you will need to convert the estimate to a sale.
To view details of an estimate go to the estimates page click on the “View” button for the estimate you want. This will open up the details of the estimate displaying the cart items added and the total. You can then resend or print the estimate by clicking on the “Resend” button
To delete an estimate use the delete button on the estimates page. This will prompt you if you are sure you want to delete the estimate. Confirming will delete the estimate permanently and it will no longer be available or calculated in totals.
An estimate can be converted to a sale by clicking on the “Pay Off” button on an estimate. Clicking on the “Pay Off” button will take you to the sell page with the cart items of the estimate automatically populated. You can then adjust the cart items if needed and then continue the sale normally. When you finish the transaction the estimate will be set to status “Paid” on the estimates page and you can no longer change the status of that estimate.
The online form allows your customer to review the estimate on their own time and gives them the option to either approve or deny the estimate. When they select a response they will need to confirm their name and email to submit their response. When their response is submitted you will be notified in real time about it.
Invoices
To use invoices get the Send Invoices Add-On
Get paid with online invoices integrated with Stripe. Send
electronic invoices to your customers and give your customer the
convenience of paying later using the online form, and keep control over
due dates and late fees to get paid as soon as possible.
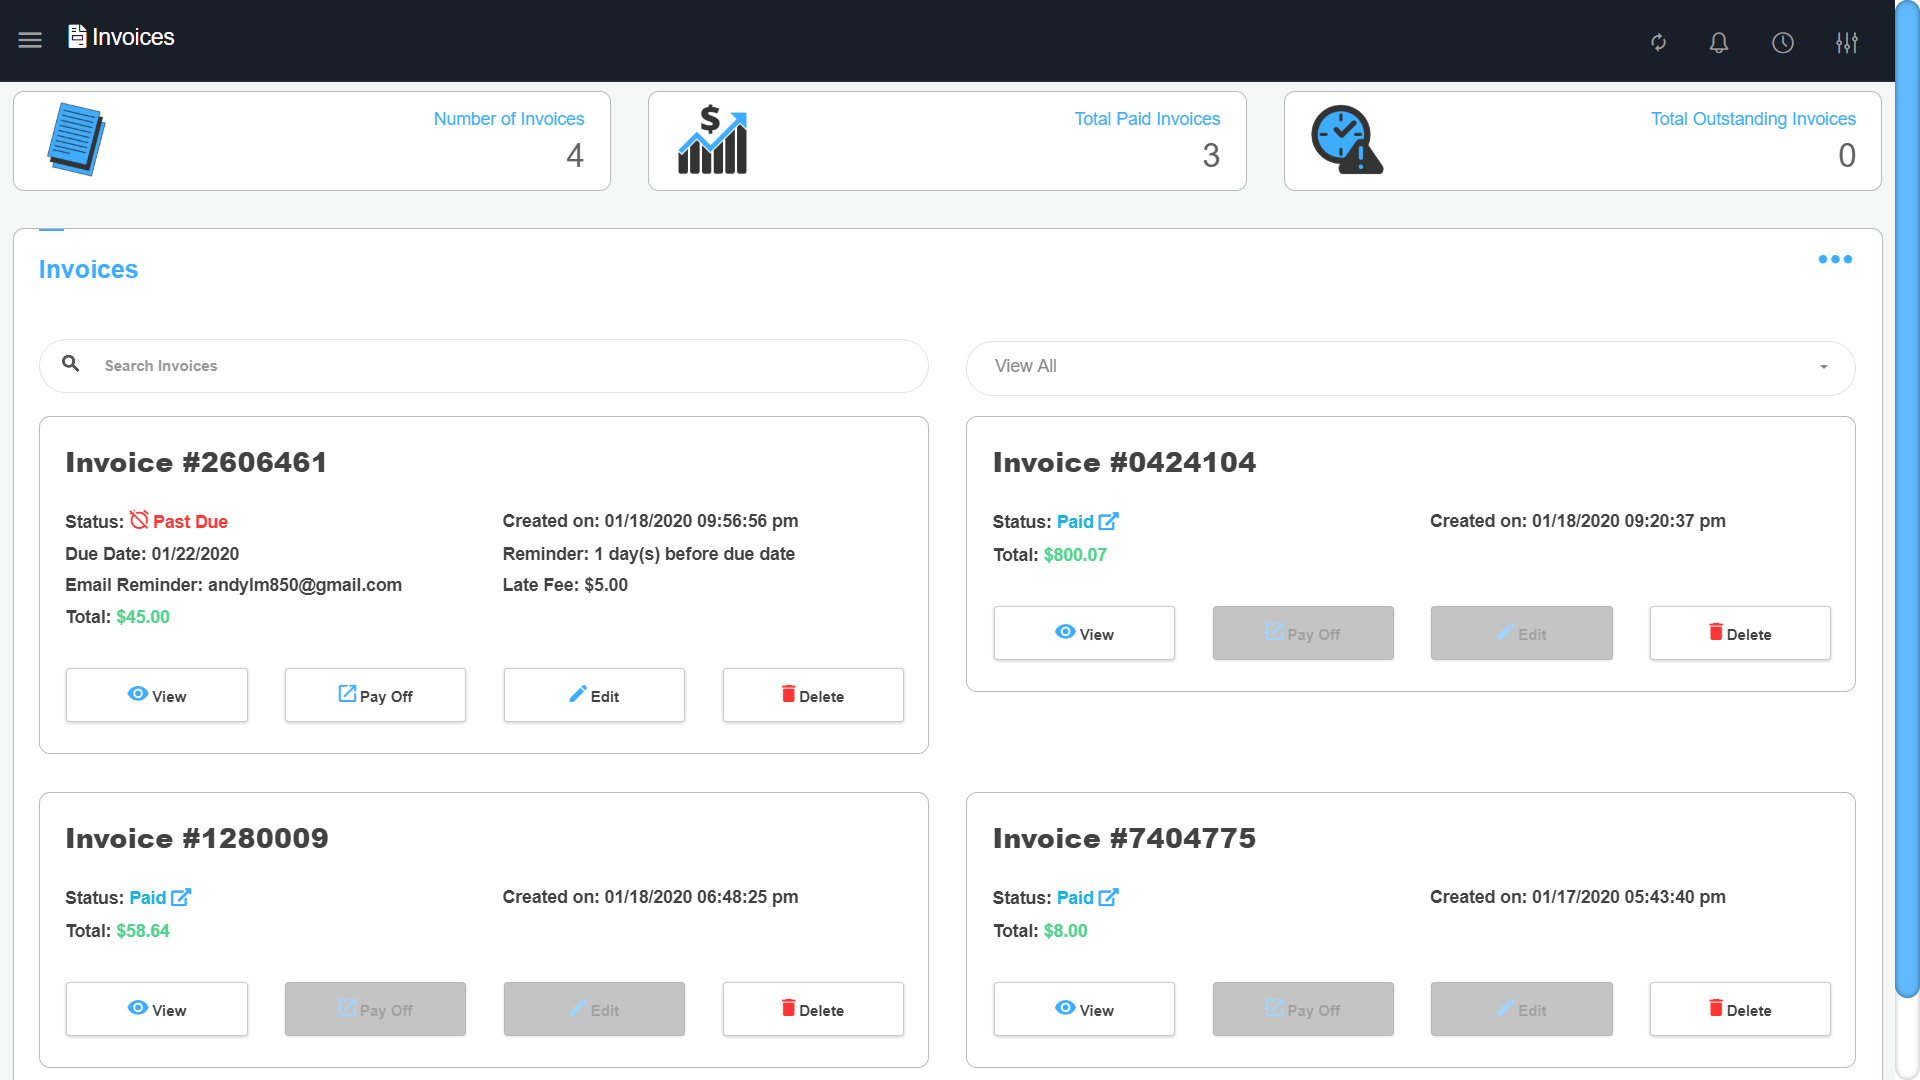
The “Invoices” page is where you manage the invoices you created. The
three cards on the top of the page give you the total number of invoices
created, the total number of paid invoices, and the total number of
outstanding invoices. You can use the search and filter dropdown list to
quickly filter down the list by the invoices' status to find a specific
invoice.
On
the Sell page when you finish adding items to the cart, in the 'Other
Options' list there will be a new option 'Invoice' This will prompt with
the invoice settings you can set:
- Invoice Name - a friendly name you give your invoice that is visible to you only and how you would find it later in the invoices page.
- Due Date- Set how many days you will give the customer to pay the invoice starting from today. For no due date set this value to 0
- Customer Email - if a due date is entered then you will need to enter the customers email address
- Late Fee - set a late fee amount to be added if the invoice is not paid by the due date. This is an optional field.
- Send Reminder - Select whether you want to send a reminder email to the customer about their invoice being due. You can select to send a reminder 1 day, 3 days, or 7 days before the invoice due date. You can also select to not send a reminder email.
Fill out the form and complete the transaction. The transaction will be saved as an invoice and you can email/text the online invoice for your customer or print it and manually edit the invoice later. By default the invoice is “Outstanding” it will be set to “Past Due” if the due date of the invoice has passed, and can only be set to “Paid” if the invoice was converted to a sale either manually or if the customer paid using the online form. Invoices have three status’ “Outstanding”, “Past due”, and “Paid”
To view details of an invoice go to the invoices page click on the “View” button for the invoice you want. This will open up the details of the invoice displaying the cart items added and the total. You can then resend or print the invoice by clicking on the “Resend” button.
To edit an invoice settings you set on the sell page go to the “Invoices” page and click on the “Edit” button of the invoice you want. This will prompt you with the settings of the invoice and allow you to update them
To delete an invoice use the delete button on the invoices page. This will prompt you if you are sure you want to delete the invoice. Confirming will delete the invoice permanently and it will no longer be available or calculated in totals.
An invoice can be manually set to “Paid” by converting it to a sale. Use the “Pay Off” button on an invoice that was paid not through the online form. Clicking on the “Pay Off” button will take you to the sell page with the cart items of the invoice automatically populated. You can then adjust the cart items if needed and then continue the sale normally. When you finish the transaction the invoice will be set to status “Paid” on the invoice page and you can no longer change the status of that invoice. The status “Paid” will be a quick link to the transaction so you can view the payment.
The
online invoice can be integrated with your Stripe account to allow your
customers to submit their payment to you electronically. All you need
to do is have your Stripe account connected and the payment form will
automatically appear in the online invoice you send to your customers.
including Apple and Google Pay options if enabled in your Stripe Account
Payments Settings
When the customer uses the online payment form they will receive a
receipt confirmation of their payment and you will also automatically be
notified about the payment. The invoice status will be marked as paid
and a new sale transaction will be made. The status “Paid” will be a
quick link to the transaction so you can view the payment.
Services
To schedule service appointments get the Services Add-On
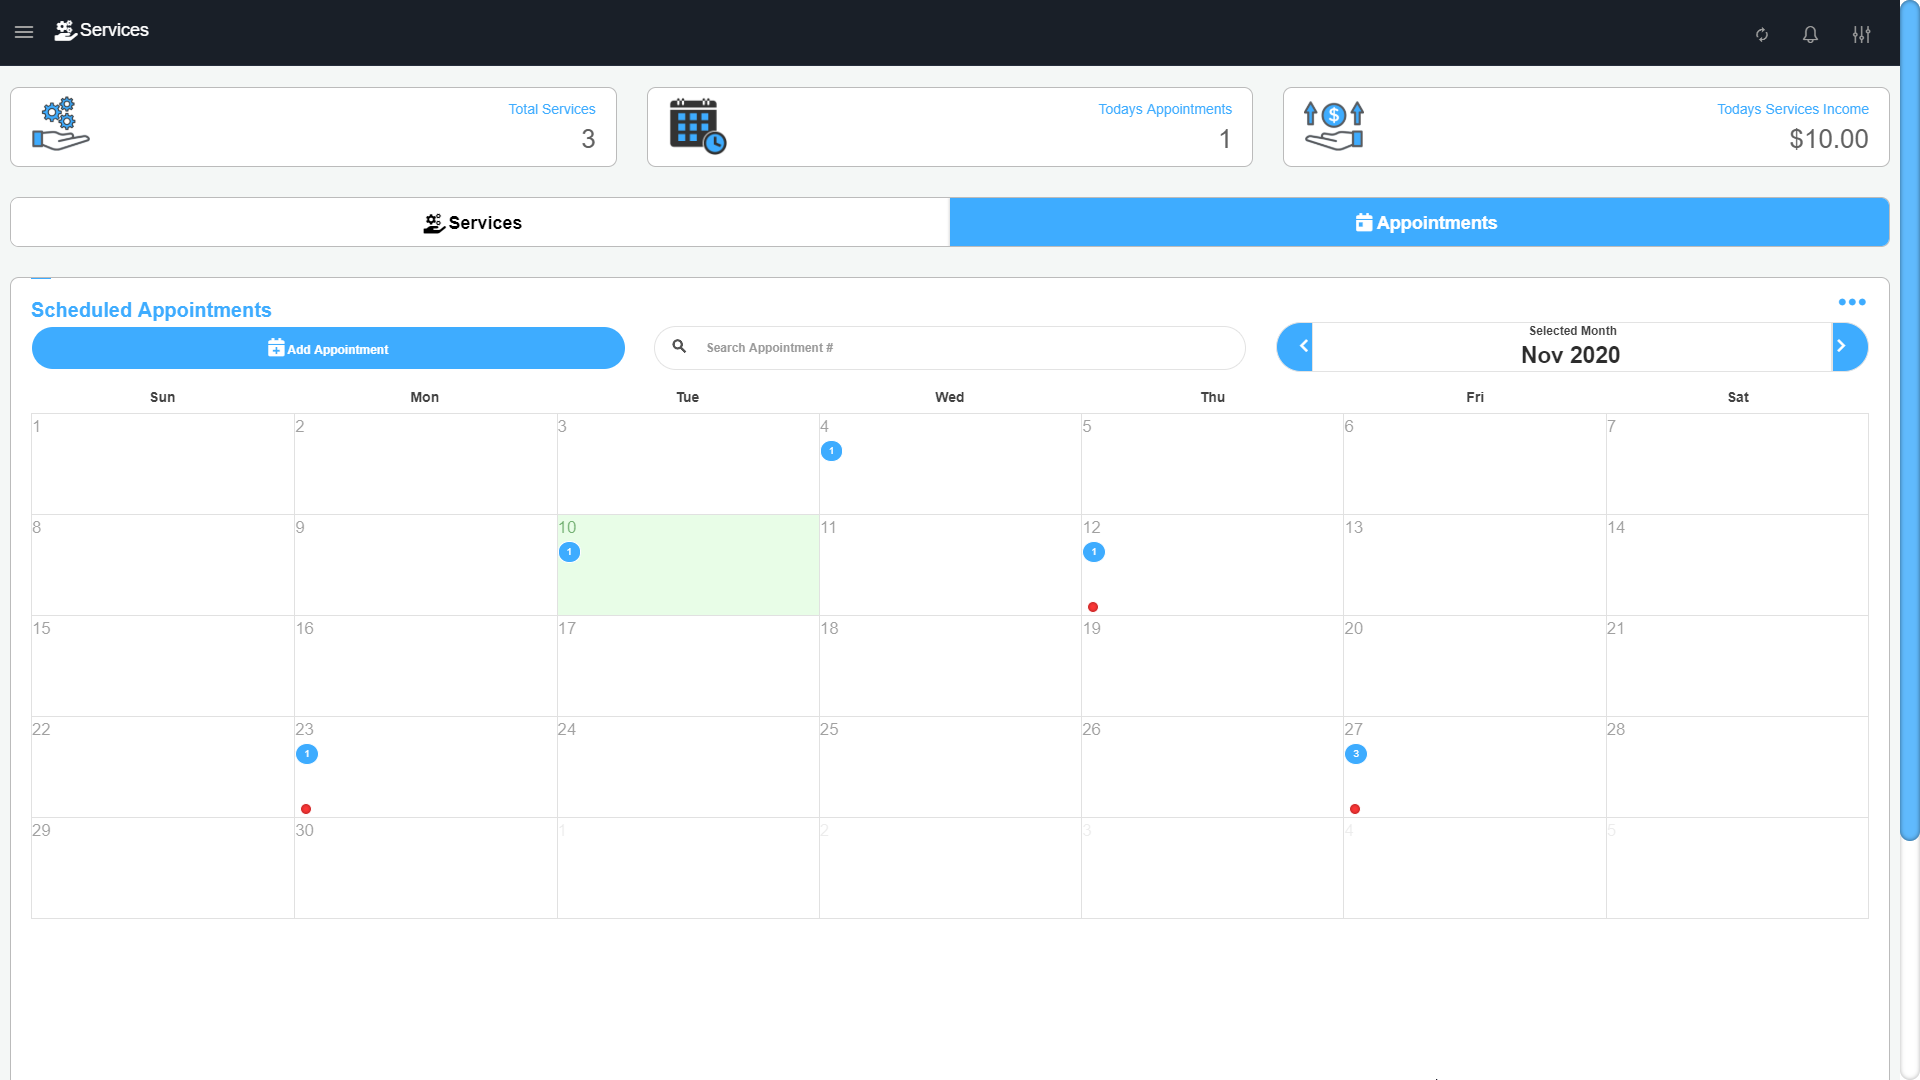
The services page allows you to add services your store provides and schedule customer appointments for those services. The top header cards show you the total number of services you provide, the total number of appointments you have for today, and the total income made from converting service appointments to sales for today. You can use the menu button to switch between card and table view and to hide and show header cards for your convenience.
The calendar will show you the days that have appointments at a quick glance. The number of appointments on a given day will be visible for you and a red dot will appear on the days that have unpaid or not completed appointments.
On the sell page there will be a new sale form button "Appointments" that will open the appointments view for you to select & create appointments to quickly convert them to sales. You can also set the appointment view to be your default sale form from the sells settings if your main focus is service appointments.
From the menu tab go to the 'Services' page and click the 'Add New Service' button. Fill in the form by entering a service name and the service price and save. You can optionally add a service duration and an internal note. The service duration will appear on appointment receipts for your customer's convenience. Once you add your services you can start scheduling appointments.
To edit a service select the edit button. This will open the edit form with all the service's properties. You can edit any field and then save at the bottom of the form
Use the delete button to delete a service. You will be prompted to agree that you want to delete the service. Once deleted the service will no longer be available and will not be calculated in your totals. All appointments made for that service will not be effected and still be available for you and your customer.
You can schedule appointments either from the sell page or the services page. The difference is that creating appointments from the sell page will add the appointment to the cart automatically for faster checkout if the customer is going to pay for the service when the appointment is created. If you are scheduling appointments and they are going to paid later then you can schedule them from the services page that will just add the appointment.
To schedule an appointment click on the “Add Appointment” button this will open the add form. Select the service from the drop down menu and then set the appointment date & time. You can then optionally add a note to the appointment this should be a customer facing note as it will appear on the printed and electronic appointment receipts. If you have the Customer Management Add-On, you can also attach a customer to the appointment which will allow you to quickly access their contact information and store the appointment in their history.
To edit an appointment select the edit button. This will open the edit form with all the appointment’s properties. You can edit any field and then save at the bottom of the form
Use the delete button to delete an appointment. You will be prompted to agree that you want to delete the appointment. Once deleted the appointment will no longer be available and will not be calculated in your totals. If the appointment deleted was not paid yet, the electronic appointment receipt will show that the appointment is canceled for your customer's convenience
By default the appointments page will load all appointments for all
services you have for today that are not yet paid. The order of the
display will be by appointment time so you see the beginning of the day
on the top and the end of the day at the bottom
Use the “Filter by Service” drop down menu to view only appointments for a specific service. By default this is set to “All”
To view paid appointments use the “Hide Paid” "Show Paid" checkbox. To
view appointments for all other days that are not just today’s
appointments use the “Just Today” “All Days” checkbox
To view all appointments ever created set the “Filter by Service” to
"All", check to view paid appointments and check to view all days. This
will list all appointments created
You can quickly search and find appointments by using the “Search
Appointment #” input field. This will allow you to quickly enter or scan
the appointment number that is found on appointment receipts to find
and convert that appointment to a sale easily.
The barcode on the appointment receipts can also be scanned on the
“Enter Barcode” field in the Barcode sale form on the sell page.
To convert the appointment to a sale to pay it off. Go to the sell page and find the appointment and click the “Pay Off” button. This will add the appointment to the cart with the price of the service. You can then continue to add more items to the cart regularly if the customer has other service appointments or purchases items. Once the sale is completed and paid the service appointment will be set to “Paid”. Clicking on the “Paid” link will redirect you to the transactions page to view the transaction. The customer’s electronic appointment receipts will update to “paid” and redirect the customer to their electronic sale receipt.
Coupons
To use coupons get the Coupons Add-On
Coupons help you grow your market share, increase sales
volume, and cultivate loyal customers. The coupons page is where you can
manage your in-store coupons, and the coupons are then given out and
applied on the sell page.
The three top cards in the coupons page identify the total number of
coupons you have created, the total number of coupons used, and the
total value your customers have saved from using coupons. You can click
on the three dotted menu button to change between table view and card view. The search input can be used to quickly find coupons by their name.

On the coupons page click on the “Add New Coupon” button
to open the add form and fill it out.
- Name - Give your coupon an internal friendly name. This name will not be displayed for customers
- Discount Amount - The amount this coupon will give customers. This can be a percentage or an amount. Use the “Discount by percent” checkbox to set if this discount amount is a percentage.
- Start Date - Set the date of when this coupon starts this can be set to any future or past date
- End Date - Set the date of when this coupon ends and expires.
- Coupon Code - The coupon code will become the barcode that you will later scan or enter in the sell page to give this coupon. You can let the system set the coupon code or you can enter your own. If you have an online eCommerce site to give more flexibility for you and your customers you can set the coupon code to match your online coupon codes.
- Description - The description field is where you can write up any disclaimers for your customers about this coupon. This description will appear on the bottom of the coupons if available.
- When to give - Set when does a customer receive this coupon. Use the “By Sale” and “By Inventory” checkbox to either set this coupon to be given out when the customer spends more than a certain amount, or when they purchase a certain quantity of an item.
- When to Apply - Set when to apply this coupon discount. Use the “By Sale” and “By Inventory” checkbox to either allow the coupon discount to be applied on the sale total when the customer spends more than a certain amount, or apply the discount on an inventory item when they purchase a certain quantity of an item.
To edit a coupon select the edit button. This will open the edit form with all the coupon's properties. You can edit any field and then save at the bottom of the form
Use the delete button to delete a coupon that you no longer want. You will be prompted to agree that you want to delete the coupon. Once deleted it will no longer be available and it will not be calculated in your totals.
There
are two ways you can give out coupons. You can use the share button
that is in the coupons page to manually share the coupons with your
customers. The share button will allow you to share the coupon to Facebook, Twitter, email, text, printer, or open the online URL.
The second way is from the sell page. When you finish a transaction, if
the transaction meets the "When to Give" rule that you have set on the
coupon then the receipt will have the coupon attached. When you send or
print the receipt the coupon will also get sent or printed for the
customer.
On the transaction page you can go back to a transaction to resend a coupon that was attached to a receipt.
On
the sell page when a customer wants to use a coupon it should be
applied last. So, after you add all the customer's items to the cart
click on the 'Apply Coupon' tab from the three dotted menu button
to apply a customer's coupon. You can scan the coupon's barcode to
quickly apply the coupon or select it from the list. When you select a
coupon, if the sale meets the requirements you set on the coupon then
the coupon will be applied. The applied coupon will be shown as a cart
item with a negative total.
The coupons page will give you information on how many coupons were used
and how much total your customers saved by using the coupon.
Customer Management
To manage customers get the Customer Management Add-On
The customers add-on gives you the ability to manage your customers
giving them the shopping experience they deserve. You can save your
customers phone numbers, emails, street addresses, give your customers
store credit and also keep track of their overdue payments.
The customer's page is where you manage your customers. The top cards
show you the total number of customers you have, the total debt amount
across all customers, and the total credit amount across all customers.
Use the three dotted menu button to switch between table and card view, and to switch between searching and sorting customers.
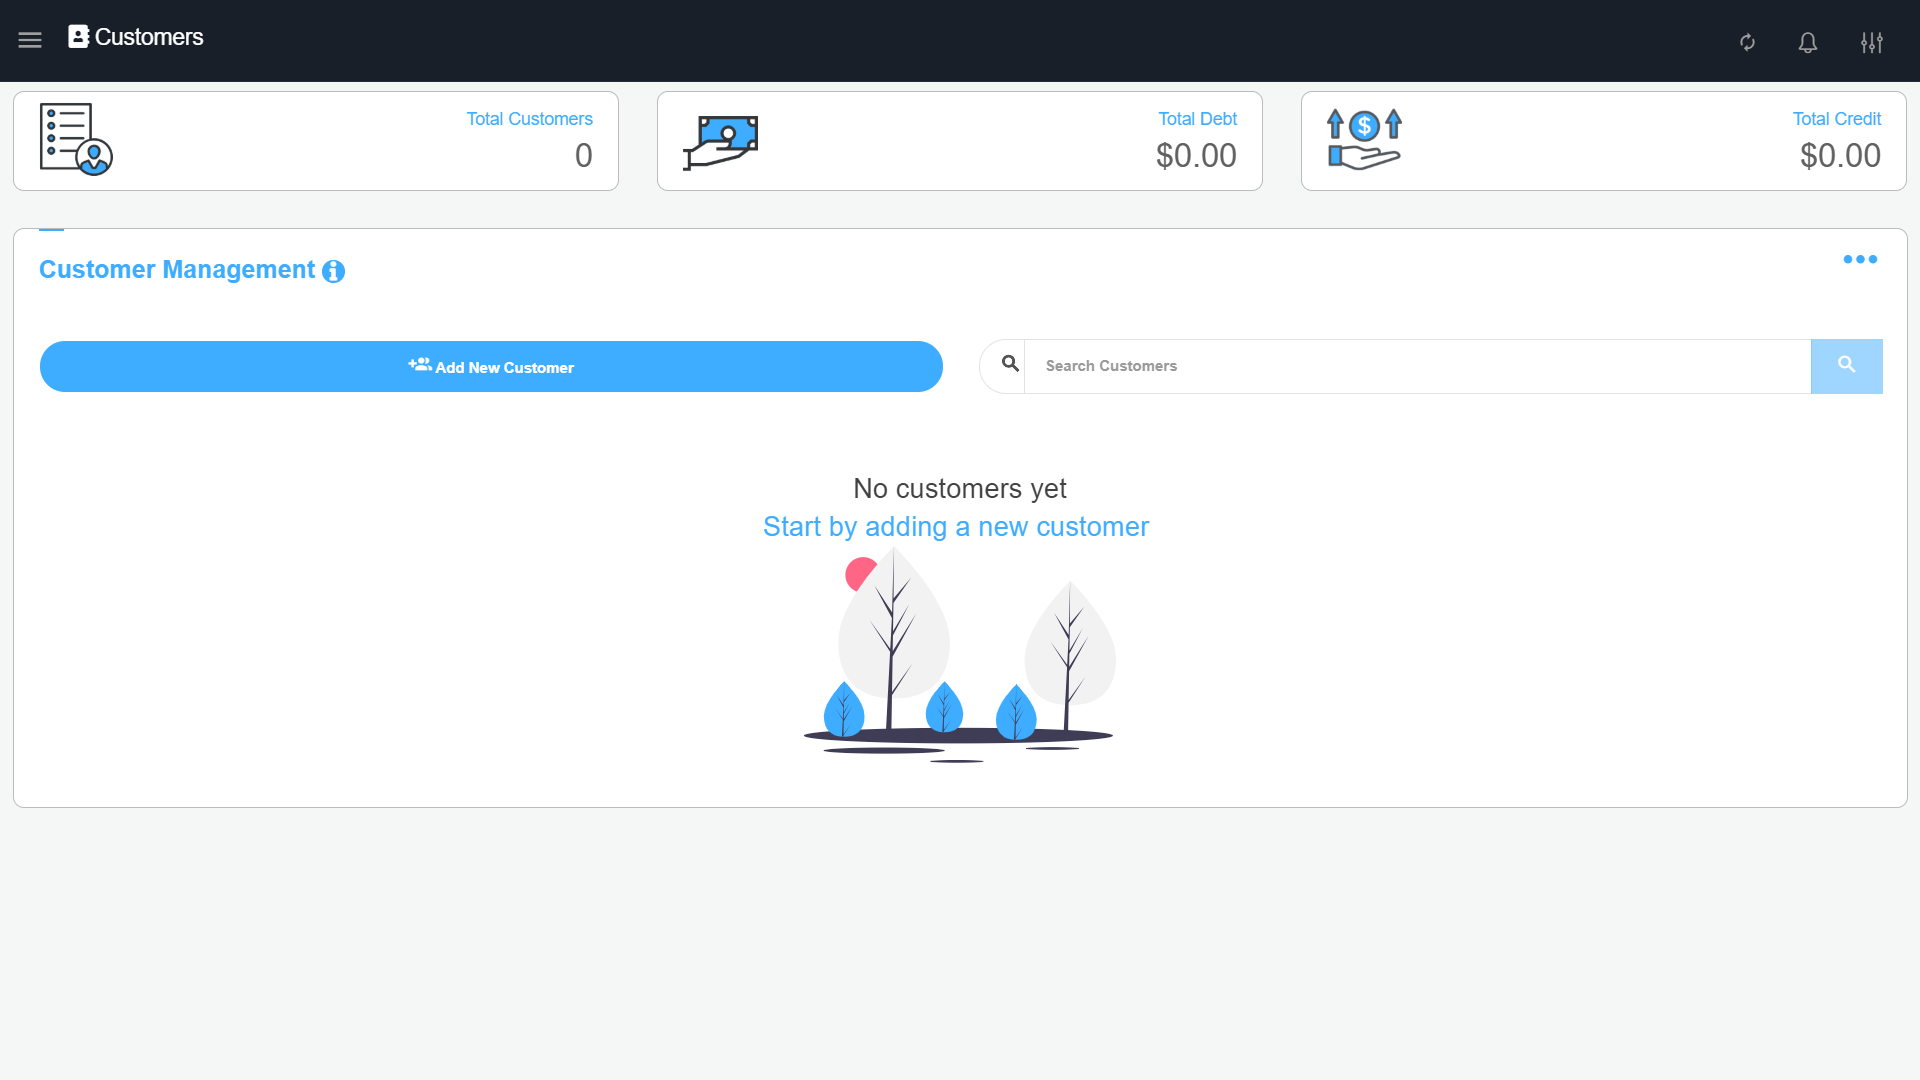
To add a customer click on the
“Add new customer” button this will open the add customer form. The
only required field for a customer is their name. You can then
optionally add their number, email, street address, internal note, and
account balance. A positive account balance means the customer has debt
that needs to be paid. A negative account balance means the customer has
credit that can be used.
Adding a customer's number, email, or address will create quick links so
you can easily call, email, or open the address in Google Maps from any
device.
When you add an internal note for a customer when this customer is
selected on the sell page their information appears in a pop up so you
can leave important information in the customer’s note if needed and
then be reminded about it when this customer is attached to a sale.
You can also quickly add new customers on the sell page when you’re attaching a customer to a sale.
To edit a customer select the edit button. This will open the edit form with all the customer’s properties. You can edit any field and then save at the bottom of the form
Use the delete button to delete a customer. You will be prompted to agree that you want to delete the customer. Once deleted the customer will no longer be available and will not be calculated in your totals.
When you enter and save a customer’s address the address will be validated with Google Maps to ensure you get the correct address. Simply fill in the address field for a customer and save. Upon saving, the address will be validated and you will be presented with a pop up that contains a list of addresses found. Select the correct address from the list to save that address or you can optionally skip the validation.
To attach a customer to a sale, on the sell page a new button
‘Customer’ will be available on top of the cart. Clicking on the
customer button will open the list of your customers to select from. If
this is a new customer you can click the ‘“Add New Customer” button to quickly add a new customer and attach them to the current sale.
If the customer already exists, you can scroll through the list and click on the
select button to attach them or you can use the search to quickly find
them from the list. When you use the search if only one result is found
then that customer will automatically get attached to the call.
After attaching a customer to a sale their name will appear on top of the cart with an info button , You can click the info button to quickly view customer information without leaving the sale.
The customer button will become a red cancel button. Clicking on the red customer button will detach and remove the customer from the current sale and then you can select a different customer.
If you have finalized a sale without attaching a customer you can still
attach a customer to that sale later on in the transactions page. After
finalizing a sale go to the transactions page and find that sale and
view its details. At the bottom of the sale details you will see a “No
Customer Attached” label and under it a “Attach Customer” link. Clicking on this will open your customers list and allow you to attach a customer to the transaction.
To view details of a specific customer on the customers page find the customer and click on the details button. The details page will show you more information about the customer:
- Quick links - to call, email, or open Google Maps if the customer number, email, or address is set
- Last seen date - This is based on the date of the customer's last transaction
- Account balance - customer’s credit/debt balance. This can be printed by clicking the printer icon next to the balance
- Transactions - A list of all transaction history sales for the customer. Clicking on the receipt number will open that transaction in the transactions page
- Invoices - View all invoices sent to the customer and their status. Directly go to the invoice by clicking on the invoice number
- Estimates - View all estimates sent to the customer and their status. Directly go to the estimate by clicking on the estimate name
- Orders - View all orders sent to the customer and their status. Directly go to the order by clicking on the order
- Appointments - View all appointments for the customer and their status.
Invoice, Estimate, Order, and Appointment history will appear when you enable the Add-Ons
You can also view get to customers details page from the transactions page. In the transactions page if a transaction has a customer attached then you will be able to see that customer. Click on the link icon to be sent to the customer’s details page
When
a customer owes you money you can keep track of their balance by
completing the transaction with a debt payment type. On the sell page
when a customer is attached to a sale a new payment option “Debt” will
appear in the “Other Options” list. Checking out with this payment type
will add a new balance for the customer.
When you checkout with the “Debt” payment option you will be presented
with their current balance, their transaction total for the current
sale, and a total of their new balance so they can be aware. Once you
complete the sale the transaction will be stored with a payment type of
“Debt” and the customer will have a new balance.
You can also manually go to the customers page and edit the account
balance to be a debt balance without recording a new transaction.
To
pay off a customer debt go to the sell page and attach the customer to
the sale. If the customer has a balance in their account a new button
“Pay Debt” will appear in the “Sale Form” Clicking on the “Pay Debt”
button will allow you to enter the amount the customer is paying off and
it will be added to the cart as “Debt Pay Off” with the total entered.
You can then checkout and complete the sale with the payment type the
customer is paying with. When you finalize the sale the customer’s
balance will be decreased by the amount they paid off.
You can also manually go to the customers page and edit the account balance without recording a new transaction.
After
you attached a customer and finalized a sale. At the “Sale Complete”
page, the customer’s information will be displayed and a “Add Customer
Credit” link will be available. Clicking on this link will ask you how
much credit to add to customer balance. Enter the amount and it will be
added to the customer’s balance as credit.
You can also manually go to the customers page and edit the account
balance to give customer credit without recording a new transaction.
To use a customer's credit when you attach the customer to the sale, if the customer has credit available then a new button
“Use Credit” will be available in the “Sale Form” to indicate that the
customer has credit available. Clicking on “Use Credit” will ask you to
enter how much of the credit to use against the current sale. The amount
entered cannot be greater than the total sale amount. Once added the
credit will be added to the cart as "Customer Credit" and have a
negative total of the amount you entered
This
add-on will allow you to print a customer card with their name, ID, and
barcode. This helps you easily select them when searching in customers
or during a sale. You can stick the printed information on a business
card or use your own label maker.
To print the card go to the customer management page, find the customer, click on the
"Print" button for the customer. This will prompt you with a review of
the card. Click on "Print Card" button to send the customer card to the
printer.
Employee Management
To manage employees get the Employee Management Add-On
This add-on will give you the ability to keep track of who did what
transaction, reporting on how much your employees sold, and allows you
to secure your business information by allowing your employees to access
the pages that you set for them only.
By default the Admin PIN is 0000 You will be required to clock in and
out of the system using your 4 digit PIN. And in order to access the
Employee Management page you will need to always enter the Admins PIN.
In the Employee Management page you can use the three dotted menu to
change from table view to card view and to switch between searching and
sorting employees.
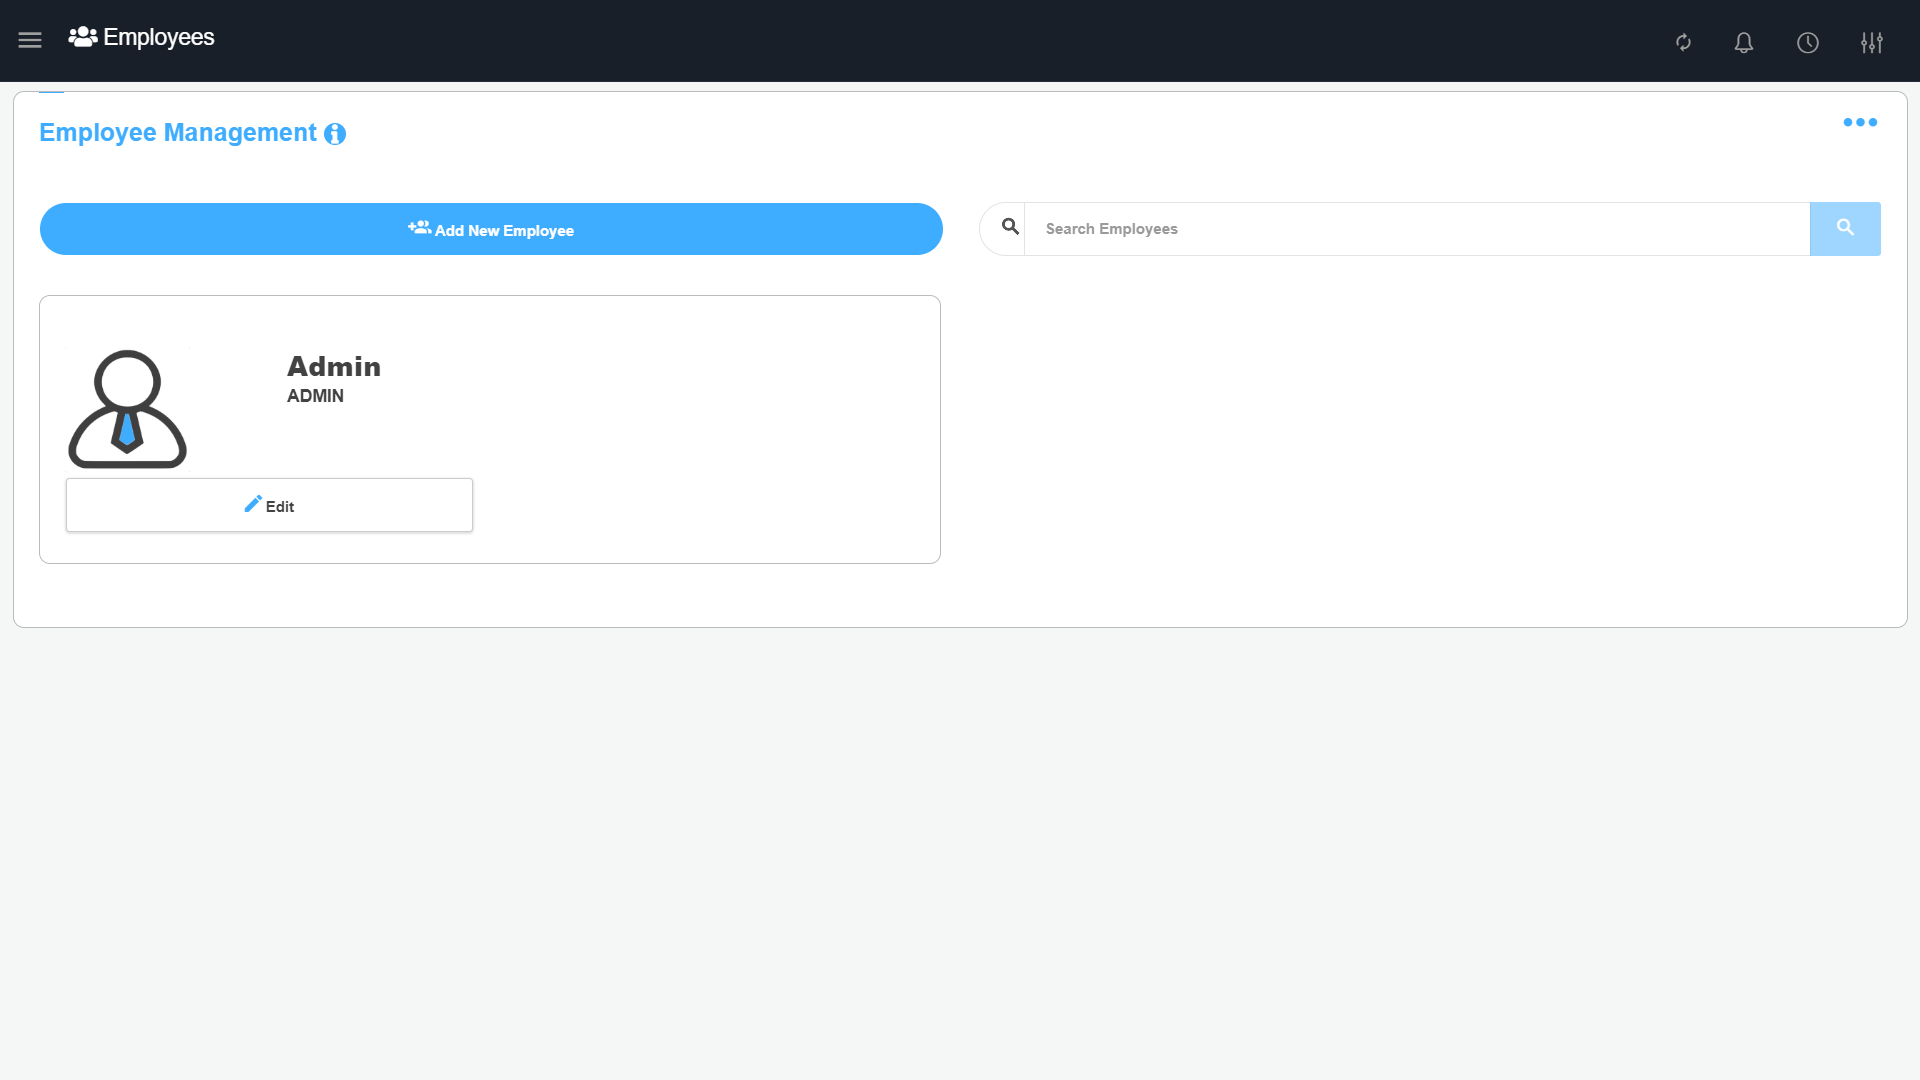
Click on the “Add new Employee” button
in the employee management page. This will open the form. To start
you will need to give the employee a username and set a 4 digit PIN. The
PIN is used later to confirm identity and to clock in. You can
optionally set a job title and an image for the employee.
Next you need to set the pages that this employee has access to. For
example, If your employee is a cashier then you can set to show only
cashier related pages such as “Sell” & “Refund” After you set the
page permissions you can click on “Add Employee” to finalize and save.
To edit an employee select the edit button. This will open the edit form with all the employee's properties. You can edit any field and then save at the bottom of the form
Use the delete button to delete an employee. You will be prompted to agree that you want to delete the employee. Once deleted the employee will no longer be available
When
there are no employees clocked in you will be on the “Employee Clock
in” page. Select yourself from the list of employees and enter your 4
digit PIN to clock in. Once clocked in you will only have access to the
pages that were set in your permissions.
You can have multiple employees clocked in on the same device. Use the new clock icon
that appears in the navigation bar. This will show you all employees
that are currently clocked in and to clock in more users on the same
device click on the “Clock in” button at the bottom. This will open the
list of employees that are not clocked in and you can select yourself
from the list and enter your 4 digit PIN
When there are multiple employees clocked in on the same device you will be asked to identify yourself upon completion of any transactions and when entering pages other employees do not have permission to.
If there is only one employee clocked in the system then any sale or expense done will be recorded under that employee. If there are more than one employee then upon completion of any sale or expense the employee will be asked to identify themselves so that sale or expense can get recorded under their name. On the transactions & expenses page all sales and expenses will have a new column that will display the username that finalized that transaction.
Improve
your store's efficiency with printed employee tags to display your name
and scan the barcode to enter your pin.
Printing the employee tags can help you speed up processes at your
store. These can be used by each employee to scan for clocking in/out or
verifying themselves. This allows employees to quickly get in their
work station and begin their day.
To print the tag go to the employee management page, and click on the
"tag" button for the employee. This will prompt you with a review of
the tag. Click on "Print tag" button to send the tag be printed.
Vendor Management
To manage vendors get the Vendor Management Add-On
The vendors add-on allows you to specify the vendor for each of your
items. This allows you to record orders in the system that you can send
to the vendor and keep track of. Once an order is placed and delivered,
you can update its status on the orders page and automatically increase
inventory quantity and create expenses.
The vendors page is broken down into two tabs “Vendors” & “Orders”
that you can switch between. By default you are on the vendors tab. The
top cards show you the total number of vendors, total number of orders,
and the value of the amount delivered. You can use the three dotted menu
to switch between card view and table view.
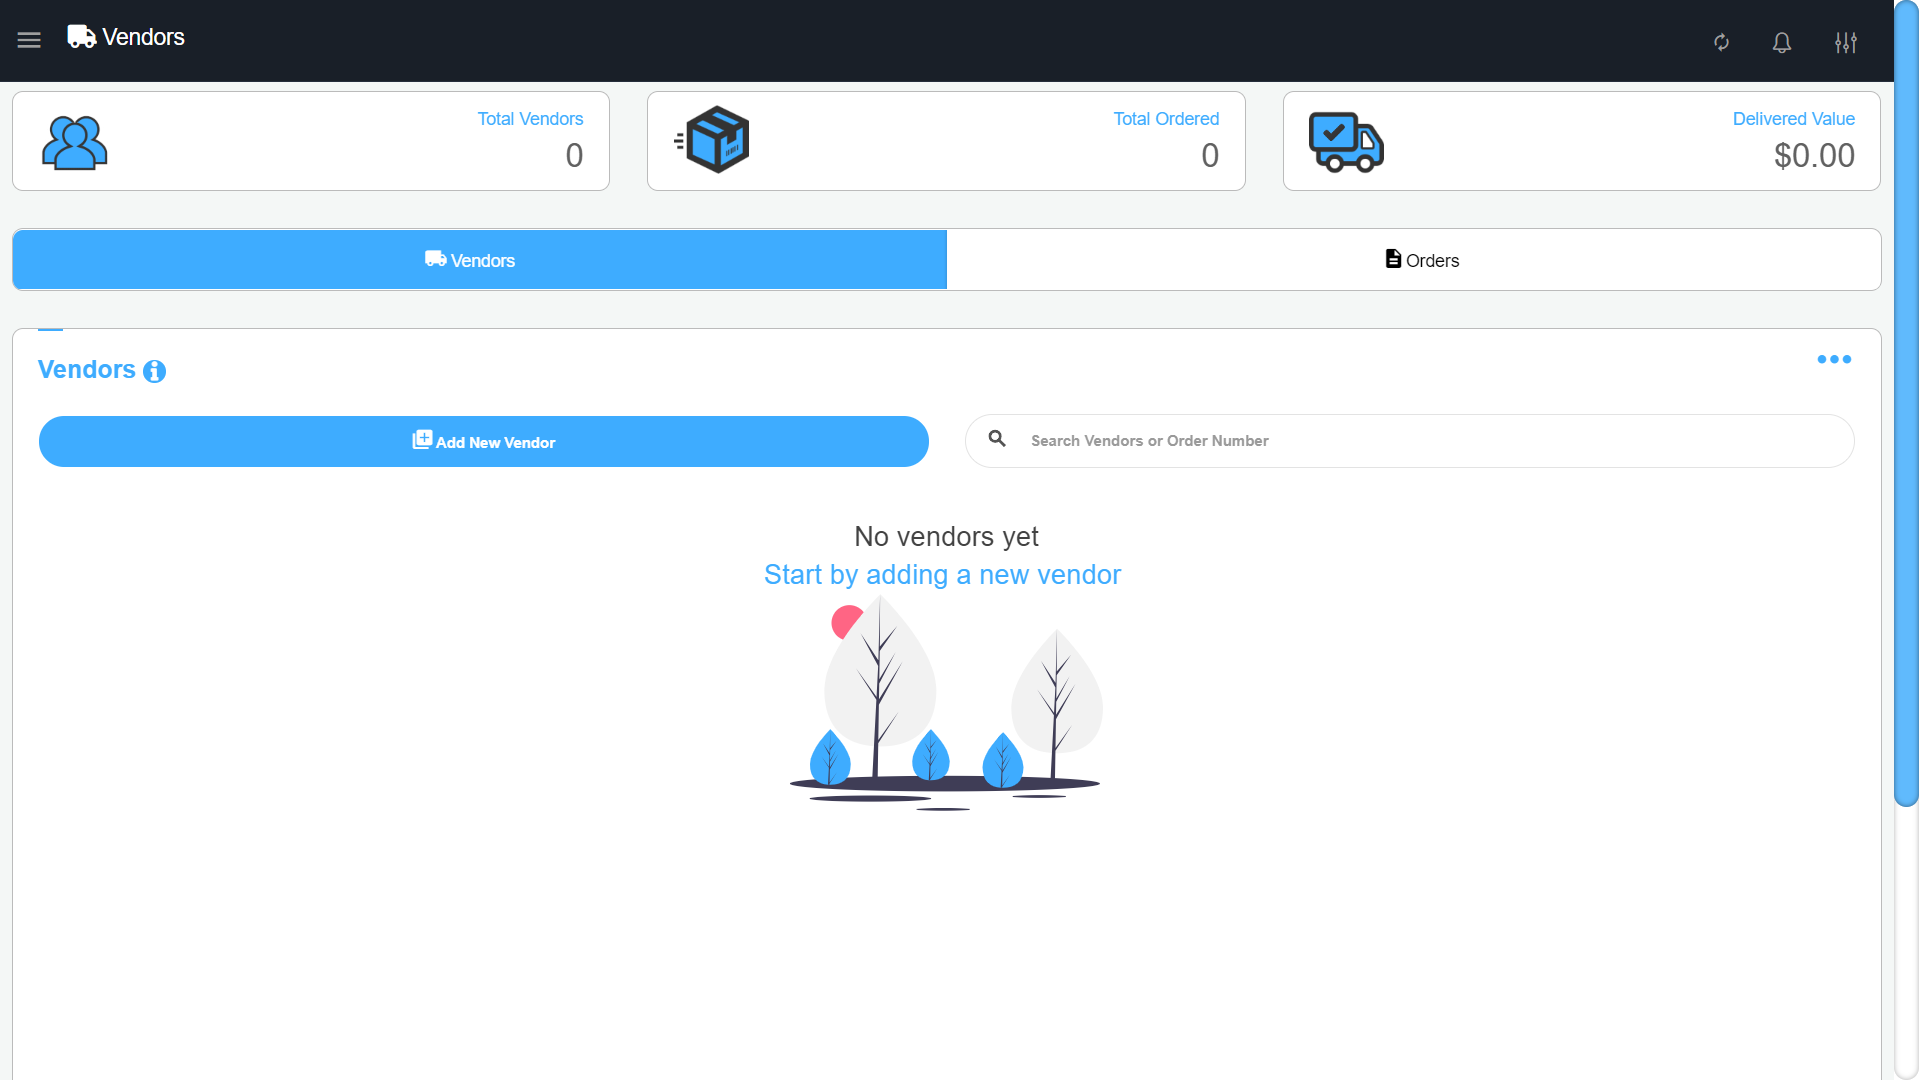
To
add a vendor click on the “Add New Vendor” button. This will open the
form where you can set the vendor information. All that is needed is the
vendor name but you can optionally enter the vendor’s address, email,
phone number, website, and an internal note. When you are done filling
the form click the “Add vendor” button to save the vendor
Adding a vendor’s number, email, address, or website will create quick
links so you can easily call, email, open the address in Google Maps, or
open the website in a browser from any device.
To edit a vendor select the edit button. This will open the edit form with all the vendor’s properties. You can edit any field and then save at the bottom of the form
Use the delete button to delete a vendor. You will be prompted to agree that you want to delete the vendor. Once deleted the vendor will no longer be available and will not be calculated in your totals.
You can set the specific items that you order from a vendor directly from the inventory page. This is so that when you make an order you will be able to filter items by vendor items only. When you add or edit an inventory item there will be a new field “Vendor” that contains a drop down list of all your vendors. Select the vendor for the item you will then need to set a cost for the item and then save the item.
To
create an order you can use the “Add Order” button on the vendor you
want to make an order from or go to the “Orders“ tab and click on the
“Add New Order” button. This will open up the order form. Set the vendor
you are purchasing from using the top drop-down list. The “Add Items”
section is where you find and select the inventory items you are
purchasing. Use the “Your Order” section to review your order and submit
it.
You can use the search field to quickly search for items by their name
or barcode. If you have set your vendor items in the inventory page you
can use the “Only Vendor Items” checkbox to filter only the vendor
specific items.
When you select an item you will be asked to enter the quantity you are
purchasing. After entering the quantity the item will be added to the
cart and you can adjust the cost and quantity by clicking on the zmdi
zmdi-edit pencil icon. When you are done adding items and you confirm
the total you can save the order and set its status.
- Draft - This is an order that is not ready for ordering and you are still putting it together
- Ordered - This is an order that is ordered with the vendor and is planned to be delivered
- Delivered -This is for orders that are completed and have arrived
You can only edit orders that have a status of “Draft” or “Ordered” To edit an order select the edit button on the order. This will open the edit form with all the items in that order. You can then adjust the order items as you like and set a new status for it
Use the delete button to delete an order. You will be prompted to agree that you want to delete the order. Once deleted the order will no longer be available and will not be calculated in your totals.
When you set the order status to “Delivered” you will be prompted with three steps.
- Payment type - Set the payment type in which you paid the vendor with, set whether to create an expense in the system for this order (by default this is checked) and optionally you can write a note about the order.
- Update Inventory - Confirm the quantity of all inventory items received and their costs to update your inventory. When you are done click the “Update & Complete” button to finalize the order.
- Order Confirmation - The order will now be set to status “Delivered” and you will have the ability to view the order online to be printed or sent to your vendor.
When the order is set to “Delivered” you will no longer be able to edit the order or change the status. There will be a “View” button available instead that will allow you to view the order confirmation and to view the online order.
Orders Management
To create and manage orders get the Orders Management Add-On
The orders management Add-On gives you the ability to create orders, allow customers to make partial payments and keep track of their payments history. The top header cards show you the total number of orders, the total money amount the orders add up to, and the total amount paid on those orders. You can use the menu button to switch between card and table view and to hide and show header cards for your convenience.
By default the orders page will show all orders for today. You can use
the date calendar to switch between days. To view more than one day at a
time use the menu button and click the “View range” option to view more orders in a specific date range
Use the filter by status to filter through orders that are not paid,
paid, and partial. And use the filter by type to filter the list further
by types that you have created and set

To create order types go to the orders page and click the three dotted menu and click the 'Manage Types' option
The form will pop up where you will be able to add & delete order types. Example order types: Delivery, Pickup, Online, Table 1, Table 2
On the Sell page a new payment option 'Order' will be available in the 'Other Options' list. You can alternatively set 'Order' to be your quick sale button in the sell settings. To create an order add items to the cart regularly on the sell page and select 'Order' as the payment option. You can optionally set the type of the order or complete the order without a type
When you complete an order you will be able to send an electronic or printed order receipt for your customer or staff
When you complete an order you can quickly pay it off using the pay off button on the “Sale Complete” page
To edit an order go to the orders page and find the order you want to edit. In the orders details click on the 'Edit' button that will take you to the sell page and allow you to edit the order and save it.
To delete an order go to the orders page and find the order you want to delete. In the orders details click on the 'Delete’ button you will be prompted to confirm that you want to delete the order. Once confirmed the order will be permanently deleted and you can no longer find the order.
To make a payment on a single order go to the orders page and find the order you want to make a payment on. In the orders details click on the “Pay Off” button you will be prompted to enter how much you want to pay off on the order. Once the amount is entered you will be sent to the sell page with the amount to pay off added to the cart automatically. You then can add more items to the sale cart and finish the sale regularly.
On the sell page you can pay off multiple orders in one transaction. Use the "Orders" button to view and select any order to pay off and it will add it to your customer's cart. This can also be accomplished by using the "Enter Barcode" input field and scanning the order barcodes. Alternatively, if you do not have a scanner type "ORD" before the order number in the search field to search for orders. Example order number is "1234" in the "Enter Barcode" field you can type "ORD1234" and search to find and add multiple orders to the cart.
To see payments made on an order go to the orders page and find the order. In the orders details the payment history of the order will be listed under the total. Clicking on the payment total will send you to the receipt on the transactions page where it was paid.
Advertise Display
To use the advertise display feature get the Advertise Display Add-On
The Advertise Display Add-On allows you to turn the App to an advertising display. You can remotely from anywhere add images and videos to play on repeat in a slideshow that presents your specials, discounts, special events, or general store information to your customers. You can connect as many monitors as you can to your desktop or use a mobile device and screen share to larger monitors via screen sharing Apps or an HDMI cable.
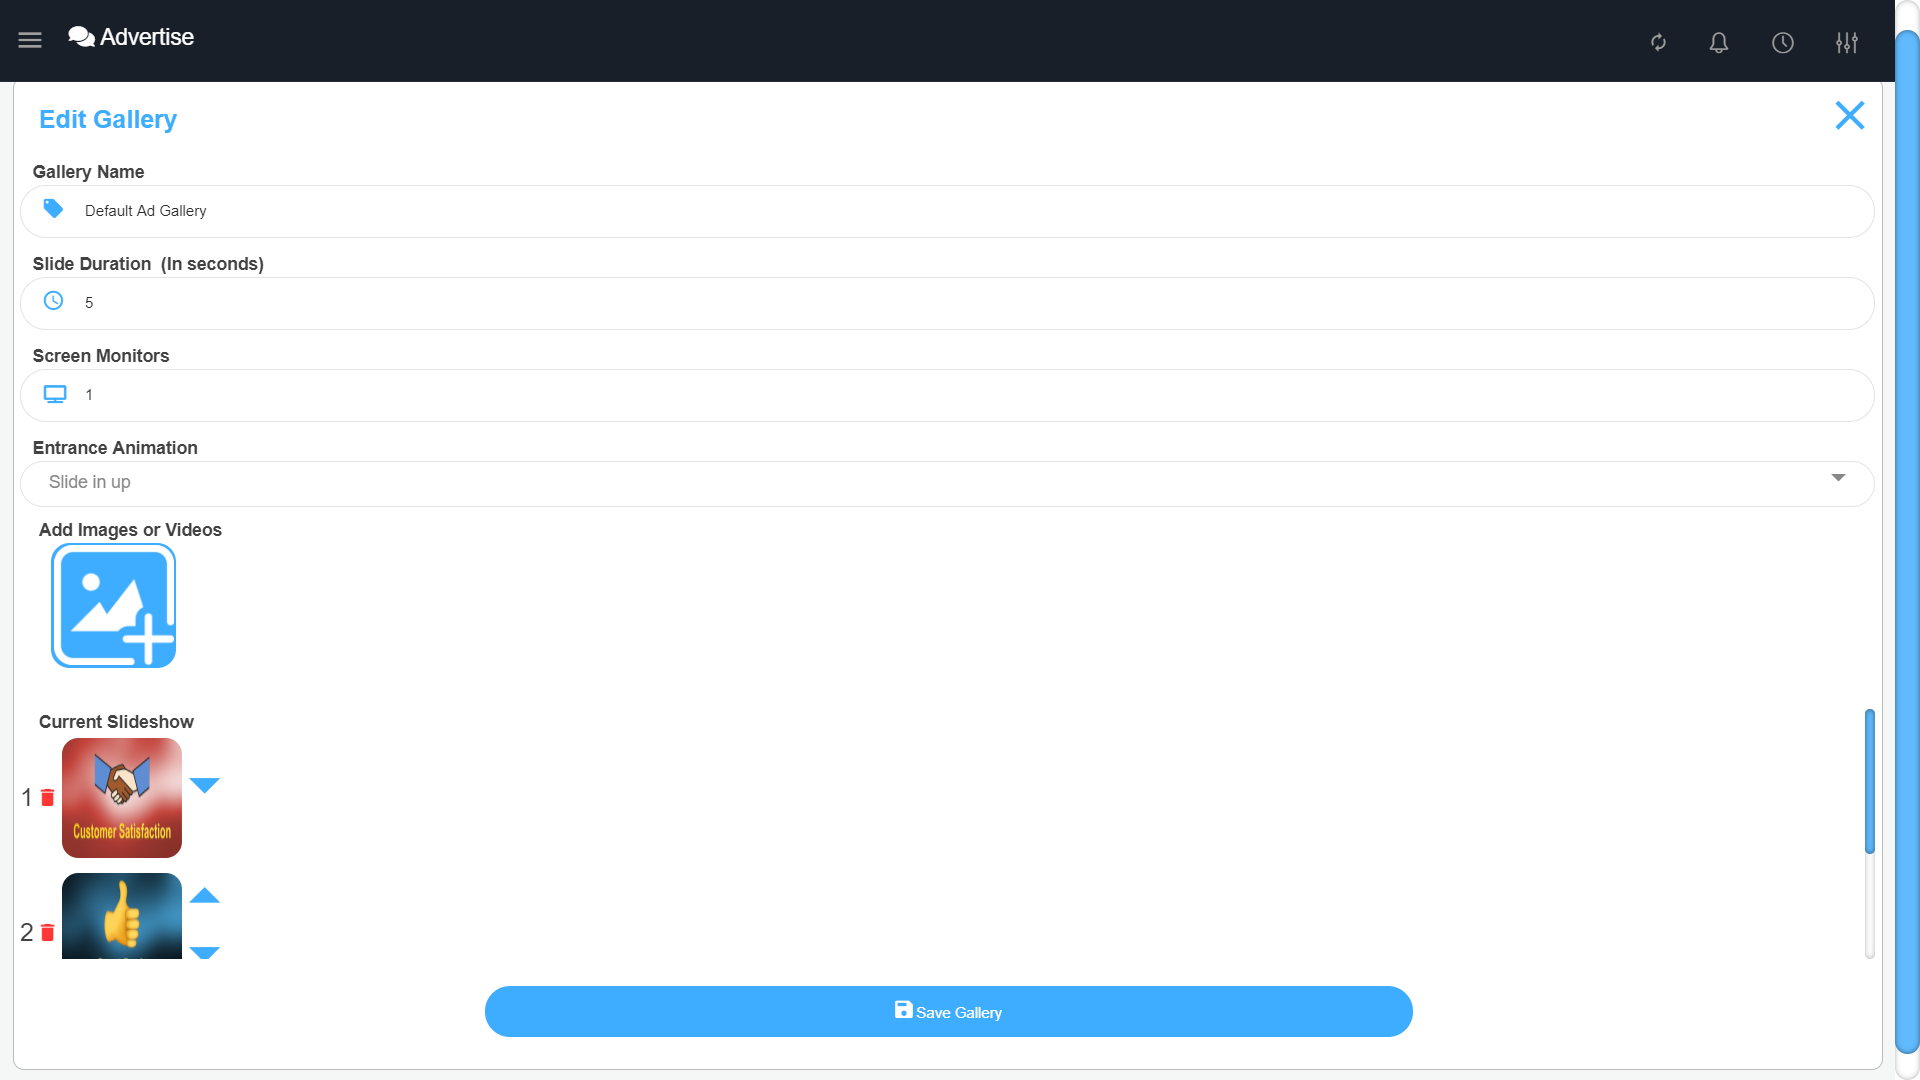
You can create different galleries to display on different monitors. You
can start by editing the default gallery created for you or you can
create a new gallery by clicking the “Add New Gallery” button. A gallery
can hold as many images/videos as you like. To upload files click on
the plus image button
 You can upload and use any type of image or video file (.png, .jpeg,
.gif, .mp4, .mkv) Once uploaded the file will appear in the "Current
slideshow" list. You can upload as many files as you like and set the
order of the slides using the caret buttons
that appears next to the file.
You can upload and use any type of image or video file (.png, .jpeg,
.gif, .mp4, .mkv) Once uploaded the file will appear in the "Current
slideshow" list. You can upload as many files as you like and set the
order of the slides using the caret buttons
that appears next to the file.
Each gallery can have its own slide duration set. The slide duration is the time in seconds it takes to switch to the next slide. By default this is 15 seconds. However, when a video is played the video will play fully before moving to the next slide.
To set the monitors you like to launch the gallery on click the monitor
input and you will be prompted to select from the list of monitors that
are found connected to your desktop. You can set different galleries to
launch on different monitors.
For Mobile the ad display will always launch on the device itself.
Each gallery can have its own entrance animation. The entrance animation options are: slide in right, left, up, and down.
Once you save your gallery it will be synced across all your other devices. This allows you to upload files from anywhere and update the slideshow in real time.
To delete slides click on the slide you want to delete under the “Current slideshow” list and you will be prompted if you want to delete the file.You will need to save the gallery to fully delete the image from the current slideshow
To start the advertised display slide show click on the "Launch Display" button
and this will start the display. If you are using a desktop the gallery
will be launched on the monitors you selected for that gallery. For
mobile the ad display will launch on the device itself.
You can set the gallery to automatically launch on App run by checking
the “Auto launch gallery” checkbox. This is saved per device so each
device can have its own auto launch configuration. Once the checkbox is
checked every time the app is opened the display will launch.
Once you have the display launched you no longer need to touch that device to upload new files. You can then use any other device to update the slides in real time. The display that is launched will update itself without you having to go to that physical monitor. This will allow you to update slides from anywhere and customer’s in the store will see them in real time.
To exit out of the display simply click on a slide and you will be prompted if you want to exit or not.
Customer Display
To use the customer display feature get the Customer Display Add-On
The customer display add-on allows you to turn a second monitor into a customer facing screen. It will give you the ability to put advertisement images that play in a slide show while t customers shop, and once you start adding their items it will display the customer's cart showing them every item and their total.
This feature is only available for desktop (Windows & macOS) however, you can use your mobile device to upload image slides.
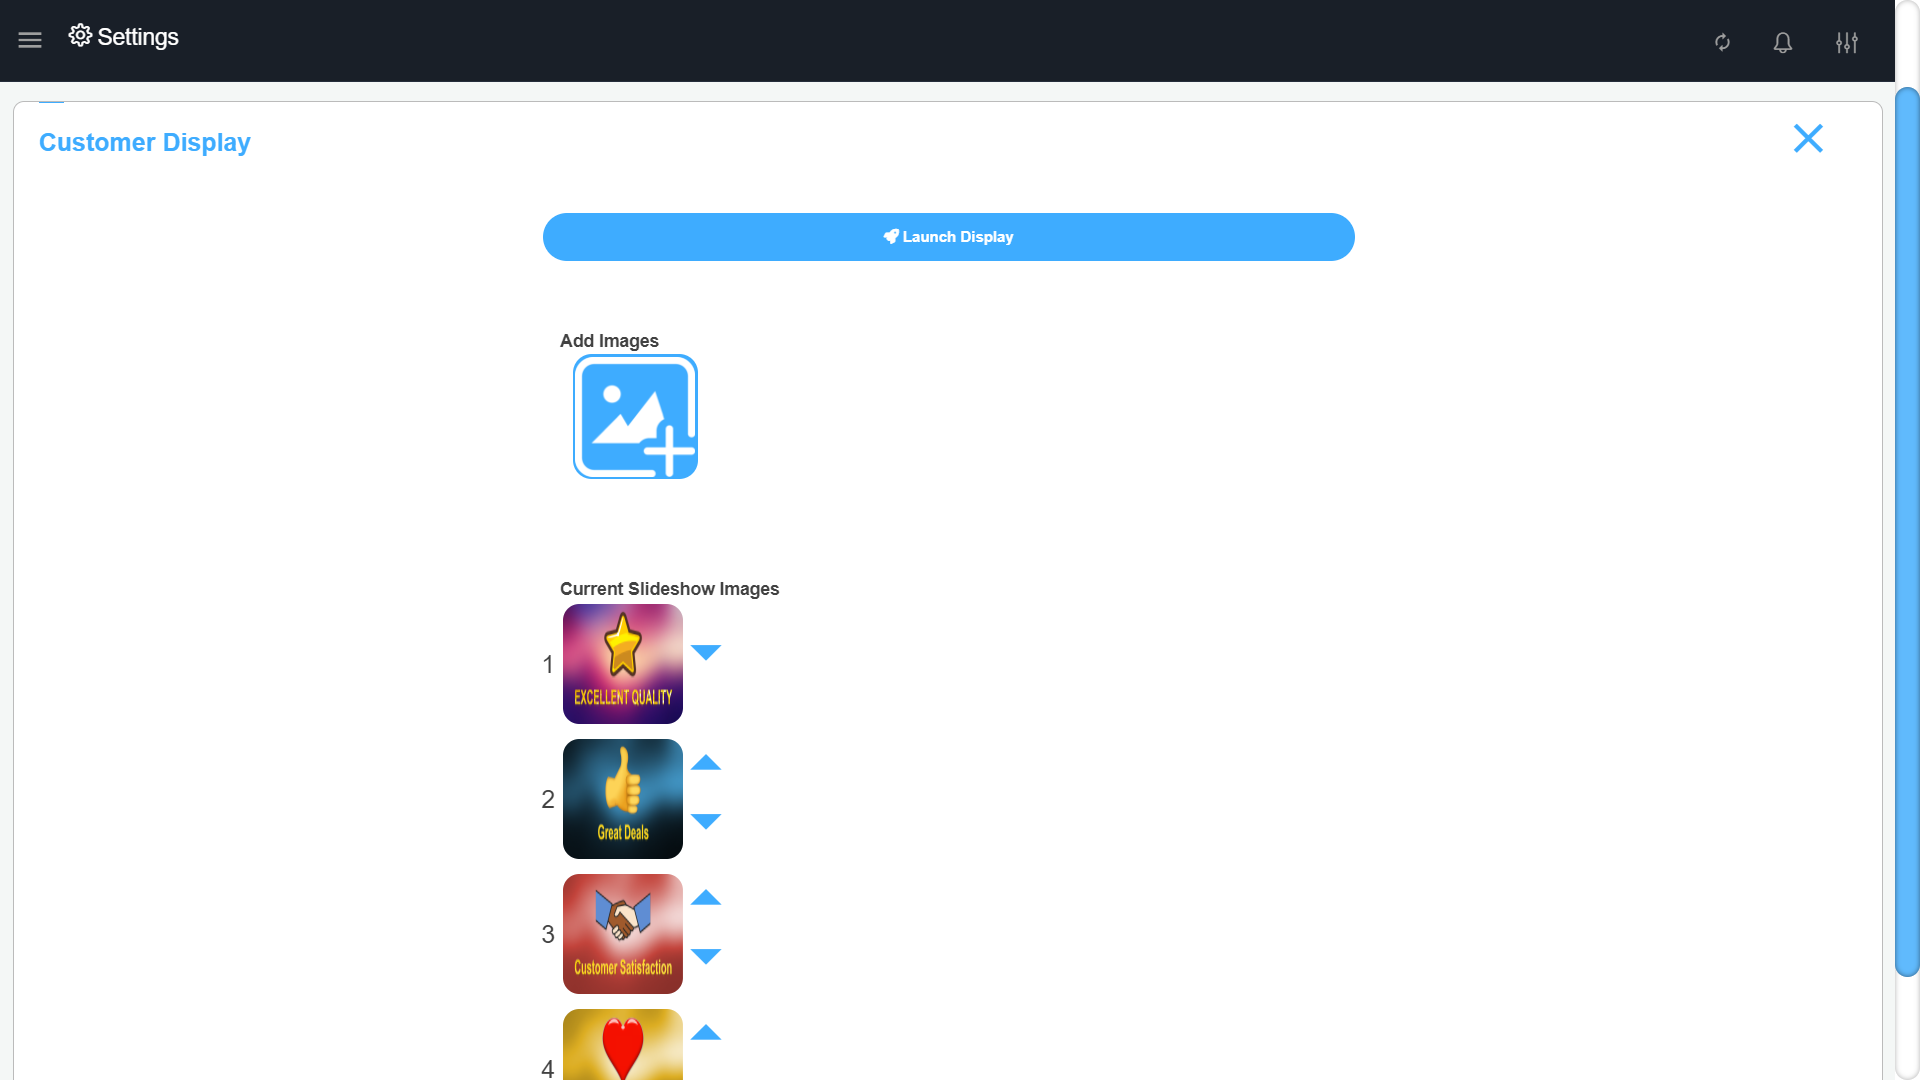
To upload files click on the plus image button
You can upload and use any type of image file (.png, .jpeg, .gif,) Once
uploaded the file will appear in the "Current slideshow" list. You can
upload as many files as you like and set there order in the slides using
the caret buttons
that appears next to the file.
Once uploaded your files will be synced across all your other devices. This allows you to upload files from anywhere and update the slideshow in real time.
To delete slides click on the slide you want to delete under the “Current slideshow” list and you will be prompted if you want to delete the file.
To start the customer display make sure your second monitor is connected then click on the "Launch Display" button and this will start the display on the second monitor.
Once you have the display launched the slideshow will begin to play. If no slide images are uploaded your logo will be displayed instead if available. The display will continue playing the slideshow until you start a new sale. When you start adding items to the cart on the sell page the customer display will start displaying the items added with the total for your customer to view. When you finalize the transaction a thank you message will appear on the display screen and then the slideshow will start playing again.
Once the second monitor is connected, every time you launch M&M POS the customer monitor will automatically launch as well. To disable the auto launch uncheck the "Auto launch display" setting
Notify Customers
To send messages to your customers get the Notify Customers Add-On
This Add-On allows you to stay connected with your customers by sending them a message notifying them of any updates, specials, sales, or events you are having.
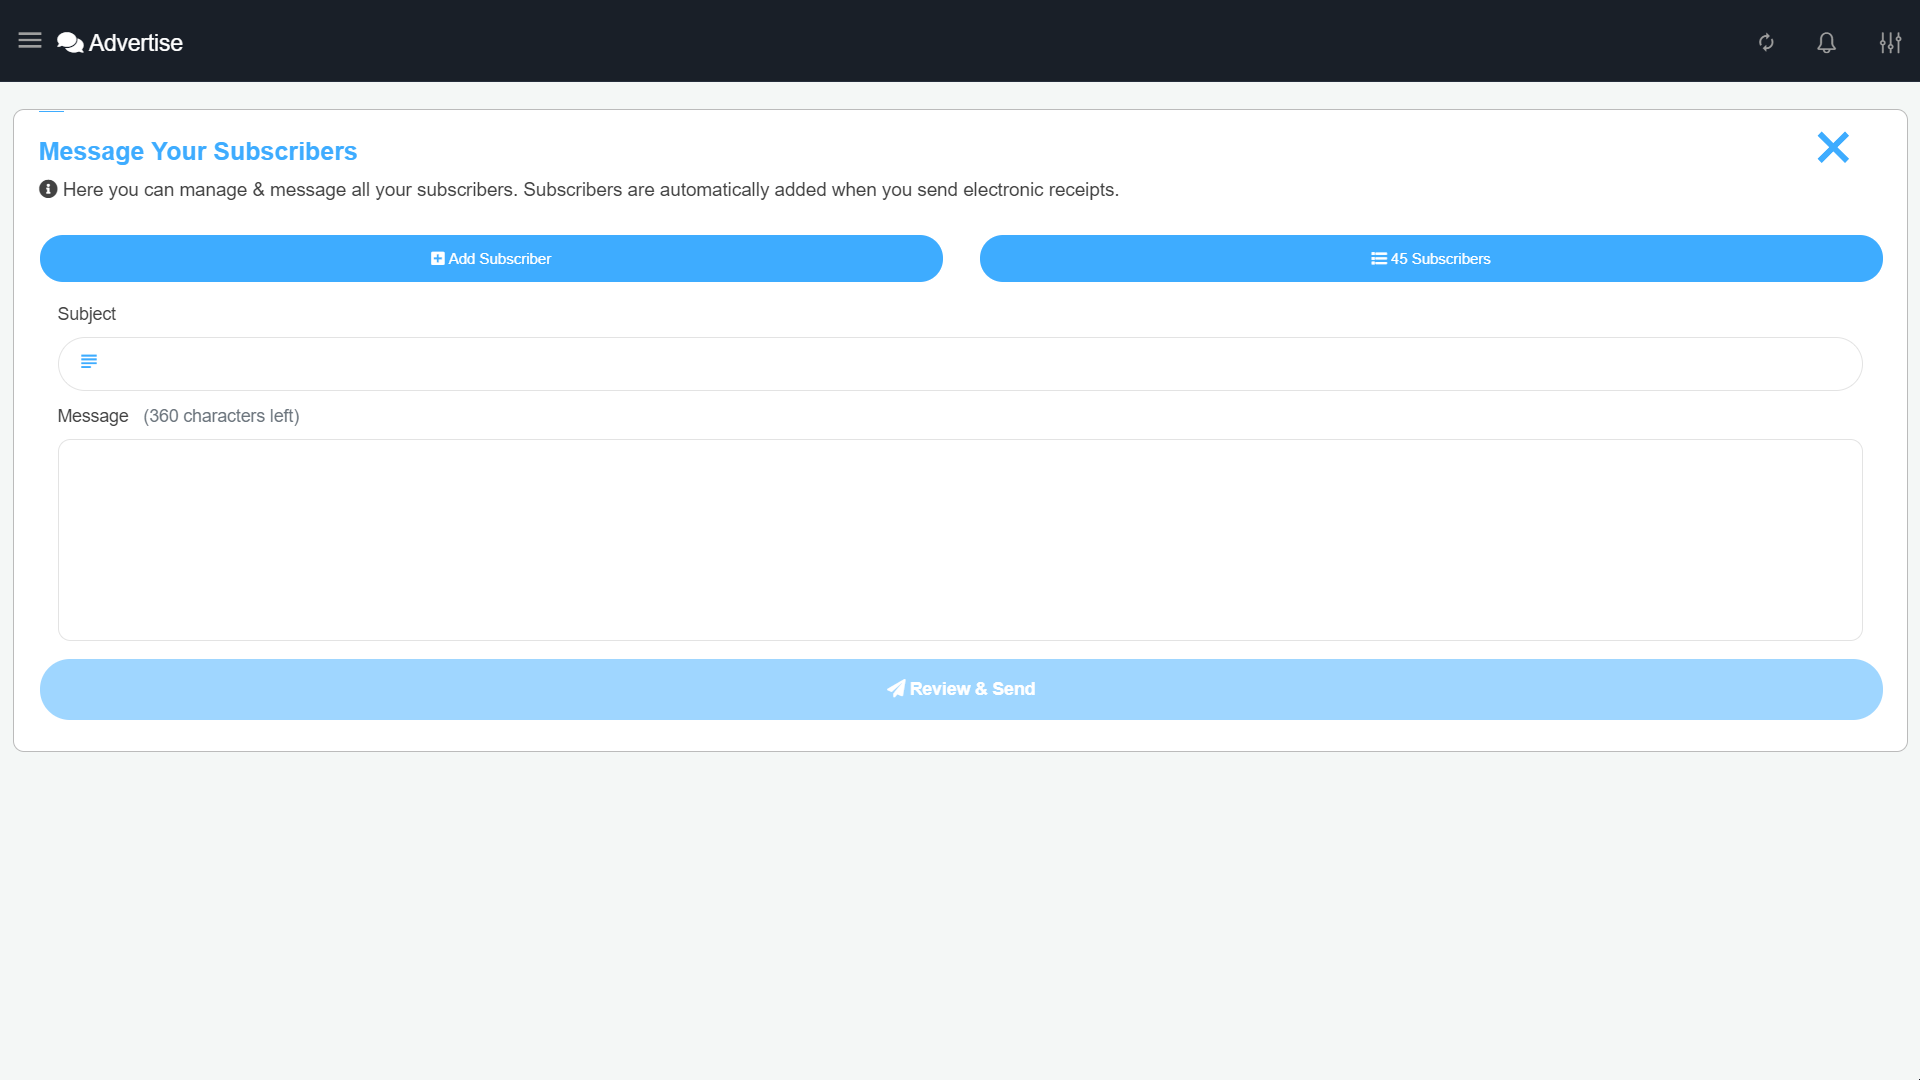
There
are two ways to add customers to your subscribers list. When you send a
customer a receipt via email or text message they are added to your
subscribers list automatically. The other way is by going to the message
customers page. In the menu tab go to the “Advertise” page and from
there go to the “Message Customers” page, click on the “Add new
subscriber” button which will open the add form where you can add new
subscribers via email or phone number.
The number of subscribers you have will be available to you on the message subscribers page under the add new subscriber button.
To send your subscribers a message go to the message customers page and use the form. Enter your subject and then enter your message. Make sure to review your subject and message carefully before sending. Once you are ready click the “Submit Message” button that will send the message to all of your subscribers.
Reports
For reporting get the Report Add-Ons
The reports page is responsible for showing detailed reporting of different types. You can view the totals for a specific date or enter a range to see the totals for a week, month or any custom range. The report generates graphs and charts that represent your data to give you a quick visual. To change between different reports use the “Report Type” drop down list on top of the page. By default this is set to “Sales Reports”
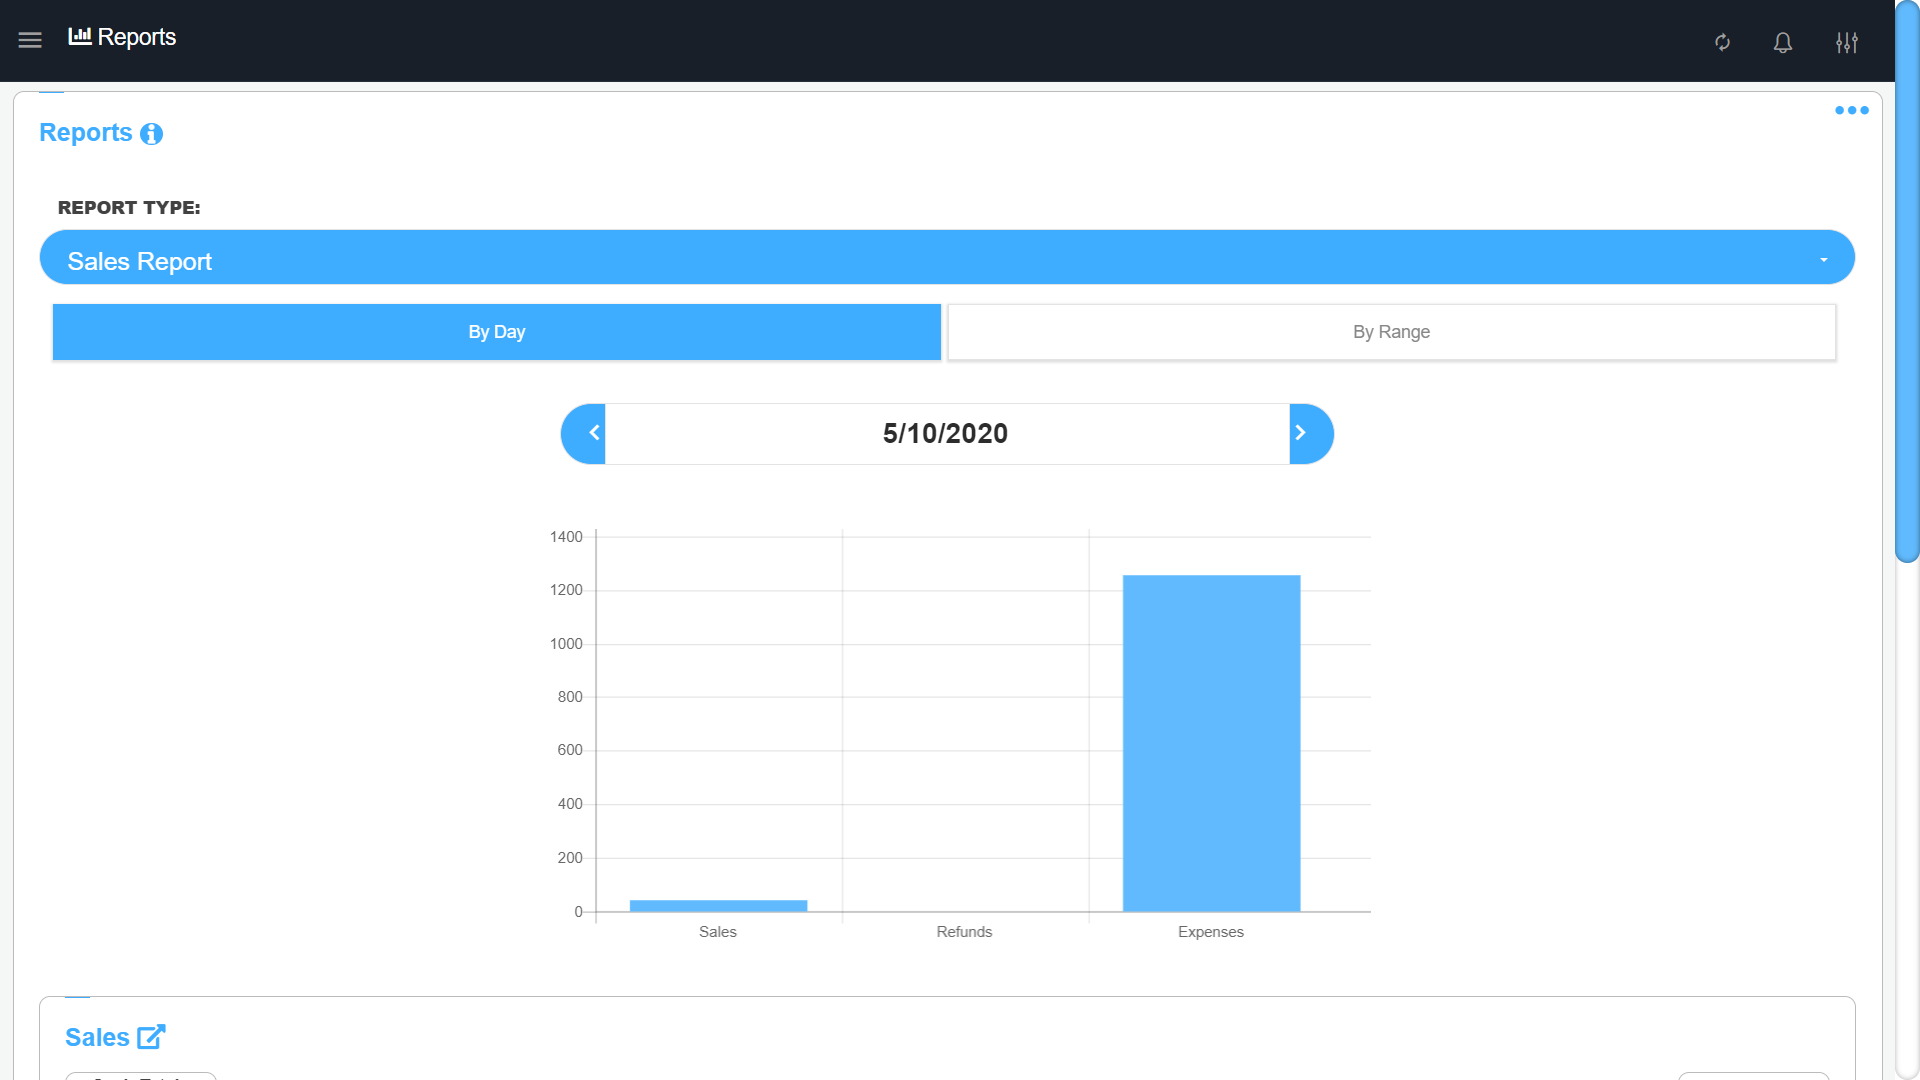
The sales reports add-on gives you the ability to view reports on your sales, refunds and expenses broken down by payment types. It also gives you a grand total report that subtracts your refunds and expenses from your sales total and gives you the final profit/loss made for the date selected. Use the printer icon button next “Grand Total” to print the grand totals.
The employee reports add-on gives you insight on your employees by displaying how much each employee has been selling, refunding and expensing. You get a visual representation of your employees' activity in a bar chart and a break down that lists each employee, the amount of revenue they have generated, how many sales were refunded, and how much is this employee expensing
The inventory reports add-on gives you insight on your sales by inventory category and by item. To switch between category and item reports use the tabs labeled 'By Category' & 'By Items' For category reports you get a visual representation of your sales in a bar chart and a breakdown that lists each category and shows you the amount of revenue it has generated in the range you selected. For items it gives you a bar chart of the top 10 most sold items, and a report on all items sold and the profit made from them
Exporting
To export your data get the Export Add-Ons
The exporting Add-Ons allows you to export your data outside of
M&M POS App. The export gives you three options to export by:
- Excel sheet - Selecting Excel will prompt you to give the file a name. The file will be downloaded to your Downloads folder and attempt to open once complete
- Email - Selecting email will prompt you to enter the email you wish to send the exported data to
- Printer - Selecting print will prompt you with your operating system’s print dialog to select which printer you would like to send the print job to
- PDF - Selecting to PDF will generate a PDF with your exported data that will be downloaded to your device
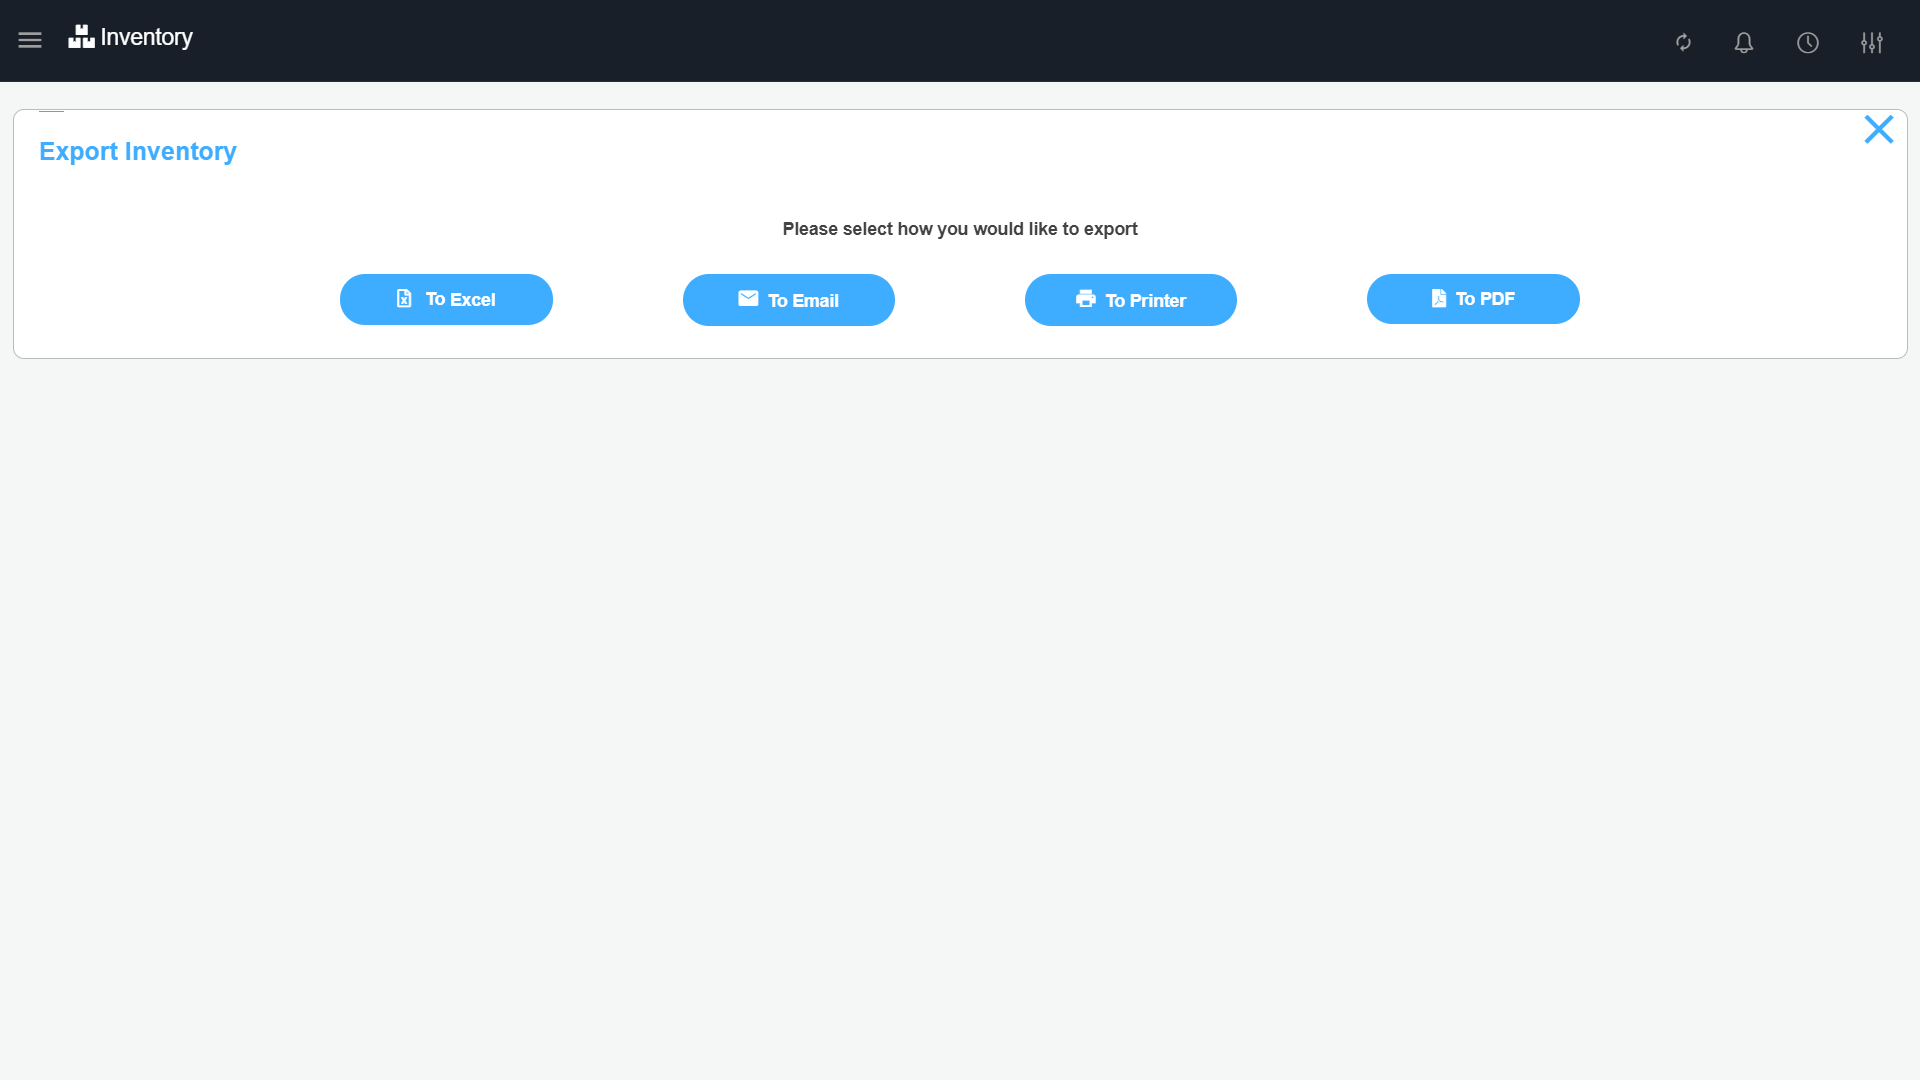
On the inventory page click on the three dotted menu and select “Export Inventory”. The export will try to export your complete inventory if you are not filtering to any category or search. To print only a set of items you can filter your results using categories or the search and when you click export only the filtered list will be exported. The exported data fields are: name, price, barcode, quantity, category, note, cost, and tax
On the transactions page select and load the day you want to export. Click on the three dotted menu and select “Export Transactions” This will then allow you to export all sales for that day. The exported data fields are: receipt number, date, subtotal, total, tax, payment type, employee username, and cart items
On the expenses page select and load the day you want to export. Click on the three dotted menu and select “Export Expenses” This will then allow you to export all expenses for that day. The exported data fields are: date, name, price, payment method, and note
On the customers page click on the three dotted menu and select “Export Customers” This will then allow you to export all of your customers. The exported data fields are: id, transactions count,total spent,last seen, name, number, email, address, account balance, and note.
On
the reports page select the type of report and load the date you would
like to export. Click on the three dotted menu and select “Export
Reports” This will then export the data that you loaded. The exported
data fields are:
- Sales Reports - The first column is the type of report “Sales”, “Refunds”, and “Expenses”, and “Grand Totals” all other columns will be the payment types amounts, and the last column will show the grand total.
- Employees Reports - Each employee will have their own table/sheet. The data in each table/sheet is the same as the Sales Reports. The first column is the type of report “Sales”, “Refunds”, and “Expenses”, and “Grand Totals” all other columns will be the payment types amounts, and the last column will show the grand total.
- Inventory Reports - For categories exported fields are category name and total. For item reports exported fields are item category, name, quantity sold, total, tax, cost, and profit.
Delete Transactions
To delete transactions get the Delete Transactions Add-On
This add-on will allow you to get your data out of the system once it is no longer needed. Deleting transactions will also help speed up calculating your reports and transactions. In some cases you might still need to retrieve transactions that were deleted so you can still get access to them by searching the receipt number in the transactions page.
To delete a specific transaction, on the transaction’s page when you view the details of the transaction you will see a new button “Delete” clicking on this will ask you to confirm if you want to delete the transaction. Once deleted it will no longer be calculated in totals or appear in the transactions page.
To
delete a full day of transactions go to the transactions page and load
the day of transactions you want to delete. Click on the three dotted
menu button
then click on “Delete Transactions” this will prompt you to confirm if
you want to delete transactions for the full day. Once confirmed all
transactions for that day will be deleted.
With the Reports Add-On you can delete all transactions between a range of dates so you can quickly delete a full week, month, or year of transactions.
Scalable Items
To support items by weight get the Sell Scalable Items Add-On
Add items to your inventory that are sold by weight, and enter their weight upon selling them For businesses that sell goods by weight this add-on will make checking out a breeze and gives your customer a better shopping experience. You can scale your items and have the weight ready and when you sell that item just simply enter the weight of it and it will be calculated and added to your customers cart.
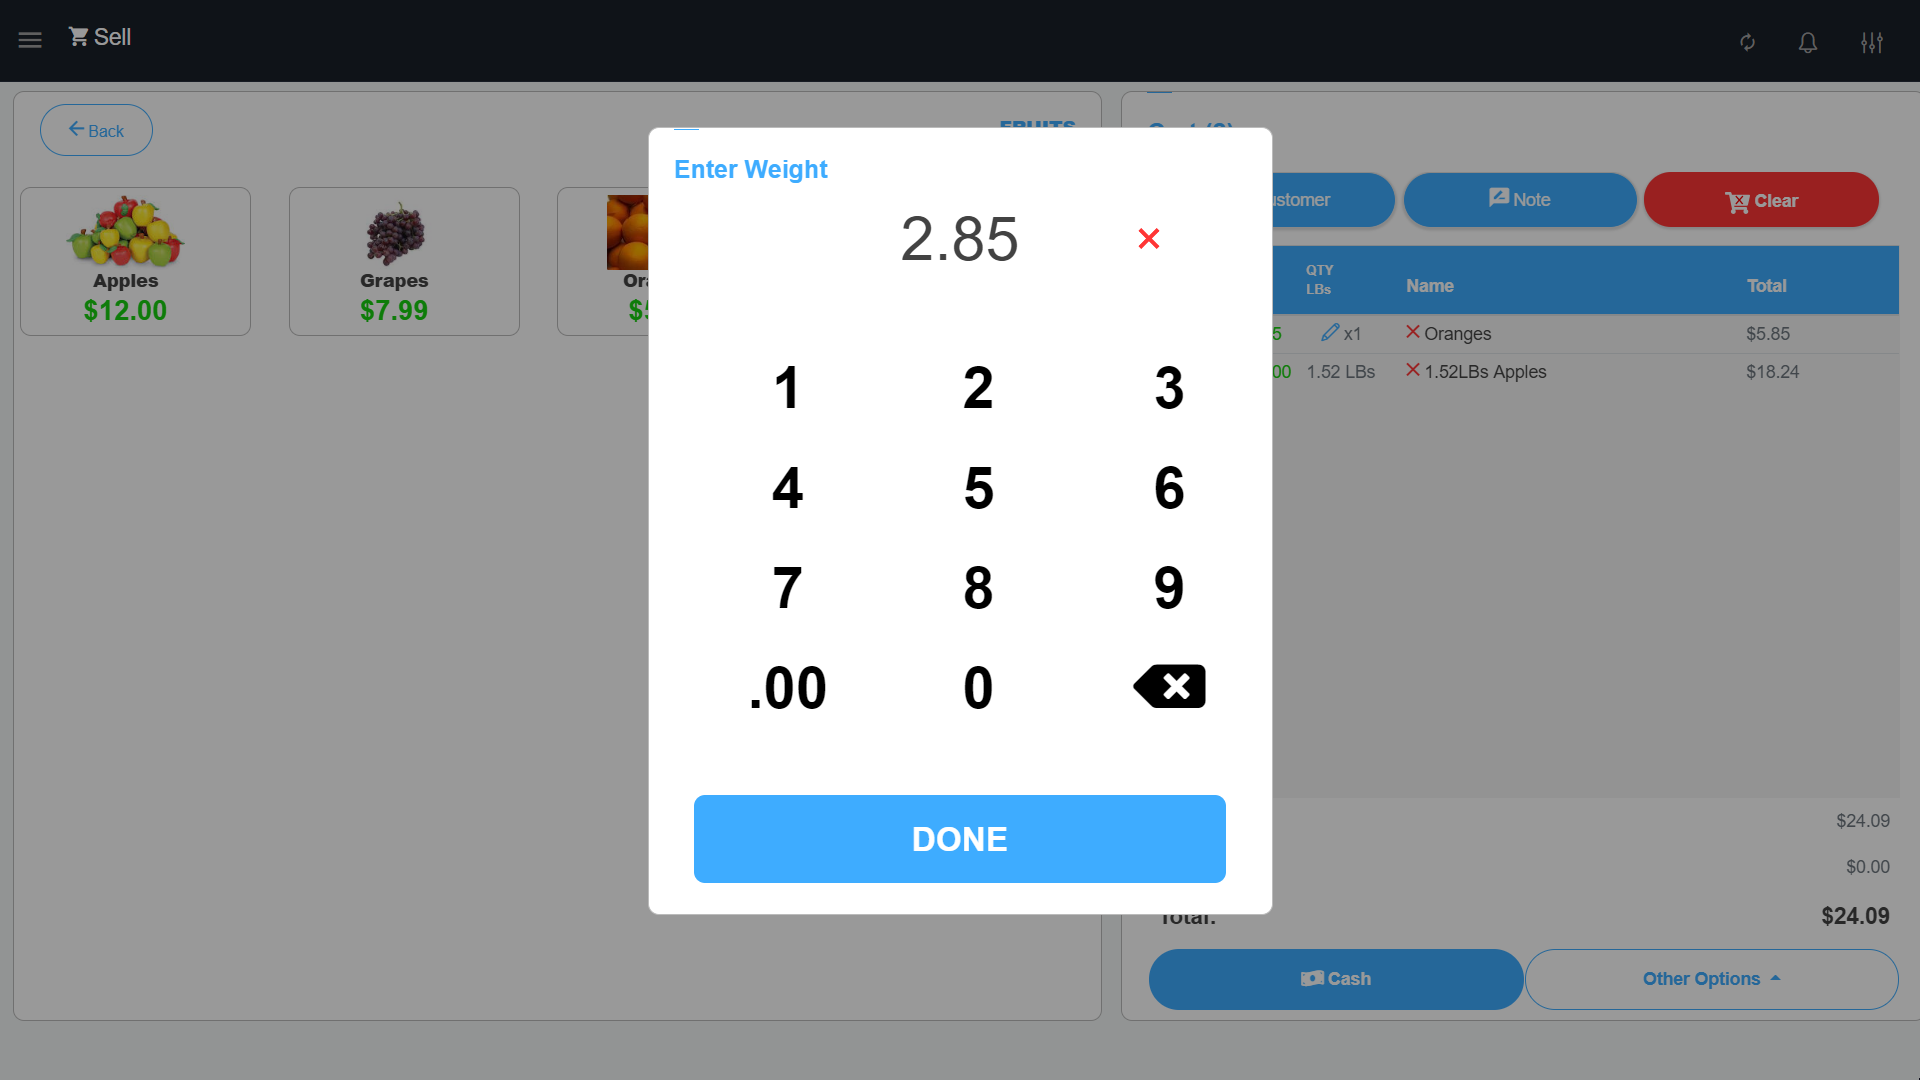
In the settings page you will find “Scale Settings” available. Going to the scale settings you can set the unit of weight that is applicable to your business either “Pounds (LBs” or “Kilogram (KG)”
On
the inventory page when you add or edit an item there will be a new
checkbox that allows you to set the item to “Sold by weight” You can
then set the price per unit of weight that the item is sold by.
When you check the checkbox an extra optional field will appear 'Weight
Tear' This field allows you to tear off an amount from the weight
entered upon selling. This is used for example when you want the
customer to only be charged for the weight of the actual item and not be
charged for the weight of the package it is contained in.
On the sell page when that scalable item is added to your customer's cart you will be asked to enter the weight amount of that item and then it will be added. The item sold with its weight will appear on your customer's receipt and in your transaction history.
For
scales that are able to connect via serial port to a desktop Only. In
the Scale Settings you will need to set the serial port number of the
scale connected (Typically this is COM1) You will need to find the
serial port from the device manager of your OS. If your current device
does not have a scale check the “No Scale On This Device?” checkbox.
This will allow you to manually enter the weight on the sell page.
On the sell page when you add items to the cart that are sold by weight
you will need to place the item on the scale first and then add it to
the cart. This will get the weight from the scale and then add the item
to the cart.
Additionally, There will be a new tab on the sell page that allows you
to read the current weight of the scale without having to add any items
to the cart, this is to just get current readings from the scale. Click
on the three dotted menu on the sale form, and click on “Scale” this
will pop up the current reading and will continuously stay reading new
values so you can increase and decrease the weight and see the results.
HoneyWell Stratos 2400 & 2700 are two models of scales that were tested and certified to work on Desktop.
Serialized Items
To use item serial numbers get the Sell Serialized Items Add-On
Start selling items by their serial number or a unique ID on the sell
page. This will help you keep track of inventory items under one item
this way you will be able to know what was sold and what inventory
should be in stock for each item when doing inventory count.
For example a phone store can use this to sell iPhones by their IMEI
and scan the IMEI on the sell page. The quantity of the serialized item
will be based off of how many serial numbers are in stock
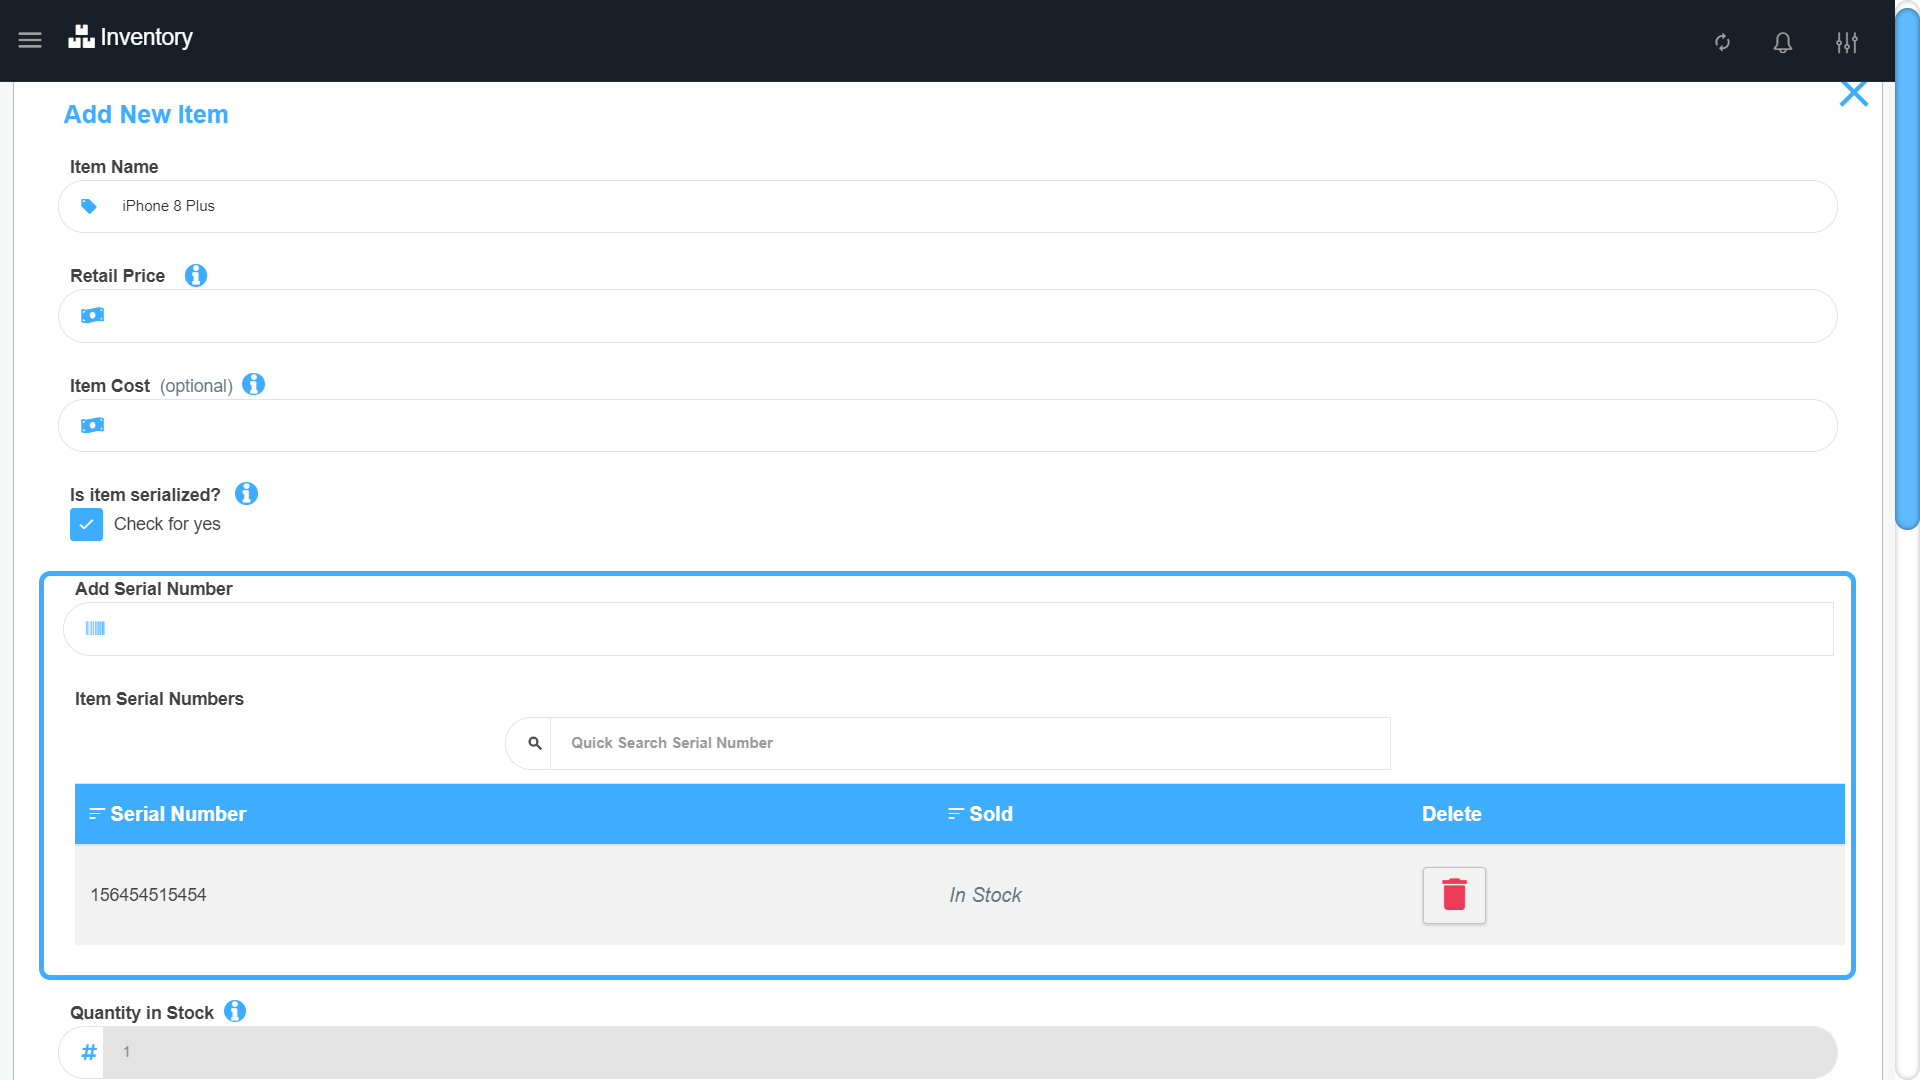
On
the inventory page when adding or editing an item there will be a new
checkbox field 'Is Item Serialized?' checking this checkbox will force
the item to be serialized. If checked a new section will appear where
you will be able to manage your serial numbers for that item. The table
will display the serial number, the status of that serial number if it
is sold or in stock, and a delete button to delete the serial number.
Use the quick search input to quickly filter the list to find a serial
number.
To add serial items click on the “Add Serial Number” input and enter the
serial number it will get added to the list. You will need to save the
item in order to save all the serial numbers for that item.
To delete a serial number use the delete button. This will prompt you if
you are sure you want to delete the serial number clicking delete will
remove it from the list but you will still need to save the item in
order to fully remove the serial number.
On
the sell page to sell a serialized item you can scan or enter the
serial number into the “Enter Barcode” field and if a serial number is
found then it will be added to the cart. The other option is by
searching the item by barcode or selecting it from the category or
search sale forms. Serialized items must be sold by their serial number
that was given so when you select an item that is serialized you will be
prompted to select the serial number of the item you are selling to be
added to the cart.
When a serial number is sold it will be indicated in the inventory page
for that item that the serial number is “Sold” and not “In Stock”
Miscellaneous Items
To sell items not in your inventory get the Miscellaneous Item Sale Add-On
Add items to the cart that are not in your inventory. Start selling items without the need for filling out your inventory. Simply set the name, price, and tax rate of the item to and sell quickly
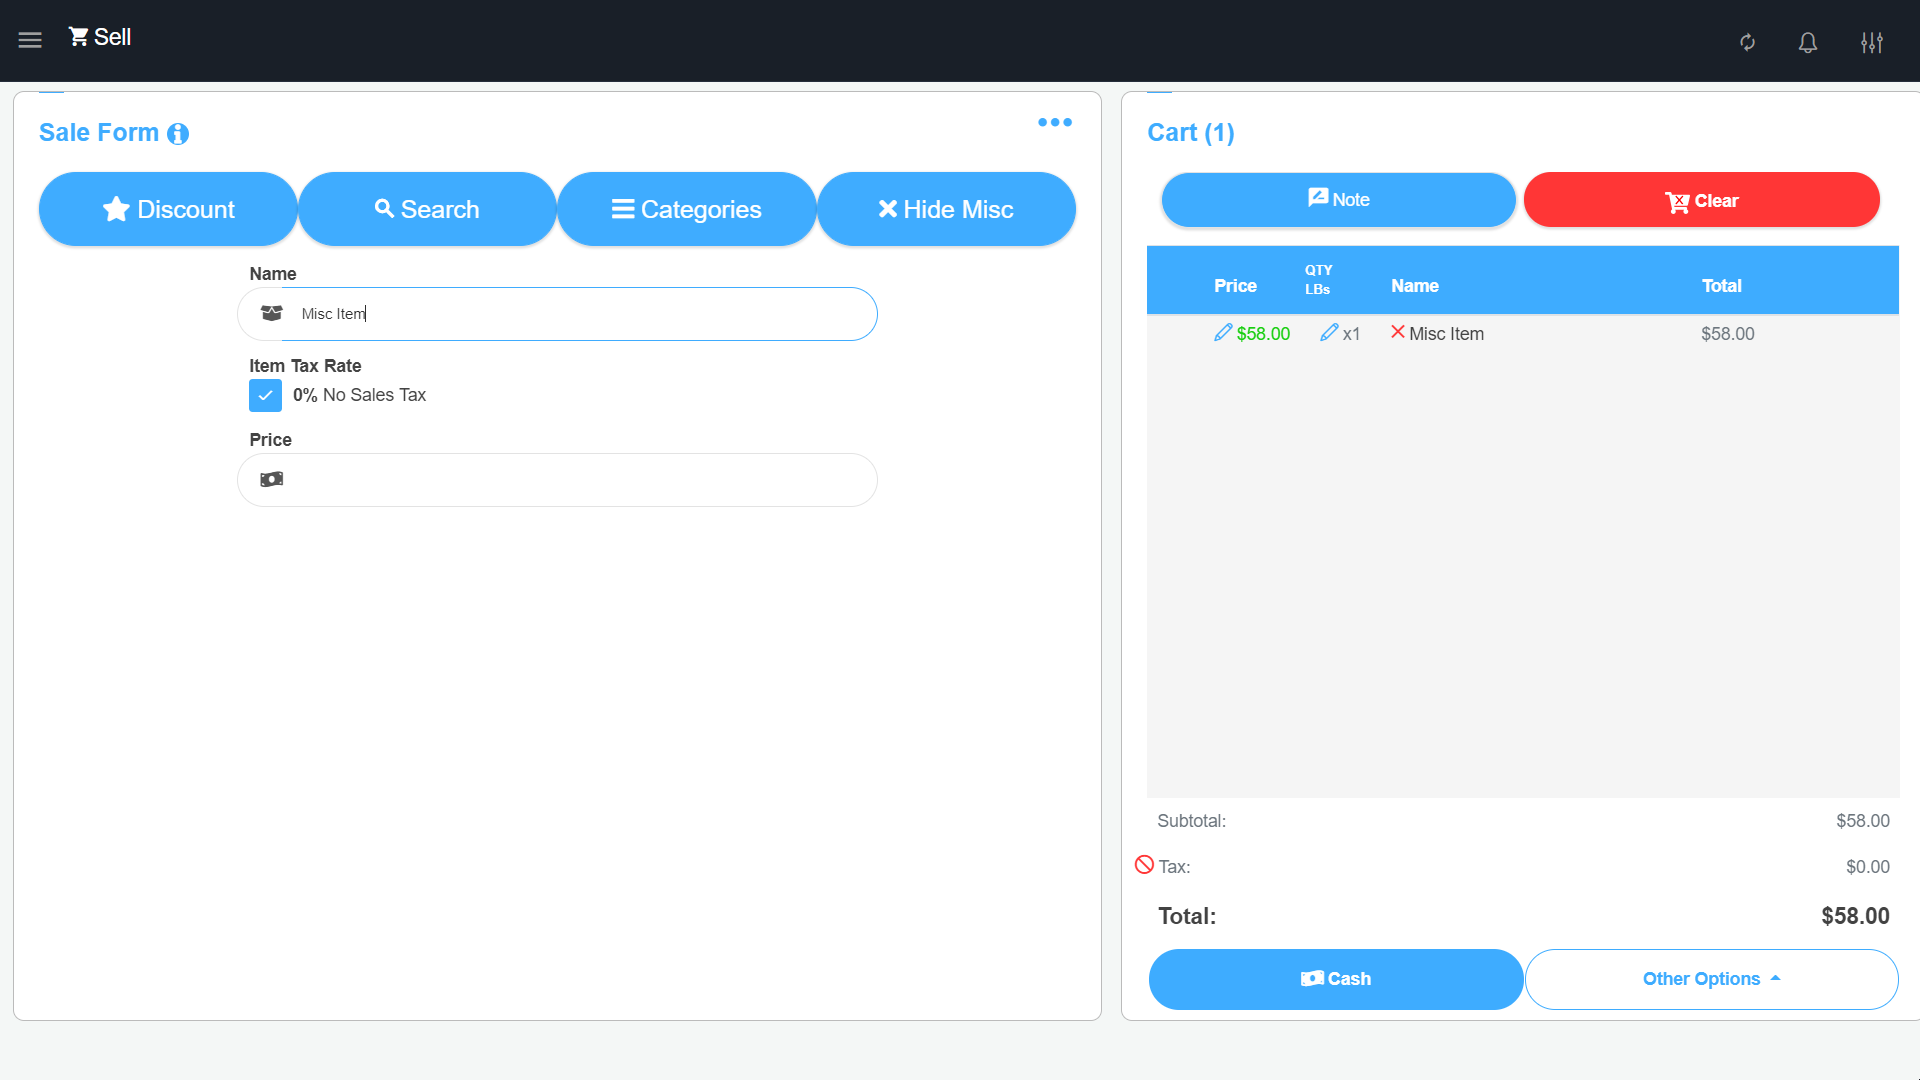
When this Add-On is enabled on the sell page the 'Misc Item' tab will be available. Clicking on this button will show a form where you can add a name, price, and tax rate. Once you add the price to the item the item will get added to your cart and you can complete the transaction.
Item Modifiers
To add modifiers to items enable the Item Modifiers Add-On
The Item Modifiers Add-On allows you to add and charge for extra options on items during a sale. For example a restaurant may use this add-on to create toppings and ingredients that go on different items. When they add an item they can select what toppings the customer requests to be added.
The item modifier page can be accessed from the three dotted menu button on the inventory page. A new option ‘Item Modifiers’ will be available in the list. The item modifier page is split into two tabs 'Modifiers’ & ‘Groups’ by default you are on the ‘Modifiers’ tab. Use the button bar to switch between tabs.
Go to the ‘Item Modifiers’ page and click the ‘Add New Modifier’ button to open the add form. Enter a name for the modifier and optionally select an image from the smart image lookup. Click the save button to add the new modifier
The smart image selector will display a list of images after you focus out of the name field. Click outside of the name input to focus out
To edit a modifier go to the ‘Item Modifiers’ page and find the modifier you want to edit. Click the ‘Edit’ button to open the edit form for the modifier. Edit the modifier name or image and click the save button. Editing the item will update the modifier in all groups it belongs to
To delete a modifier go to the ‘Item Modifiers’ page and find the modifier you want to delete and click the ‘Delete’ button this will prompt you to confirm that you want to delete the modifier selected. Once confirmed the modifier will be deleted from the list and from any group it belonged to
To add a group go to the ‘Item Modifiers’ page and click on the ‘Groups’ tab to open the groups tab. Click the ‘Add new groups’ button to open the add group form. You will be required to enter a name for the group you are creating and then select from the list of modifiers you created to be added to this group. Selecting a modifier will prompt you to enter the price of this modifier for the specific group. The items selected will be highlighted and be added to the ‘Selected Modifier’ list. Once you are done adding all the modifiers to the group click the ‘Save Group’ button to create the group.
Creating groups for modifiers is a good way to organize your modifiers for items that use the same modifiers with the same price
To edit a group go to the ‘Item Modifiers’ page and find the group you want to edit and click on the ‘Edit’ button. This will open the edit group form. Make any changes to the group and then click the ‘Save Group’ button when done.
To delete a group go to the ‘Item Modifiers’ page and find the group you want to delete and click the ‘Delete’ button this will prompt you to confirm that you want to delete the group selected. Once confirmed the group will be deleted from the list.
To clone a group go to the ‘Item Modifiers’ page and find the group you want to clone and click the ‘Clone’ button this will open the add form with the item cloned. Make the necessary changes and then save the group as a new group.
To attach the modifiers or groups you created on an inventory item go to
the inventory page and add or edit an item. A new optional field
'Item Modifiers' will be available in the add/edit item form. Clicking
on the new 'Item Modifiers' field will display a dialog that will list
all the modifiers and groups you have created. Use the button bar to
switch betweens 'Modifiers' & 'Groups'
The modifiers you select will appear in the ‘Selected Modifiers’ table.
When you select a modifier to be added you will be prompted to enter the
price to charge for the modifier for the item. Selecting a group will
automatically add all the modifiers in that group with the prices you
have already set to the item. Once you are done adding all modifiers
click the
“Save” button. The new 'Item Modifiers' field in the add/edit form will
be populated with the list of groups and modifiers you selected. You
will then need to save the item to fully save the modifiers you selected
on the item.
On the sell page when you select an item that has modifiers attached to
it a new dialog is shown. The dialog will list all the modifiers
attached to the item and you will be able to select which modifiers to
add to the item for the current sale. The total calculated price of the
modifiers will be added to the price of the item.
To set the quantity of a modifier on an item there will be a button bar with numbers 0, 1/2, 1, 2 and a
keypad button icon to allow you to enter any number. This number that
is selected in the button bar is the quantity for the modifier you are
adding. By default the quantity is always 1. To set a different
quantity, select the quantity from the button tab then select the
modifier you want to add to the item. The quantity selected will reflect
in the name of the modifier and adjust its price.
When you save the modifiers and add the item to the cart a new modifier icon
button will appear on the left of the item. Clicking the modifier icon
button will allow you to edit the modifiers entered.
When selecting modifiers for items there will be a
'Misc Modifier' button that is always available for you to add special
instructions if the modifier requested was not found in the list. To add
a misc modifier click the
'Misc Modifier' button you will be prompted to enter a name and a
price for the modifier and it will be added to the current item. For
items that do not have modifiers attached to them the modifier icon in the cart will still be available to allow adding Misc Modifiers
Inventory Specials
To add specials to items get the Inventory Specials Add-On
Specials are used to set a discounted price for customers who purchase a specific amount of an item. For example, you can set a juice bottle to have a $2.00 retail price for 1 bottle and set a special to sell 3 bottles for $5.00 saving the customer a $1.00 on their purchase.
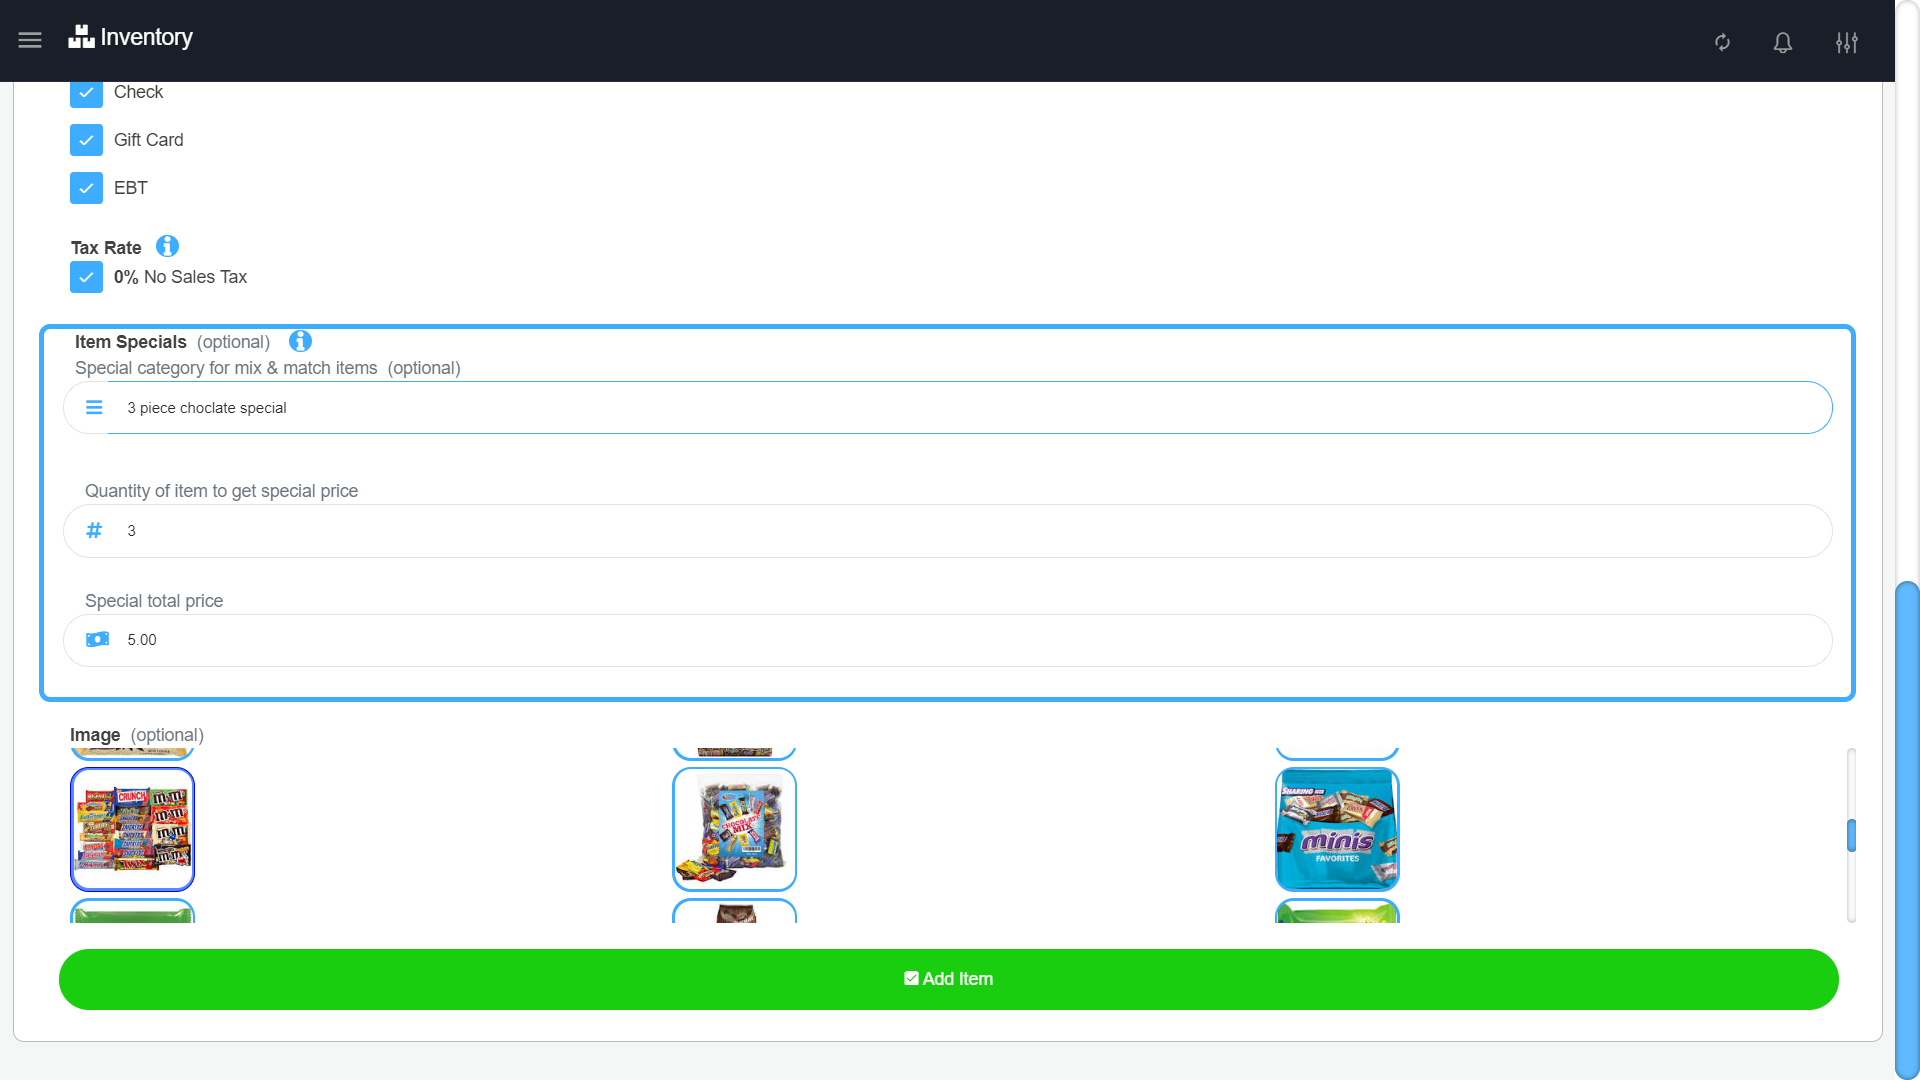
On
the inventory page when you add/edit an item there will be a new
section in the form labeled 'Item Specials' that is optional. The
section has three fields:
- Special Category for mix & match items - This is an optional field which you can use to allow this item special to be a mix & match with other items.So if Orange Juice and Apple Juice are both 3 for $5.00, you would set both of their special category to the same thing such as "Juice Special"
- Quantity of item to get special price - This is the amount of the item that is required to get the special
- Special Total Price - This is the total price for the special after when getting the special quantity (This would be $5.00 in our Juice bottle example in the overview)
On the sell page when the special quantity is reached on the item the special will be added as a new item line that will include the item name, the quantity received, followed with the word “special” The total of the item special will be the special price you set.
Inventory Count
To create inventory count sheets get the Inventory Count Add-On
Create inventory count reports & keep track of every item you have. You will be able to enter the current quantity available for each item and a count sheet will be generated. It will highlight the items that did not match the current quantity count entered so you can resolve their counts. The sheets generated can then be exported outside of the App for external use.
To create a new sheet click the 'New Count Sheet' button. This will open the form to create a new count sheet. You can give the sheet a friendly name to find and search for it later. By default this is set to the today's date. A table will list all your inventory items in alphabetical order and have a 'System Count' and 'Store Count'. You can quickly find items by using the search input. By default the 'Store Count' will be set to the 'System Count' you can then adjust this count to the actual amount you have on hand. Once you entered all the counts click the 'Review Count Sheet' button on the bottom of the page to review and submit. If there are any differences found you will be able to review them. After review click the 'Save & Update Count' button to create the sheet and to update the inventory items stock.
To view a count sheet's info find the sheet and click the 'View' button this will open the sheet count details displaying all items that were counted and the differences found
To export a sheet click the 'Export' button. This will give you the option to select how you would like to export the sheet; Excel, email, printer, or PDF
To delete a sheet click the 'Delete' button. You will be asked to confirm you want to delete the sheet. Once confirmed it is permanently deleted
Store Connector
To manage multiple locations from one device get the Store Connector Add-On
Connect multiple M&M POS accounts to manage inventory and view reports from one device. This Add-On gives you the ability to oversee and manage all your locations and businesses from one device. Simply sign in to the accounts you own and seamlessly switch between accounts with one click. The accounts you connect to will be stored on your device and you will not have to remember the emails and passwords for other accounts any longer.
The connected accounts are stored per device and are not synced with other devices. You will need to connect your accounts on each device separately
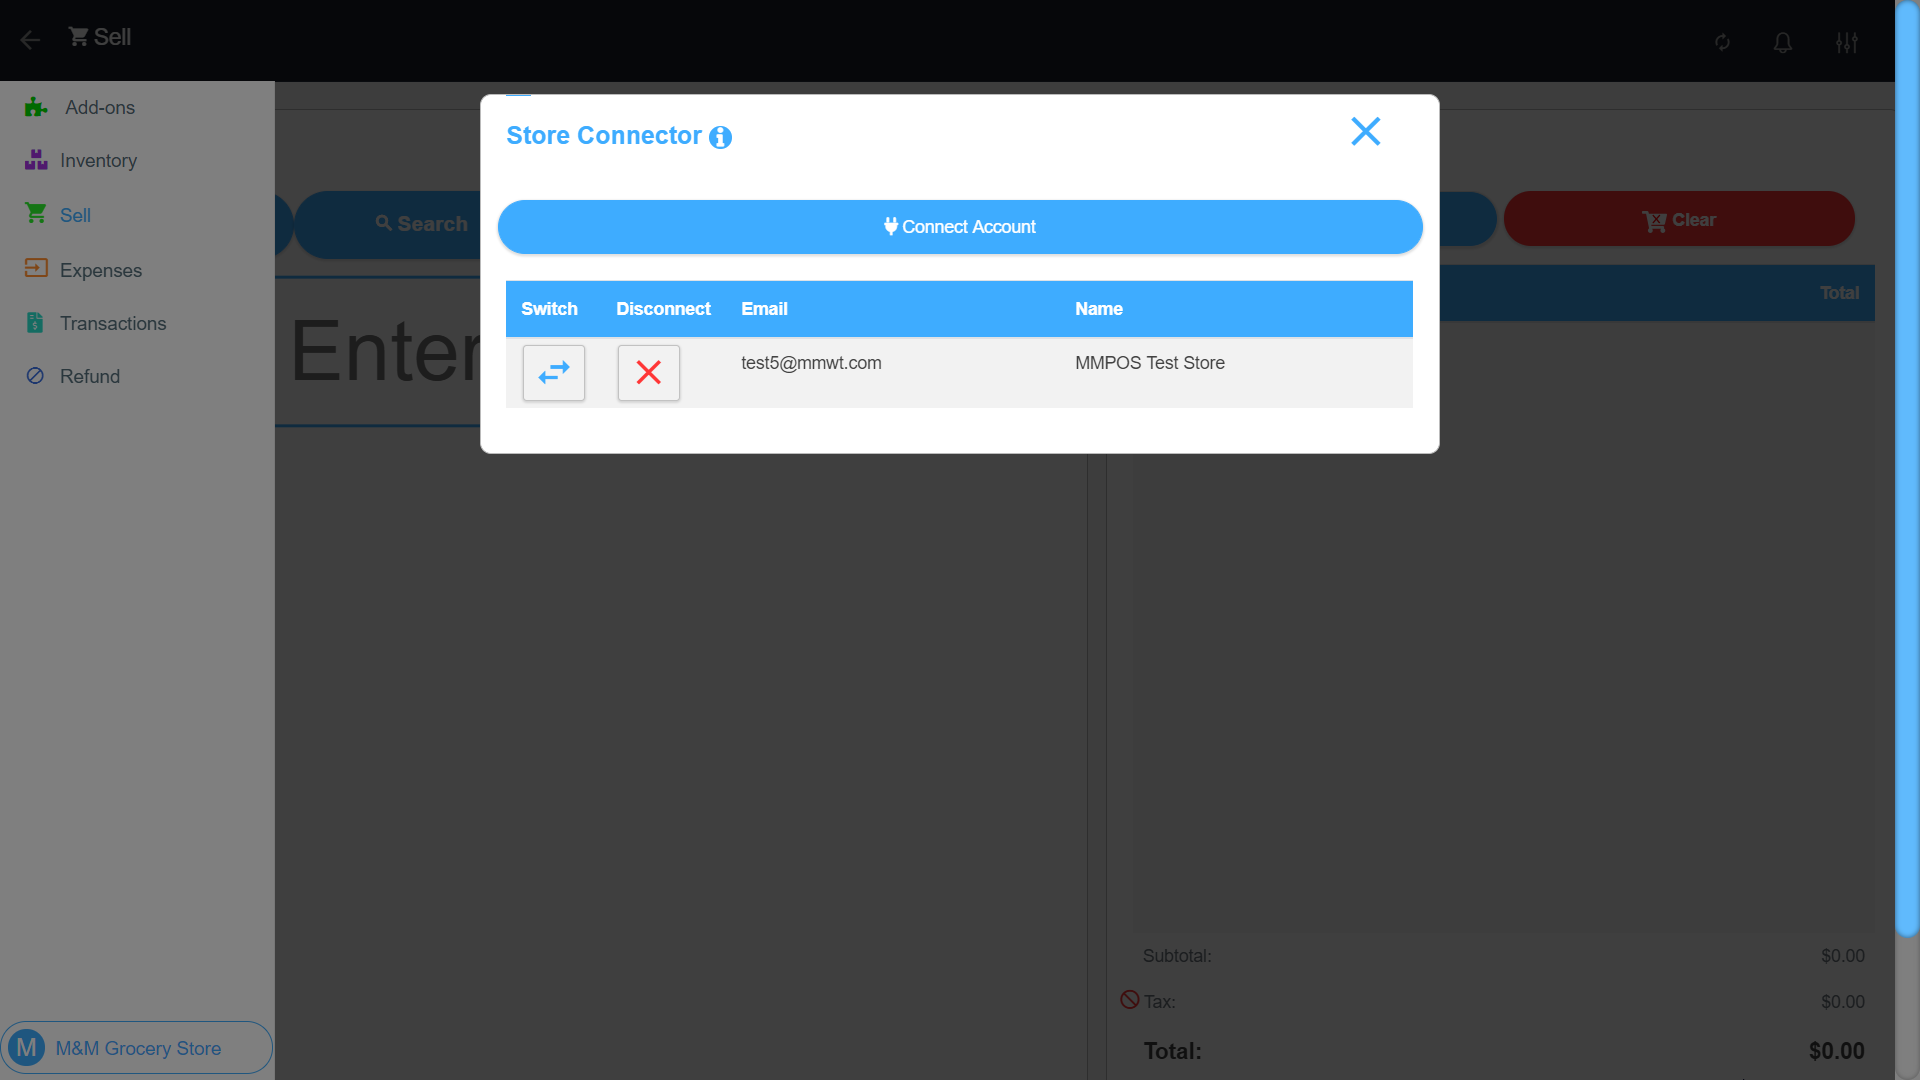
From the menu tab click on the account menu button at the bottom of the menu. A new 'Store Connector' tab will be available in the account menu options. Clicking on this will open the connector screen where you can connect and switch between accounts. Connect a new account by clicking the 'Connect Account' button and enter the email address and password of the M&M POS account
Once connected you can start switching between the accounts by clicking the switch icon button. Once you switch to the other accounts the tab 'Store Connector' will still be available to switch back again even if the Add-On is not enabled for the other accounts
To disconnect an account click the disconnect icon button. You will be prompted to confirm that you want to disconnect. Once confirmed the account will be removed form the list
Device Manager
To track devices on your account get the Device Manager Add-On
This Add-On will help you take control over the devices logged into M&M POS and keep track when they are online & offline. You can also force devices to log off the system and keep track of new devices.
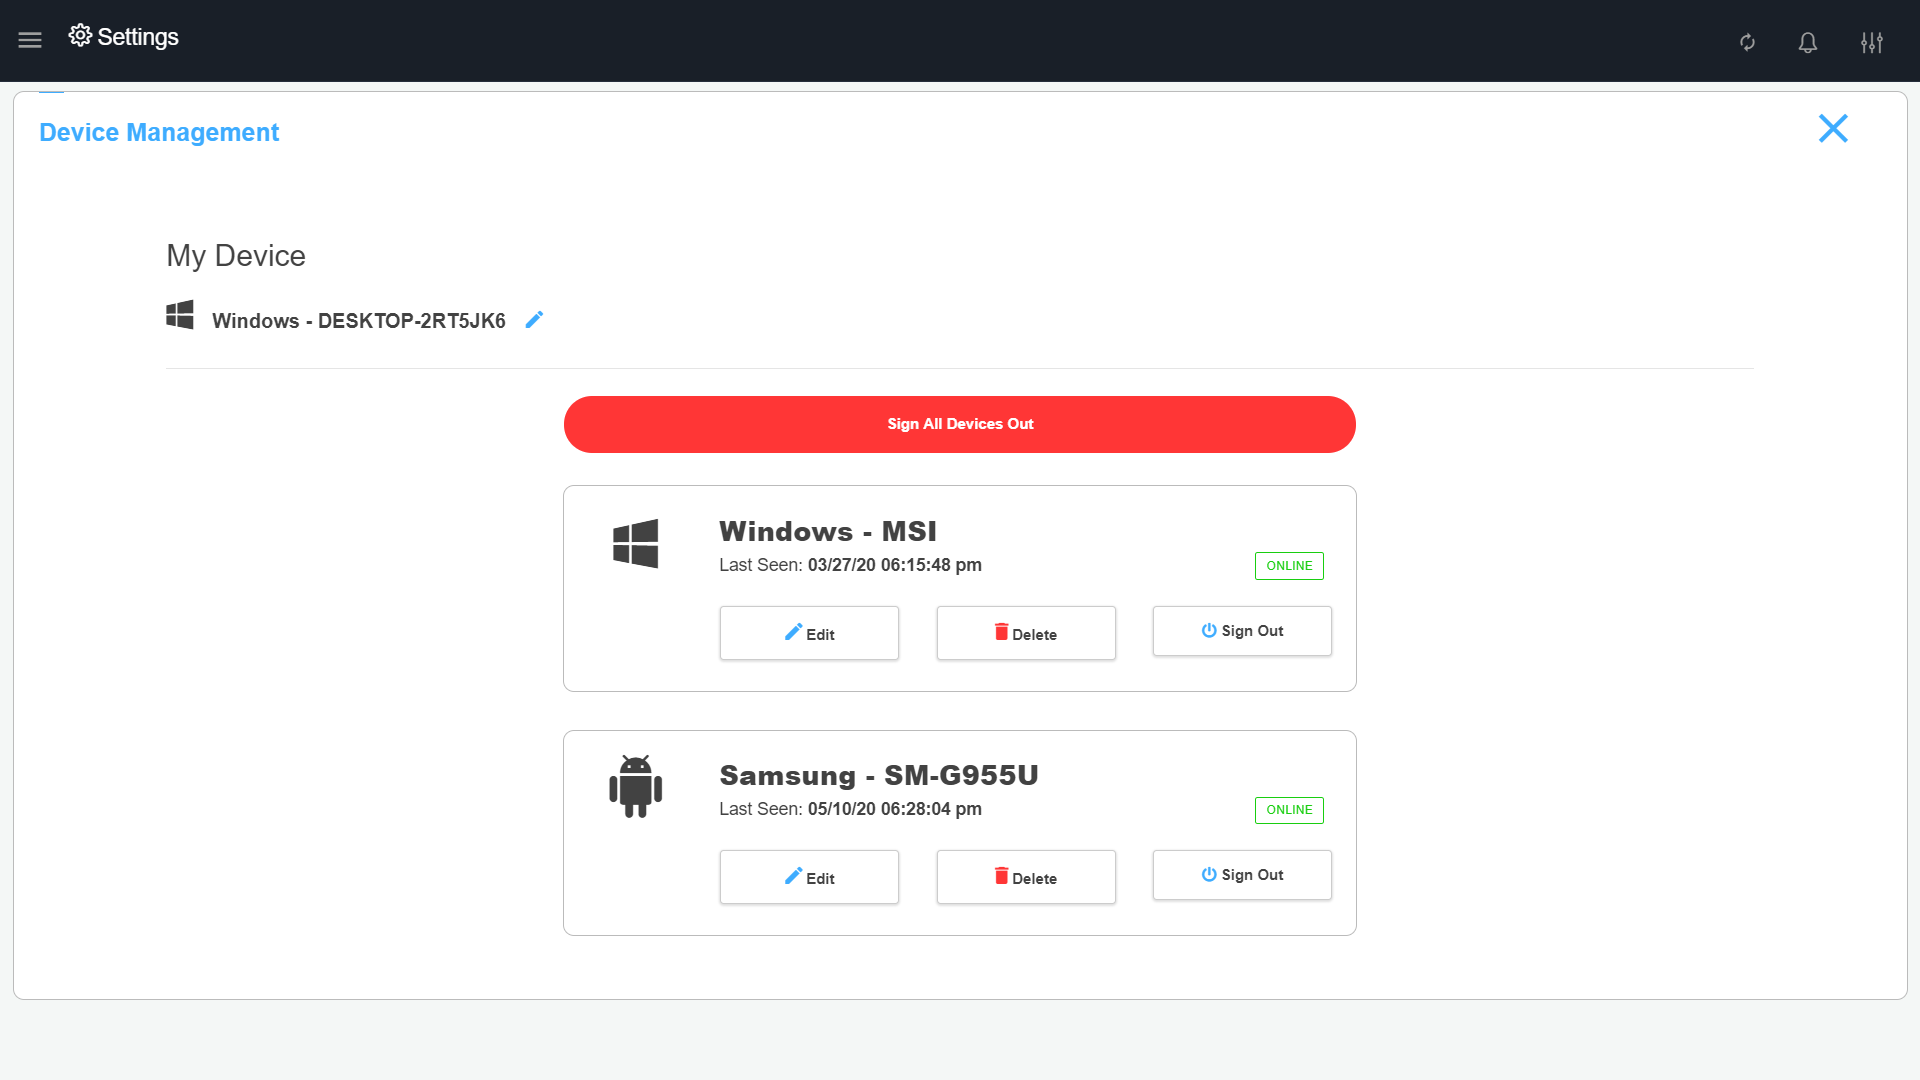
To update a device name go to the device management and click on the pencil icon button next to the device you want to edit. You will be prompted to edit the name and save.
Use the delete button to delete a device. You will be prompted to agree that you want to delete the device. Once deleted the device will no longer be available and if they were signed in they will be automatically logged out.
Use the sign out button
to sign a device out of your account. You will be prompted to agree
that you want to sign the device out. Once signed out the device will
automatically be logged out in real time.
You can also sign all devices out by clicking on the "Sign All Device
Out" button. This will sign out all devices except for your device.
Control Register
To open the register get the No-Sale Open Register Add-On
The No-Sale Open Register Add-On gives you more security over the cash register allowing the system to control when it is opened. This also gives you a new button on the sell page to open your cash register. This supports many types of printers connected and has a legacy mode to open on any cash register.
This is only for cash registers that are able to connect to a printer, and the printer must have serial port connected to Desktop
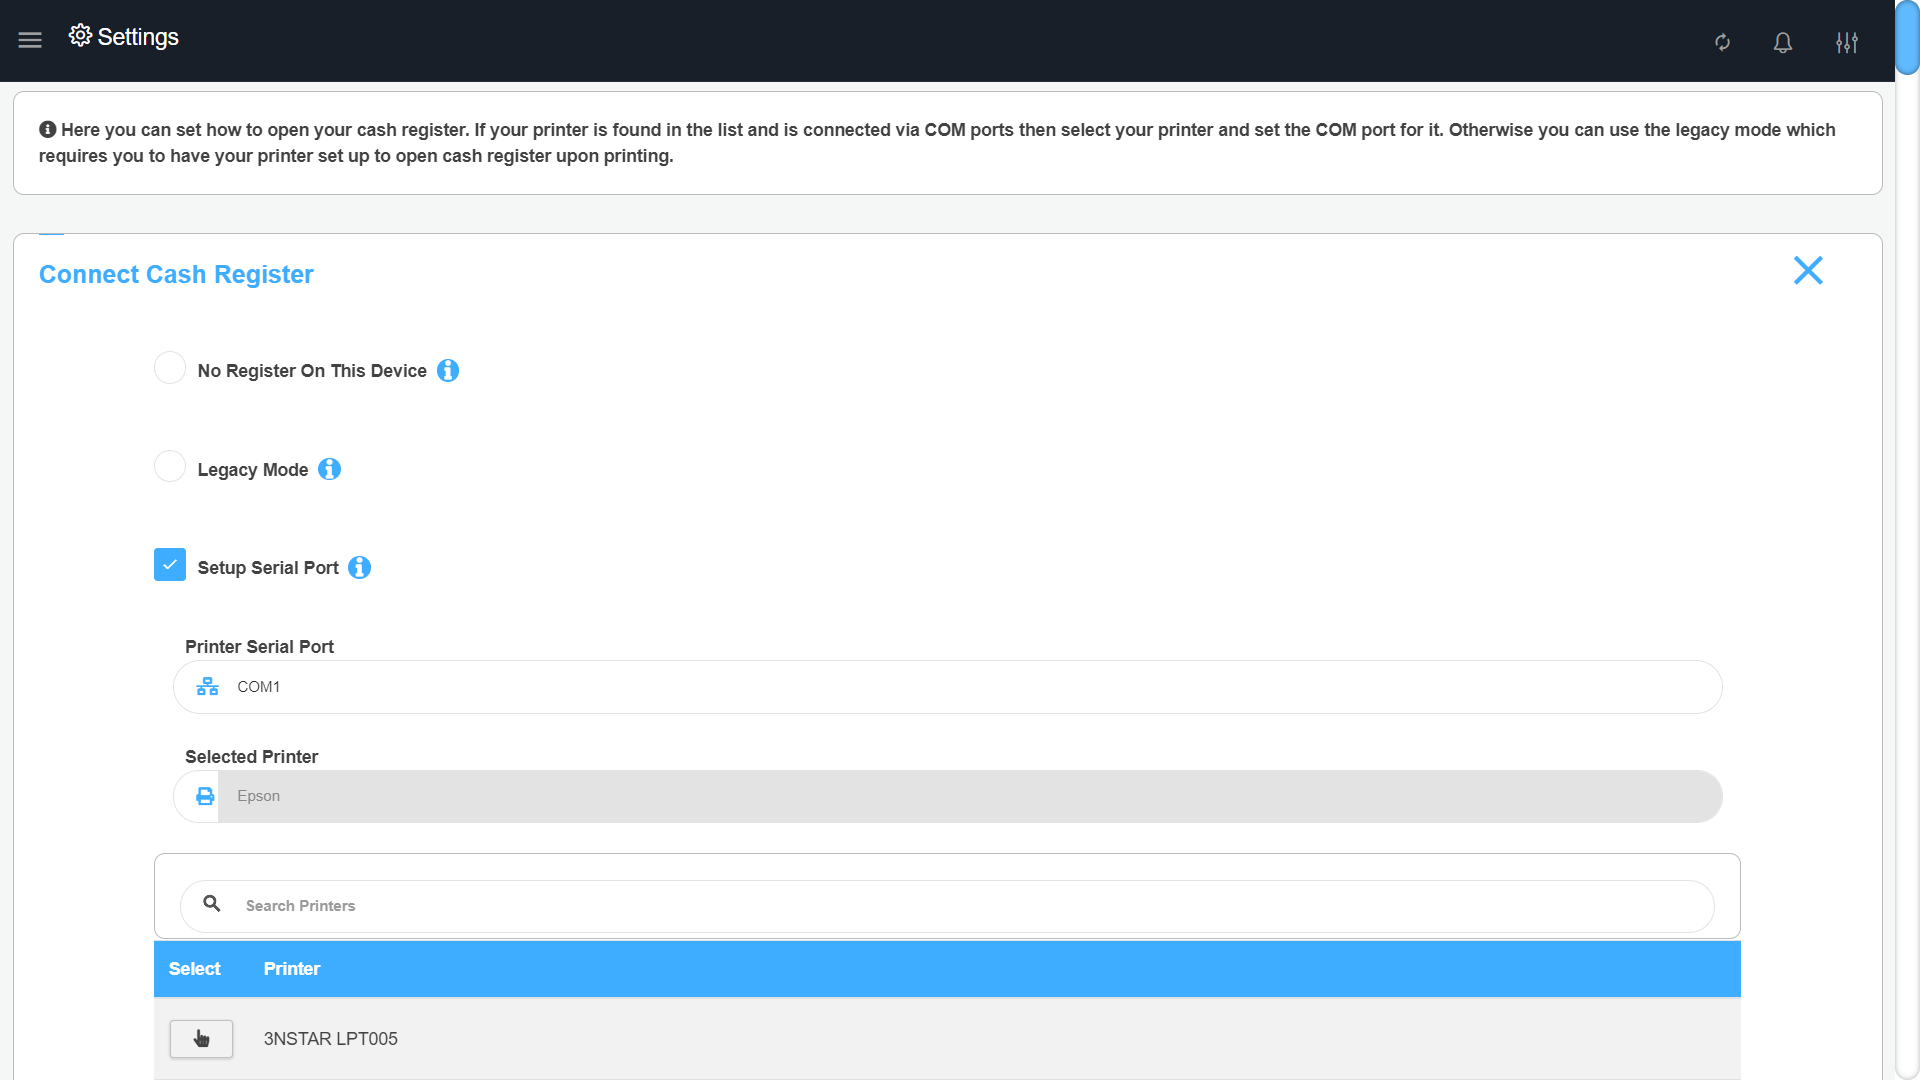
In the settings page open the "Receipt Printer" settings a new button "Connect Cash Register" will be available that will take you to the “Connect Cash Register” page. Ther you can set how to open your cash register. If your printer is found in the list and is connected via COM ports then select your printer and set the COM port for it. Otherwise you can use the legacy mode which requires you to have your printer set up to open the cash register upon printing. If your device does not have a register connected you can check the “No register on this device” checkbox
On
the sell page after transactions have been completed the cash register
will open. Additionally, a new option is available in the sale form
menu. Click on the three dotted menu button in the sale form and click on the “No Sale” option. This will automatically open the register.
You can set a pin on this action using the Override Actions Add-On
Override Actions
To set pins on certain actions get the Override Actions Add-On
This Add-On will give you control over who can do certain actions such as editing item prices & deleting inventory items. This will help you restrict actions that should be done only by a manager or a supervisor.
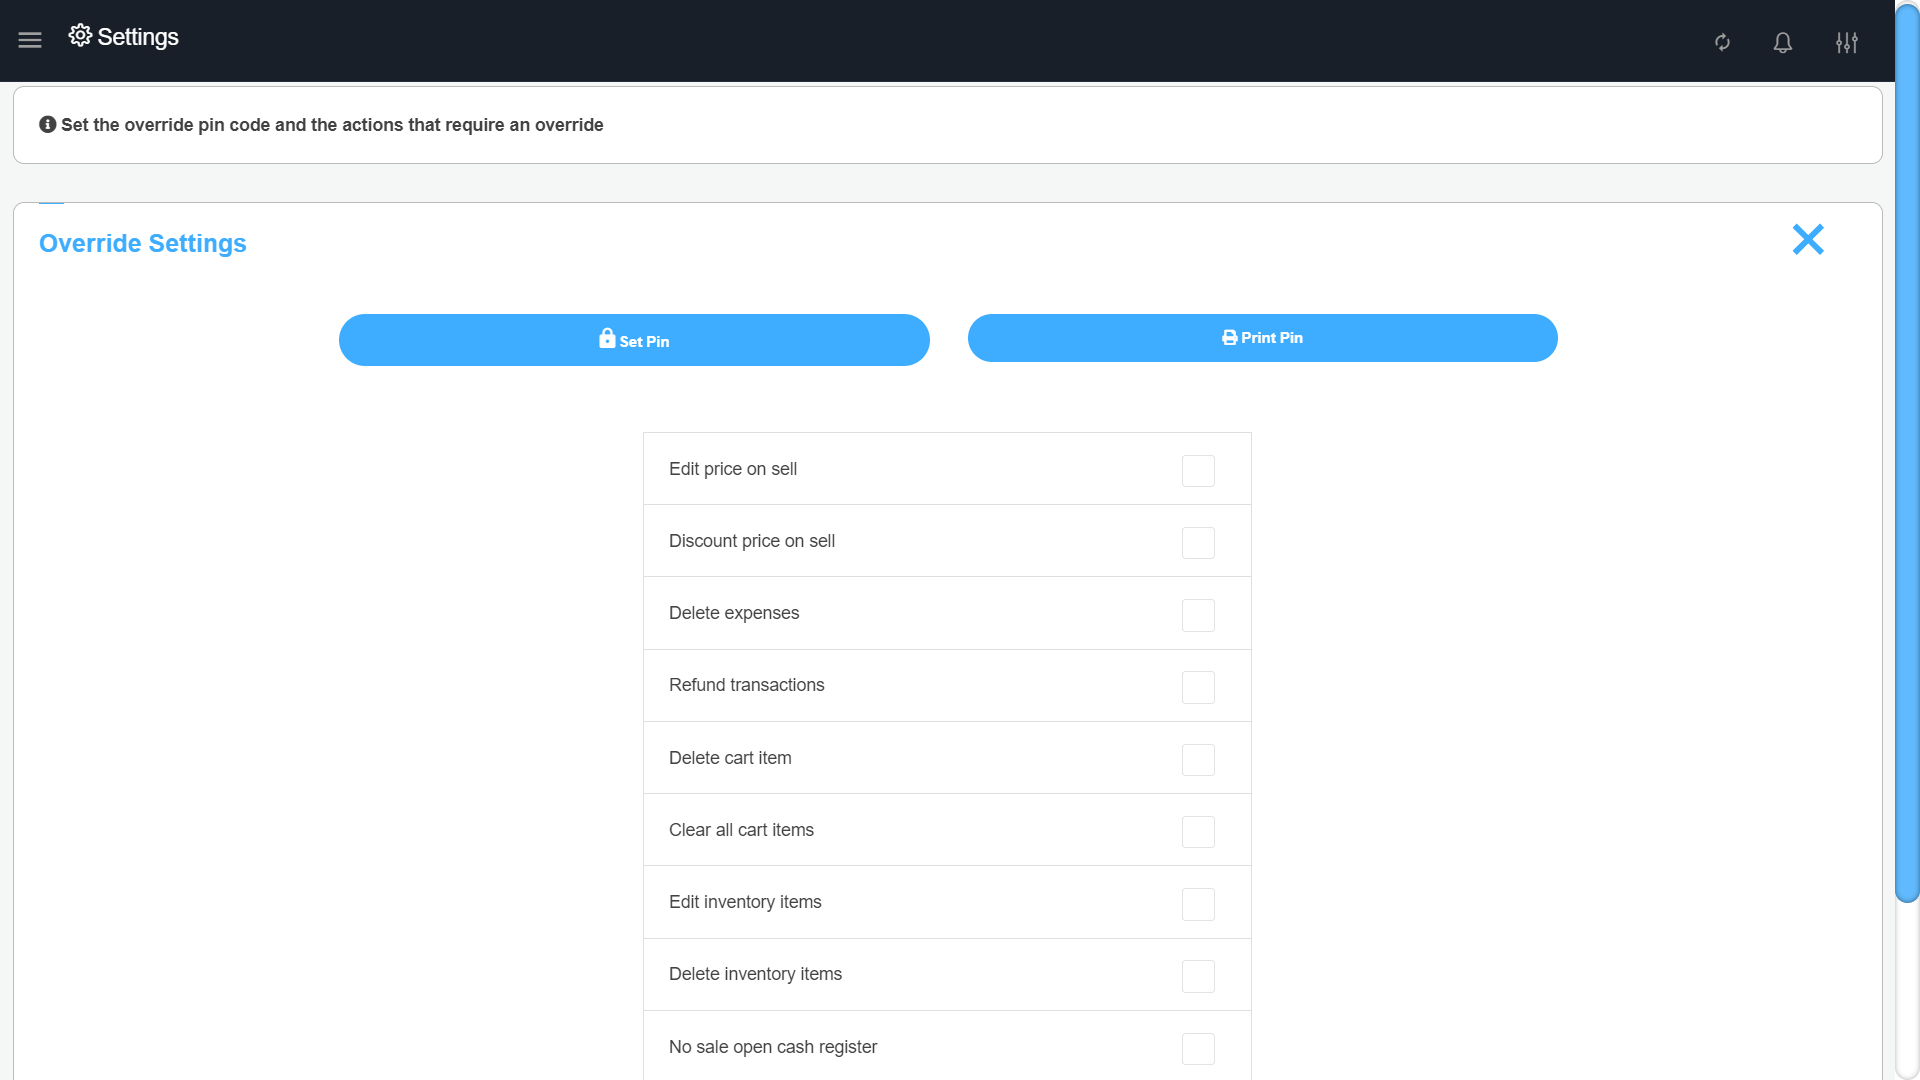
By default the override PIN is 0000 to change this go to the settings page and click on the “Override Actions” settings. This will ask you for the override PIN in order to access these settings enter 0000 this will open the Override settings. Click on the “Set Pin” button to set a new override PIN. You will be prompted first to enter your current PIN, second to enter your new PIN, and lastly verify your new PIN.
You can print the PIN as a barcode using the “Print PIN” button. This can then be scanned to quickly enter your override PIN when prompted instead of having to manually type in the PIN.
In the Override Settings there is a list of actions available that you can set to prompt for an override PIN or allow to happen. If the action is checked then when anyone tries to perform that action they will be prompted to enter the override PIN in order to continue. The list of actions is below
- Edit price on sell
- Discount price on sell
- Delete expenses
- Refund transactions
- Delete cart item
- Clear all cart items
- Edit inventory items
- Delete inventory items
- No sale open cash register
- Toggle full screen (Desktop feature)
- Void mode on sell page
Fave Buttons
To add item shortcuts on the sell page get the Sell Fave Buttons Add-On
This Add-On allows you to add shortcut buttons on your sell page for quickly adding popular items to the cart. The faves addon gives you 10 buttons on the sell page that you can set to an inventory item so you can quickly add it to the customer's cart. These buttons help you perform sales quicker by having popular items easily accessible for ringing up a customer
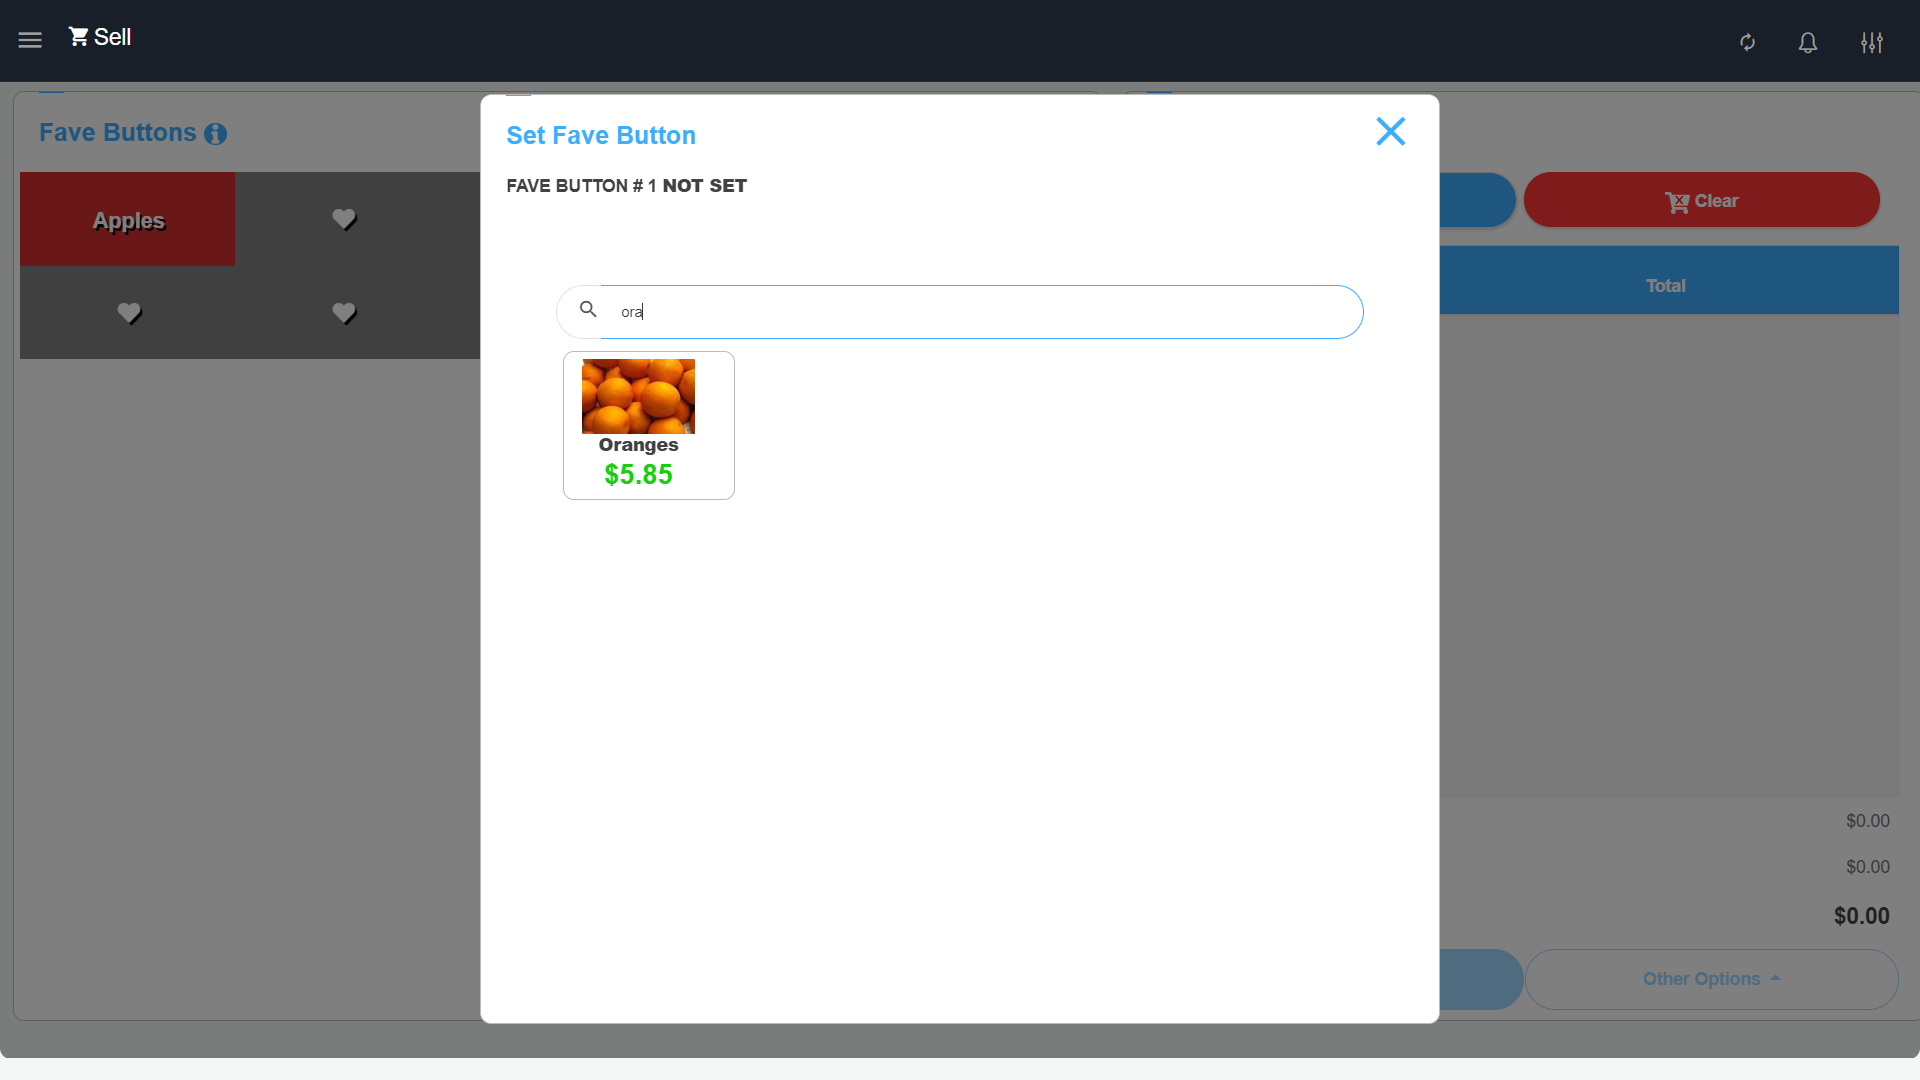
On the sell page, select the three menu buttons on the top right of the sale form and select the 'Edit fave buttons' option. This will open the fave buttons setup page. There will be 10 fave buttons available to fill in. Selecting one of the 10 buttons will prompt you to set the fave button by searching for the inventory item you want the button to hold. After finding and selecting the item you will be prompted to select a color for the button from the list of colors available.
To change or unset a fave button go to the "Fave Buttons" page and click on the fave button you want to change or unset. You will then be prompted to select a different item or you can click on the “Unset” button to unset the button.
On the sell page the fave buttons will be displayed on the top of the sale form. The buttons will display the item name and clicking on the button will add that item to the cart.
Fave buttons are stored per device so you can have different fave buttons set on different devices
Need Extra Help
If you have any feedback or still need assistance you can contact us here and we will follow up with you as soon as possible.